
 Pin it
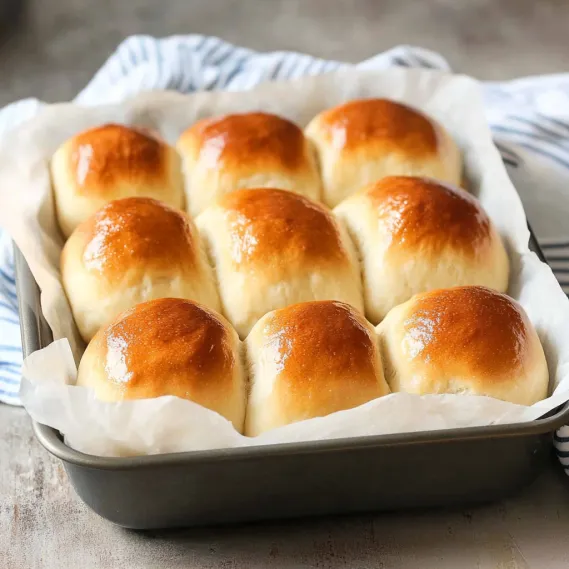
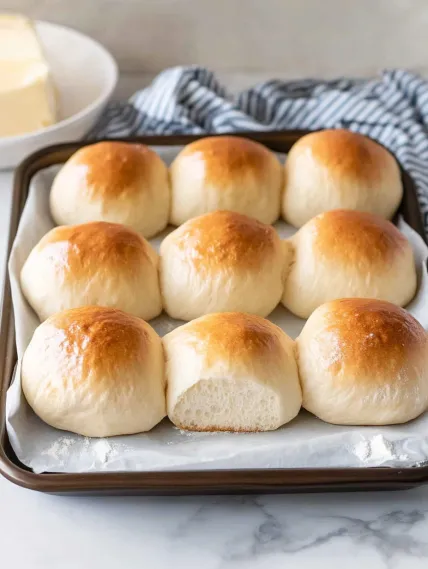
These pillowy stir-and-wait dinner rolls will make you question why you ever tried complex bread recipes. You simply dump ingredients in a bowl, mix with a spoon, and let nature handle the rest—no kneading, no fancy equipment, just a bit of waiting. They turn out amber-topped, airy on the inside, with that ideal balance of mild sweetness and saltiness that makes them utterly addictive. Whether you're enjoying them hot with a pat of butter alongside your meal or using them for tomorrow's lunch sandwich, they're a total gamechanger for anyone who wants homemade bread without the hassle.
I whipped these up during our latest family get-together, and they disappeared quicker than everything else we served. My hubby, who normally only cares about crusty bread, couldn't stop talking about how soft they were. I've kept making them since then—sometimes just to fill our home with that amazing fresh bread smell.
Essential Ingredients
- Bread Flour: Creates extra softness—regular flour works too, but bread flour gives you the airiest texture. Get a new bag since older flour can taste dull.
- Dry Yeast: This makes everything rise—check that it bubbles when activated. I grab instant yeast at the grocery store and it always works great.
- Milk: Slightly warm whole milk adds depth—you can use low-fat but they won't be quite as tender. Just warm it till it feels comfortable, not hot.
- Butter: Melted then cooled gives flavor and softness. Go with unsalted so you control the overall saltiness.
- Eggs: Use them at room temperature for smooth mixing and better rising—cold eggs slow everything down.
The butter really makes these shine—it turns them into something special without any extra work. I tried making them without it once, and they just weren't as good. My family can tell right away—they'll come running from all over when they smell that buttery goodness.
Simple Preparation Guide
- Step 1: Activate the Yeast
- In a little bowl, combine 1 tablespoon dry yeast with 2 teaspoons sugar (taken from your total ¼ cup) and ½ cup warm water. Wait 5 minutes until it gets foamy—if nothing happens, your yeast isn't good and you'll need to start fresh.
- Step 2: Create the Dough
- In a large bowl, mix 4 cups bread flour, the remaining sugar from your ¼ cup, and 1 ½ teaspoons kosher salt. Make a hole in the middle, then pour in 1 cup slightly warm milk, 3 ½ tablespoons melted butter, 2 beaten eggs, and your bubbly yeast mixture. Stir using a wooden spoon until you get a thick, tacky mixture—similar to thick muffin batter, not runny dough.
- Step 3: Let It Grow
- Cover your bowl with a moist tea towel and put it somewhere warm (about 77°F or warmer) for 1 ½ to 2 hours until it almost triples in size with bubbles on top. My secret? Turn on your dryer briefly, then stick the bowl inside—works perfectly every time.
- Step 4: Form Your Rolls
- Put parchment in a 9x13-inch baking dish with extra hanging over the sides. Push down the dough to remove big air pockets, then dump it onto a floured surface. Dust some flour on top, form it into a log shape, and cut into 12 equal pieces. For each piece, press it flat, pull edges upward like making a little sack, flip it over, and roll into a smooth ball—this keeps the tops nice and tight. Arrange them in your pan, 3 across and 4 down.
- Step 5: Second Rising
- Spray the rolls lightly with oil (or cover with greased plastic wrap) and let them rise in that warm spot for 30-45 minutes until they've grown about 75% bigger—not fully doubled. Halfway through, start heating your oven to 350°F (fan) or 390°F (regular).
- Step 6: Bake to Perfection
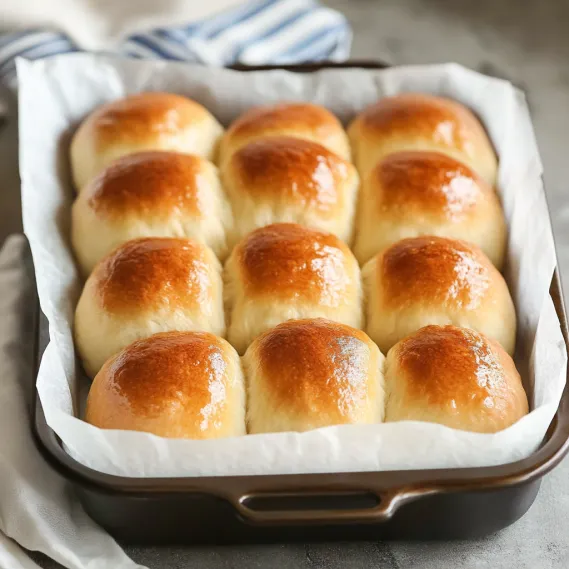
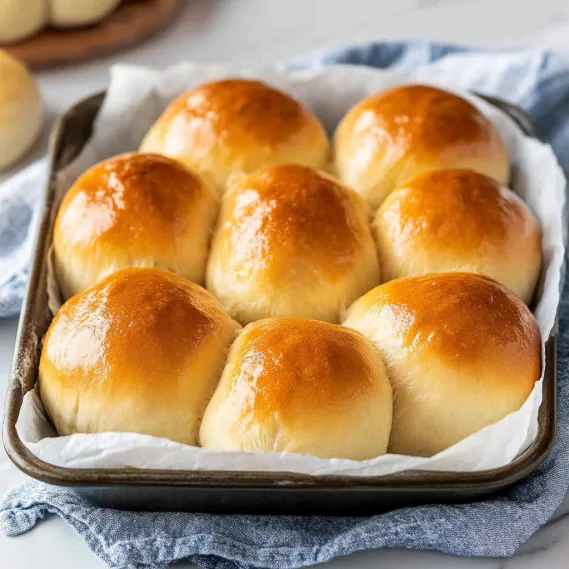
- Bake for 15-18 minutes until they're golden brown—tap the center roll and listen for a hollow sound. Brush with 1 tablespoon melted butter right when they come out, then lift them onto a cooling rack before serving warm.
 Pin it
I'm always amazed by how the yeast works in these—it's like watching magic happen. My mom tried them and said they reminded her of what her grandma used to make, without all the hard work. We've been fans ever since, especially when you slather them with butter straight from the oven.
Prep Them Earlier
These rolls are perfect for busy schedules. Form them, stick them in the fridge overnight (tightly covered), and let them sit out 30 minutes before baking them fresh. I've done this for big family meals—hot, fresh rolls without any morning rush.
 Pin it
Try These Tasty Variations
Top them with garlic butter after baking for extra flavor—my children gobble those up. Or mix a bit of cinnamon sugar into the dough for something sweet. Once I added shredded cheddar—those cheesy rolls were gone within an hour.
Keeping Them Fresh
After a day, the rolls get a little dry, but 15 seconds in the microwave makes them soft again. You can freeze them baked or as shaped dough—thaw in the fridge overnight, then warm at 320°F under foil for 8 minutes. I've saved extras this way and pulled them out for quick meals.
Ways To Enjoy Them
They're fantastic with a hot bowl of soup—their soft centers soak up liquid beautifully. For holiday meals, I've cut them for tiny sandwiches—always popular. Even just with jam at breakfast, they feel like a treat.
 Pin it
These pillowy no-knead dinner rolls are real kitchen wizardry—straightforward, forgiving, and incredibly tasty. They show you don't need to struggle with dough to enjoy that freshly-baked happiness. Just one taste, and you'll be sold on how simple and delicious they are.
Frequently Asked Questions
- → How is kneading skipped in this recipe?
- The dough is wetter than usual, letting gluten form during the rising process on its own. This eliminates the need for kneading, as time allows the dough to create air pockets and turn fluffy. You just let the ingredients work together, making life easier!
- → Can I swap instant yeast with active dry yeast?
- Sure thing! Active dry yeast works as well. You’re already combining the yeast with warm liquid in the recipe, so no extra steps are needed. Just use the same amount and follow the rest—activating it in warm water with a pinch of sugar will do the trick.
- → My kitchen’s too chilly for rising dough—what should I do?
- No worries! Try one of these tricks: 1) Preheat your oven briefly, switch it off, and pop the dough inside. 2) Warm up a clothes dryer for a minute or two, then set the dough bowl in there. 3) Place it next to something warm, like a radiator. 4) Put the dough in your microwave along with a mug of hot water—don’t turn the microwave on. 5) If you’ve got a bread proofing box, that’s always handy too!
- → Can I prep these rolls ahead of time?
- Absolutely! After the first rise, shape the buns and let them rest covered in your fridge for up to 24 hours. Take them out about half an hour before baking. Another option—cook them entirely, freeze once cooled, and reheat when needed (warm them up covered in foil or zap in the microwave for a few seconds).
- → Why is the dough so sticky to handle?
- This dough’s meant to be super sticky—that’s the secret to the softness! When handling it, flour your hands and surface liberally, but don’t knead the flour into the dough. In damp weather, you might need even more flour for shaping. A quick touch-and-flip technique helps prevent sticking too.
- → Can I make other bread shapes or stuff these rolls?
- Totally! Shape them into knots, braid them, or pop small dough pieces into muffin tins for cloverleaf buns. Fancy filled rolls? Just press out the dough, add stuffing like cheese or jam, seal it well, and bake seam-side down. Keep in mind that the soft dough can tear, so handle it gently.