
 Pin it
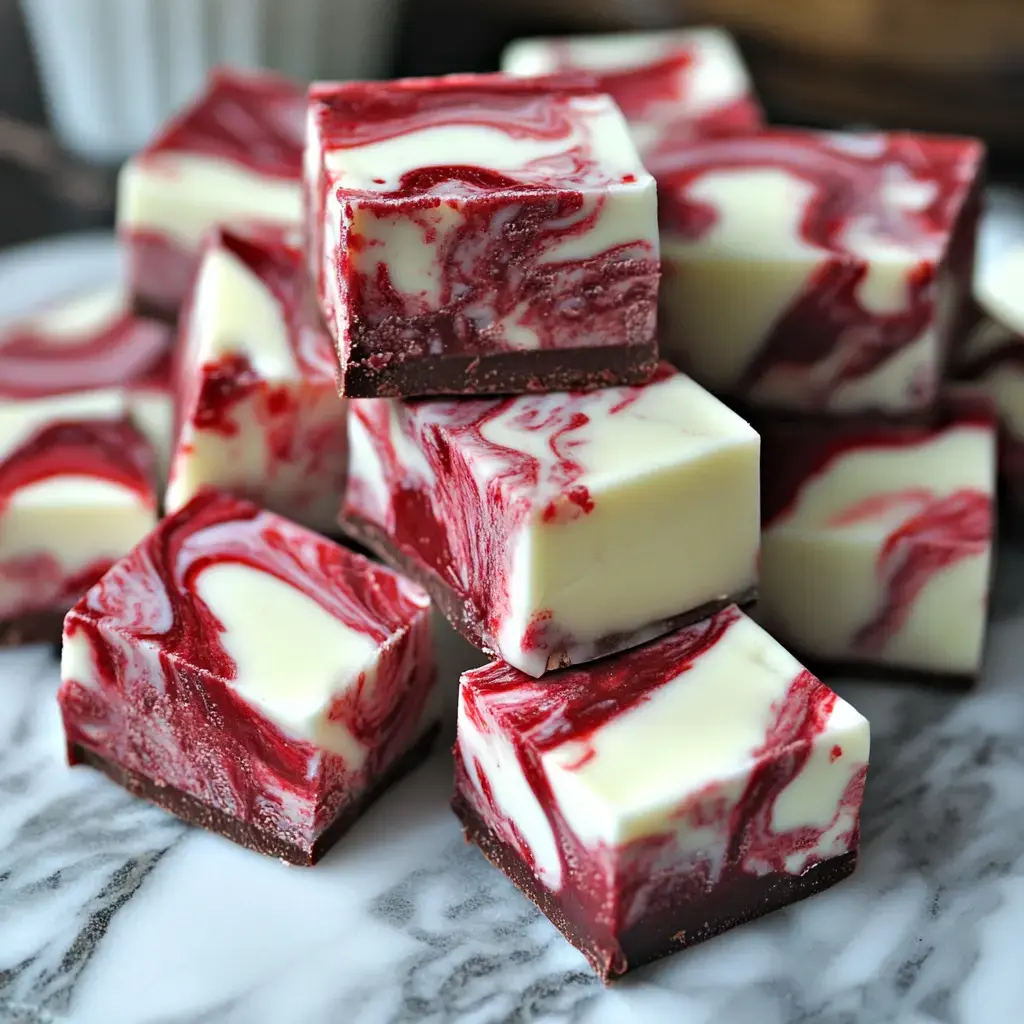
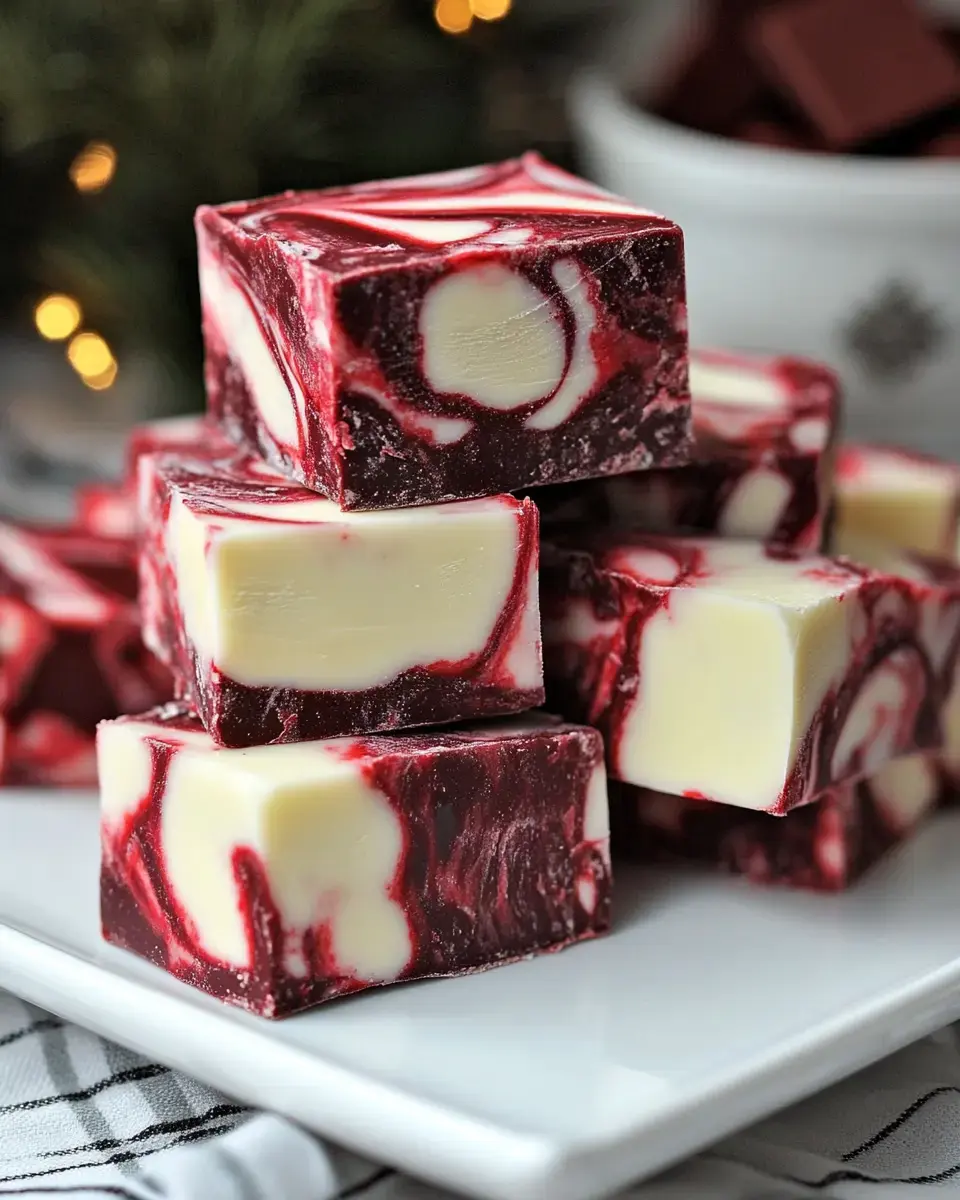
This DIY Red Velvet Marble Fudge is an uncomplicated sweet treat mixing smooth white chocolate, fluffy marshmallow, and bold red patterns to create something that looks amazing and tastes even better. It's great for celebrations, homemade presents, or whenever you want something special - you'll get fancy-looking results using basic ingredients and simple methods.
What Makes This Fudge Special
You'll enjoy how this fudge takes the popular red velvet taste and blends it with super creamy traditional fudge texture. Those eye-catching red swirls make it look fancy though it's actually quite easy to do. Whether you've never made candy before or you're an old pro, you won't need fancy tools or complicated steps - just regular ingredients and a bit of time.
What You'll Need for Red Velvet Marble Fudge
- Base Ingredients:
- 3 cups sugar
- 3/4 cup soft unsalted butter
- 2/3 cup half-and-half
- 2 cups white chocolate chips
- 7-ounce jar marshmallow fluff
- 2 teaspoons vanilla
- For the Marble Pattern:
- 1 cup semi-sweet chocolate chips
- 3 tablespoons red food coloring
- Tools You'll Need:
- 9x9-inch pan
- Parchment paper
- Big pot
- Microwave-safe bowl
- Good knife
Easy Making Instructions
- Get Your Pan Ready
- Put parchment in your 9x9-inch pan with extra hanging over the sides so you can lift it out later.
- Cook The Base Mixture
- Mix butter, sugar, and half-and-half in your big pot over medium heat. Let it bubble gently for 4-5 minutes while you keep stirring.
- Mix In White Chocolate
- Take it off the heat. Stir in your white chocolate chips, marshmallow fluff, and vanilla right away until everything's smooth.
- Make The Red Part
- Melt semi-sweet chocolate in the microwave using short 20-second bursts. Mix in red food coloring until it's completely red.
- Make The Pretty Swirls
- Pour the white mixture into your pan. Drop spoonfuls of red mixture on top. Use a knife to make swirly patterns.
- Let It Set
- Leave it out for 30 minutes, then put it in the fridge for 2 hours until it's firm.
Tricks For The Best Results
Go for good white chocolate since it melts better. Get everything measured out before you start cooking. Don't dawdle when adding chocolate and making swirls because the mix hardens fast. Try gel food coloring for the brightest red. Wipe your tool clean between swirls to keep patterns sharp.
 Pin it
Ways To Enjoy It
Slice into small 1-inch squares for the right size. Put them on pretty plates for holiday gatherings. Wrap them in wax paper and pack in boxes for gifts. You can also drizzle extra melted white chocolate on top before serving. They're wonderful on dessert spreads or alongside cookies.
Keeping It Fresh
Keep in a sealed container at room temp for up to a week. Put wax paper between layers so they don't stick together. You can freeze it for up to 3 months if you wrap it tight in plastic and foil. Thaw in your fridge overnight when you want some. Let it warm up to room temperature for the best taste and feel.
Frequently Asked Questions
- → What makes marshmallow creme special?
It keeps the fudge creamy and prevents it from turning gritty or hardening with sugar crystals.
- → What's the best way to store it?
Keep it in a sealed container at room temperature for up to two weeks, or refrigerate for longer. Layer pieces with wax paper so they don't stick.
- → Can milk chocolate work instead of semi-sweet?
You can use it, although semi-sweet contrasts more with white chocolate and balances the sweetness better.
- → Why use parchment paper?
Lining the pan with parchment helps lift the fudge out easily for neat slicing and avoids sticking problems.
- → Tips for a perfect swirl?
Move fast while the mix is warm, and gently swirl with a knife. Stop before colors blend too much to keep the pattern sharp.
Conclusion
This vibrant and creamy fudge blends white chocolate with semi-sweet chocolate dyed red, forming decorative swirls. Made smoother with marshmallow creme, it's excellent for the holidays or special moments.