
 Pin it
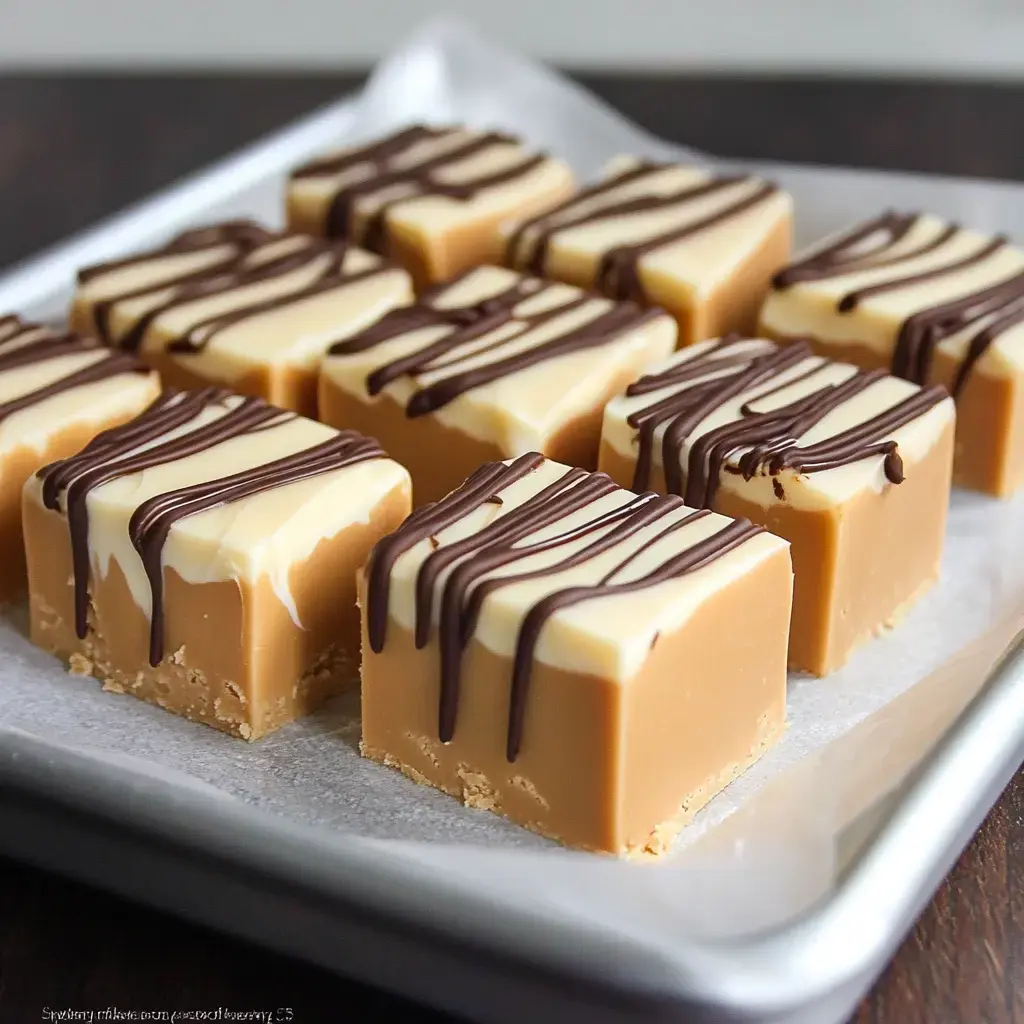
This Caramel Coffee Fudge brings together velvety caramel and intense coffee flavors in every chunk. The caramel base has that sweet candy shop feel, while the upper section tastes just like your favorite morning brew. Watching it come together is almost magical - simple ingredients transform into tender, sugary cubes that dissolve on your tongue. You don't need any candy-making background to pull this off at home. It looks just like something you'd pay big bucks for at a coffeehouse, but costs pennies to make yourself. You might plan to give some away, but after your first taste, you'll probably want to keep the whole batch!
What Makes This Fudge Worth Trying
Dreamed of turning that caramel latte you love into something you can bite into? This treat does exactly that. There's no need for fancy equipment or candy thermometers - just grab some regular kitchen bowls and a pan. Those dark chocolate streaks on top look impressive but they're just simple lines of melted chocolate. Whip some up for get-togethers, tuck pieces into packed lunches, or stash some in your fridge for when sugar cravings hit. It's way cheaper than buying fancy sweets at shops, and you can adjust how strong the coffee flavor is. The best part? Everyone who tries it will beg you for your secret recipe.
What You Need
- White Chocolate Chips: These create the silky foundation. If you only have white chocolate bars hanging around, just chop them up - they'll melt perfectly too
- Butter: Go with plain unsalted sticks. Make sure it's slightly softened so it combines smoothly with the chocolate
- Dulce de Leche: This caramel goodness gives the bottom section its deep, sweet flavor. You'll spot it near where they keep condensed milk
- Marshmallow Cream: The magic ingredient that keeps your fudge perfectly tender. It'll stay good in your fridge for other sweet projects
- Instant Coffee: Use whatever brand you enjoy - whether light or dark roast. This gives the top section that authentic coffee shop flavor
- Hot Water: Just a splash of hot water from your tap to melt the coffee. Make sure it's steaming so the coffee granules fully dissolve
- Sweetened Condensed Milk: This sticky, sugary milk binds everything together for that creamy texture. Don't accidentally grab evaporated milk instead
- Dark Chocolate: Used for the fancy topping design. The slight bitterness from dark chocolate perfectly balances all the sweetness underneath
How to Make It
- Get Your Pan Ready:
- Cover an 8x8 pan with aluminum foil. Leave extra hanging over the edges so you can easily pull everything out later. Press the foil firmly into all corners for clean edges.
- Start the Caramel Layer:
- Set a pot over gentle heat. Toss in white chocolate with butter. Keep mixing until everything looks glossy and smooth. Take your time here - rushing with too much heat will ruin the chocolate.
- Make it Caramel:
- Add the dulce de leche into your mix. Keep stirring until everything blends perfectly. Mix in the marshmallow cream until your mixture looks like smooth caramel sauce.
- First Layer Goes In:
- Scrape this caramel mixture into your foil-lined pan. Spread it evenly with the back of a spoon. Stick it in the fridge for 30 minutes until it's firm enough to support another layer.
- Mix Up Coffee:
- While waiting, dissolve your instant coffee in hot water in a small cup. Stir thoroughly until no granules remain. Pour this into the sweetened condensed milk and mix until it looks like coffee with cream.
- Start Coffee Layer:
- Wash your pot or grab a fresh one. Melt more white chocolate and butter using the same gentle method. Once melted, pour in your coffee-milk mixture. Add marshmallow cream and stir until it resembles coffee-colored ice cream.
- Add Second Layer:
- Pull your pan from the fridge. Gently pour the coffee mixture over the set caramel layer. Carefully smooth the top. Be gentle so you don't disturb the bottom layer.
- The Waiting Game:
- Wrap the pan with plastic. Return it to the fridge for at least 4 hours. Leaving it overnight works even better - this gives both layers time to set completely.
- Cutting Time:
- Use the foil edges to lift everything out. Carefully remove all the foil. Warm a knife under hot water, wipe it dry, then slice into squares. Wipe the knife clean between cuts for pretty edges.
- Make it Pretty:
- Melt dark chocolate in short microwave bursts. Heat 30 seconds, stir, then continue with 15-second intervals until smooth. Transfer to a sandwich bag, snip a tiny corner, and zigzag lines across your fudge pieces.
- Finishing Up:
- Let those chocolate lines harden about 15 minutes. Now you can layer the pieces between wax paper in a container. They'll stay fresh for a week at room temperature - if anyone lets them last that long!
Why This Treat Stands Out
The real wow factor happens where these flavors meet. The bottom tastes just like the caramel swirl in your fancy coffee drink - sugary, buttery perfection. The top half brings that coffeehouse flavor you crave, but in a chewy candy form. Each bite delivers both sensations at once, like sipping a premium latte. Those dark chocolate lines aren't just for show - they add just enough bitterness to balance all the sweetness below. This isn't your grandma's plain fudge - it's like your favorite coffee shop drink transformed into something you can eat.
Choosing Quality Ingredients
Go for good white chocolate - the bargain stuff often won't melt properly. Look for packages listing cocoa butter, not just palm oil. Your butter should be fresh, not something that's been sitting forgotten in your fridge. Dulce de leche is what makes this fudge stand out, so find authentic stuff if possible. For coffee, use whatever brand you actually enjoy drinking - your taste preferences matter. The marshmallow cream might seem weird, but it's crucial - skip it and you'll end up with brick-hard fudge. Good ingredients working together make something way tastier than anything from a store shelf.
Creating Perfect Layers
The secret to beautiful layers is patience. Begin with your caramel base - melt everything on low heat while constantly stirring. If you notice any small bumps, keep mixing until they vanish. Let this first layer get really cold before adding the coffee part. When making the coffee mixture, make sure your coffee completely dissolves - nobody wants to bite into dry coffee chunks. Pour the second layer on carefully to avoid damaging what's underneath. The more time you give it all to chill, the cleaner it'll slice. Many folks let it sit overnight - tough to wait but totally worth it.
Keeping It Fresh
Your candy will stay tasty for about a week at room temp if you store it in an airtight container. Put wax paper between layers so they don't stick to each other. If your house runs warm, better store it in the fridge - melted fudge is just sad. Want to save some for later? Wrap it tightly in plastic, then aluminum foil, and toss it in the freezer. It'll keep frozen for up to two months. When cravings hit, move it to the fridge the night before. Let it warm up before eating for the best texture. Just try to show some self-control!
 Pin it
Tricks for Better Results
Here's what fudge experts have figured out: Aluminum foil works better than wax paper for lining - it peels off more easily. Always use low heat when melting chocolate - high temps lead to grainy disasters. Want picture-perfect squares? Use a ruler to mark your cuts first. Dip your knife in hot water and dry it between each slice - this keeps edges looking sharp. If fudge sticks to your knife, a tiny spritz of cooking spray helps. Before drizzling chocolate on your masterpiece, practice your technique on some wax paper. And never rush the cooling time - truly amazing fudge deserves those extra hours in the fridge.
Frequently Asked Questions
- → Can I try using a different chocolate type?
You can! Milk and dark chocolate are great, and white chocolate will sweeten it up. For layers, let each kind cool before adding another. Chocolate chips are easier to work with, while chocolate bars might not melt as easily. Fresher chocolate works best, so check the date before starting.
- → How should I store it?
Keep it in an airtight container. It'll stay good for about two weeks if you leave it in a cool, dry place. Avoid putting it in the fridge because that makes it hard and may cause white spots. Always cut it after it sets or it'll crack. Stack pieces with parchment paper between them.
- → Want to mix in extras?
Chopped nuts are a hit—toast them first for better flavor. Sprinkle some salt on top to make it pop. Add crushed cookies or dried fruits for variety. Coconut flakes add great texture. Be sure to skip watery ingredients to avoid making the fudge gritty.
- → How long until I can cut it?
Give it a solid 4 hours minimum, but leaving it overnight is even better. Touch it in the center—if it's firm and not sticky, it's ready. Use a warm knife for clean slices, wiping it between cuts. Cut into smaller pieces since it's pretty sweet.
- → No caramel sauce in hand?
You can make some by heating sugar with cream. Alternatively, melt soft caramel candies with a splash of cream. Even maple syrup can work—just use a little since it's thinner. Honey is another option, though it changes the flavor a bit.
- → Why is it so soft to cut?
It might need more time to set. You could chill it briefly in the fridge. Consider adding extra chocolate next time to firm it up better. Humid days can make fudge softer, so try keeping the room cool while prepping.
- → Having trouble with the fudge not setting?
If it didn't firm up, check your cooking heat—you don't want it too high. Stir gently to avoid adding air bubbles. Use real butter as substitutes can mess with the setting. Double-check your measurements. Old marshmallow creme can also cause issues.
- → How do I travel with it?
Transport it in a sturdy container to keep the pieces from squishing. If it's warm outside, keep it cool during the trip. Stack the fudge with parchment paper between layers if needed. Smaller pieces work better since it's rich.
- → Want the coffee flavor stronger?
Espresso powder gives more kick than regular coffee. You can also reduce strong brewed coffee into a thick concentrate. Stay away from using cold coffee—you might get grainy fudge. Adding coffee beans on top is a nice touch for presentation.
- → Why does the fudge feel grainy?
It might've been cooked too hot or stirred a bit after cooling. Next time try lowering the heat. Wait for the sugar to dissolve fully before mixing in other stuff. When pouring it out, avoid scraping the sides of the pan.
Conclusion
If you're a fudge fan, try combining rich dark chocolate with coffee flavor. Not into coffee? Use vanilla instead. Try mixing dark and white chocolate for different flavors.