
 Pin it
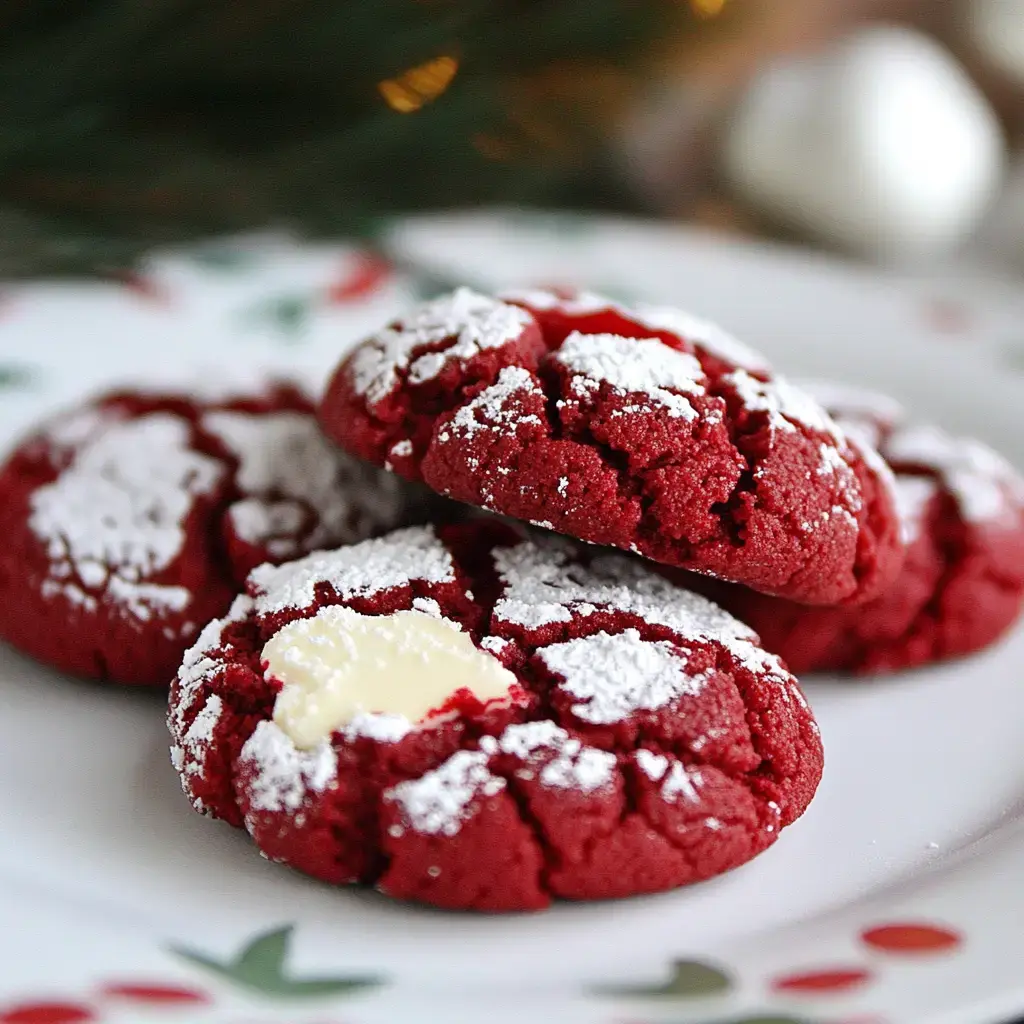
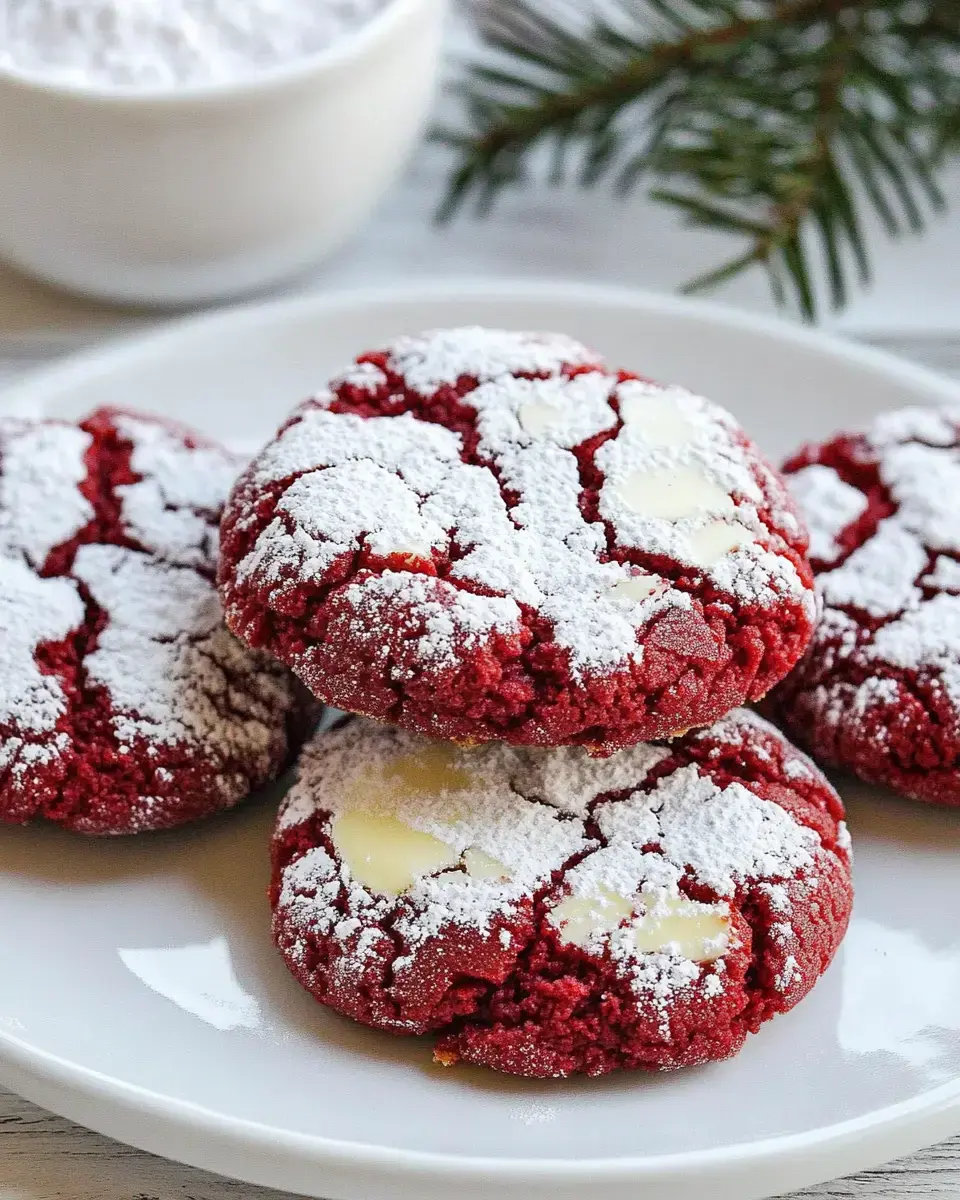
I discovered this treat by accident when mixing up my favorite red velvet cake flavors with buttery cookie recipes—talk about a wonderful surprise! These cookies are truly fantastic with their vibrant red appearance, sugar-coated crackly tops and super gooey middles. Whenever I bring them to cookie swaps, they disappear faster than anything else.
What Makes These Special
Anyone who enjoys red velvet will fall head over heels for these treats. They've got that subtle cocoa hint wrapped in butter-rich goodness, and the pretty sugar dusting makes them look so fancy. Though they're perfect for holiday gatherings, I can't help making them throughout the whole year because they're just that amazing.
Winning Components
- Flour: All-purpose works great for the right balance of structure and softness.
- Sugar: Balanced sweetness that won't overwhelm your taste buds.
- Cocoa Powder: Delivers that signature red velvet flavor we crave.
- Baking Powder: Creates those lovely surface cracks everyone loves.
- Salt: Just a touch brings out all the other tastes.
- Cream Cheese: Adds an incredibly rich, moist texture.
- Butter: Don't skimp here—quality butter makes a big difference.
- Egg: Ties all the elements together nicely.
- Red Food Coloring: Creates that eye-catching shade everyone wants.
- Powdered Sugar: Forms the beautiful snowy exterior coating.
Easy Preparation Guide
- Mix Your Dry Stuff
- Combine flour, sugar, cocoa powder, baking powder and salt in a bowl and stir everything together until well blended.
- Prepare Your Wet Mix
- Whip cream cheese and butter until they're completely smooth, then add your egg and the bright red food coloring.
- Combine Everything
- Slowly add your dry mix into the wet ingredients until you see a beautiful red dough form. Stick it in the fridge for at least 60 minutes to get firm.
- Form Your Cookies
- Take the chilled dough and form small balls, then roll them generously in powdered sugar.
- Bake Them Up
- Set them on your cookie sheet and bake at 350°F for around 10-12 minutes. You'll know they're done when cracks start appearing.
- Cool Down Time
- Let them sit on the baking sheet briefly before moving to a cooling rack. They're hard to resist warm, but waiting helps the texture develop.
Foolproof Cookie Advice
Don't rush the chilling step—it really helps with handling the dough. Go heavy with the powdered sugar coating for that amazing crackle look. I always grab the nicest cocoa I can find because you'll definitely taste the difference. And don't rush the cooling part, they need this time to set up just right.
 Pin it
Adaptable and Showy
These little gems work for any occasion. They fit right in on Christmas cookie trays, make sweet Valentine's gifts, or just brighten a random Tuesday. Sometimes when I'm feeling fancy, I'll stick two together with cream cheese frosting in between—it's absolutely wonderful.
Everyday Treat
Even though folks go wild for these during holiday season, I whip them up whenever I feel like it. There's nothing better than dunking one in cold milk or enjoying it alongside your coffee to brighten your day. They also work great as a thoughtful homemade gift when someone needs a little pick-me-up.
Frequently Asked Questions
- → Why does the dough need chilling?
This step helps make the dough easier to shape and handle.
- → What food coloring works the best?
For a bold red color, go with gel-based options.
- → Is freezing an option?
Yep, keep them good in an airtight box for up to 3 months.
- → Why do ingredients need to be at room temperature?
It helps everything blend smoothly and gives a better texture.
- → How long will these cookies stay fresh?
They’ll stay good for about 3 days in a sealed container.