
 Pin it
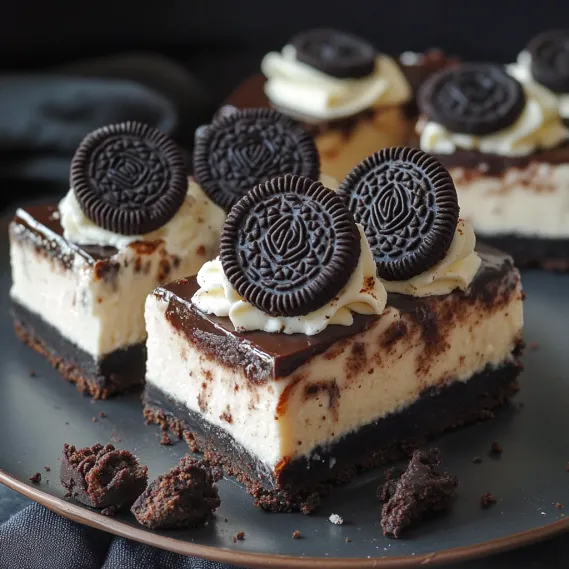
I've been pulling off this no-bake Oreo cheesecake for years as my go-to party showstopper. When I need to wow guests without firing up the oven, these indulgent bars save the day with their ideal mix of crunchy cookie chunks and velvety cheesecake.
The first batch came about during my nephew's party when we lost electricity in a summer thunderstorm. What started as a kitchen workaround has turned into our family's most wanted celebration treat, with everyone grabbing for the edge pieces.
What You'll Need
- For the Base
- 18 Oreo cookies: Just the dark cookie parts, making a rich chocolate foundation
- 4 tablespoons melted butter: Gives depth and holds the base together
- For the Creamy Middle
- 10.5 ounces cream cheese: Make sure it's soft to get that signature tangy flavor
- 1/3 cup granulated sugar: Cuts the tang without drowning out the Oreo taste
- 18 Oreo fillings: Saved from your base cookies for that true Oreo kick
- 2/3 cup heavy cream: This makes everything fluffy and mousse-like
- 10 chopped Oreo cookies: So you get yummy cookie bits in every mouthful
- 3 whole Oreo cookies: Creates a hidden middle section
- For the Chocolate Top
- 5 ounces milk chocolate: Makes a smooth, glossy layer
- 3.5 tablespoons heavy cream: Helps the chocolate reach just the right thickness
- 3 Oreo cookies: For topping it off and hinting at what's underneath
Simple Steps For Oreo Bar Success
- Fix the Base:
- Pull apart your Oreos and keep the filling for later. Smash the chocolate cookies into tiny bits using a food processor or by putting them in a bag and crushing them with a rolling pin. Mix with melted butter until it looks like damp sand. Push firmly into a parchment-lined 8x8 inch pan, using a glass bottom to smooth it out. Stick it in the fridge for at least 30 minutes until it's totally hard.
- Mix the Cheesecake:
- In a big bowl, beat the soft cream cheese with an electric mixer for 3 full minutes until it's super smooth. Wipe down the sides of the bowl often so there aren't any lumps. Throw in all the saved Oreo filling and beat again until everything's mixed and there aren't any white streaks left.
- Fluff the Cream:
- In another cold metal bowl, whip the heavy cream with the sugar. Start slow then speed up to medium-high and beat for about 4 minutes until you get soft peaks that stand up but curl a bit at the tops. Don't go too far or it'll get grainy real fast.
- Put It All Together:
- Using a rubber spatula, fold the whipped cream into the cream cheese mix very carefully. Use an up-and-over motion to keep all the air bubbles for a light texture. When it's almost mixed, add the chopped Oreos and keep folding just until they're spread out evenly.
- Build It Up:
- Spread half the cheesecake mix on the cold crust in an even layer. Line up 3 whole Oreos down the middle for a fun surprise when you cut it. Cover with the rest of the mix and use a flat spatula to make the top super smooth. Tap the pan on the counter a few times to get rid of air bubbles.
- Let It Rest:
- Cover the pan with plastic wrap without touching the cheesecake surface. Leave in the fridge overnight or at least 8 hours. This waiting time is super important for getting the right texture and letting all the flavors blend together.
- Whip Up the Topping:
- Heat the cream in a microwave-safe bowl or small pot until it's almost bubbling but not boiling. Pour over the milk chocolate pieces in a heat-safe bowl. Wait 2 minutes then stir gently from the middle outward until it's all smooth and shiny. Let cool for 10 minutes until it thickens a bit but still pours easily.
- Top It Off:
- Pour the cooled chocolate over the cold cheesecake, tilting the pan gently to spread it evenly. Use a flat spatula if needed to cover everything perfectly. Put it back in the fridge for 30 minutes until the chocolate hardens.
- Finish and Serve:
- Before serving, top with cut Oreo cookies for show. For clean slices, use a sharp knife dipped in hot water and dried between cuts. Lift the whole thing out using the parchment paper edges and cut into 12 equal bars.
 Pin it
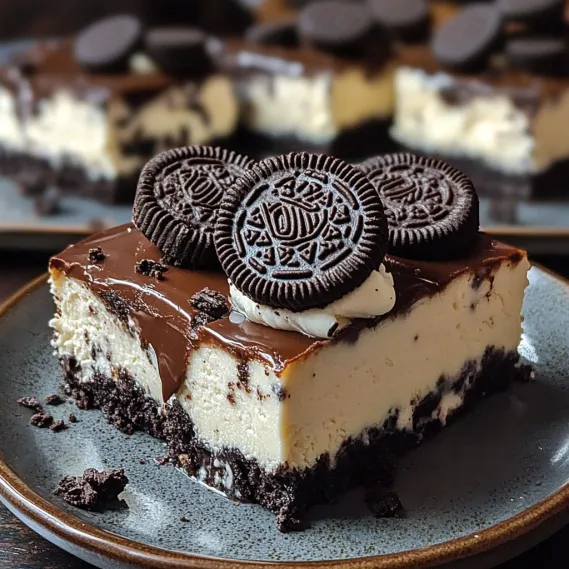
The real magic in this recipe comes from using both parts of the Oreos separately. I figured this out after wondering why my early tries never quite captured that true cookie taste. Breaking the cookies apart lets you max out the flavor in both the base and filling while getting the sweetness just right.
Keeping It Fresh
These cheesecake squares stay fresh in the fridge in a sealed container for up to 5 days. Put some parchment between layers if you stack them so they don't stick together. For keeping them longer, wrap each bar by itself and freeze for up to 2 months. Let them thaw in the fridge overnight for the best results never on the counter as they'll get watery and change texture.
Make It Your Own
While regular Oreos nail the classic taste, you can play around with different flavors like mint, golden, or birthday cake Oreos for something different each season. For a grown-up twist, add 2 tablespoons of coffee liqueur to the filling and swap in dark chocolate for the topping. If you want something lighter, use Greek yogurt for half the cream cheese and try whipped coconut cream instead of the dairy stuff.
What To Serve With It
These bars taste even better with the right sides. Try adding a little raspberry sauce on each plate for a bright color pop and tangy taste that cuts through the richness. For fancy occasions, pair with a scoop of real vanilla ice cream and coffee on the side. At summer get-togethers, serve them just slightly cool but not ice-cold from the fridge to get the creamiest texture.
 Pin it
Quick Fixes For Common Problems
If your chocolate topping looks dull or gritty, warm it gently over a water bath and stir in a teaspoon of vegetable oil to bring back the shine. When your filling seems too soft after sitting overnight, pop it in the freezer for 30 minutes before slicing. In a warm kitchen, chill your bowl and beaters before whipping cream to get more volume. Just remember that no-bake desserts need time to set up properly so don't rush the chilling time if you want the best flavor and texture.
Frequently Asked Questions
- → How do I prepare the Oreo crust?
Crush some Oreo cookies finely, then combine them with melted butter. Press this mixture into a pan lined with baking paper and let it chill until firm.
- → Can I switch up the chocolate for the ganache?
You sure can! Swap milk chocolate for dark or white options to change up the sweetness or richness to your liking.
- → Why is overnight chilling important?
It helps the cheesecake layer fully set, and the flavors come together better with more time to rest.
- → Can I make these ahead of time?
Definitely! Just prepare them a day or two before and keep them in the fridge. They're great to serve whenever you need.
- → Is it okay to use other types of cookies?
Of course! You can swap out Oreos for any similar sandwich cookies to mix up the flavor combinations.
- → What's the best way to cut the bars?
Use a sharp knife and wipe it with a damp towel between slices to avoid sticking and get clean cuts.