
 Pin it
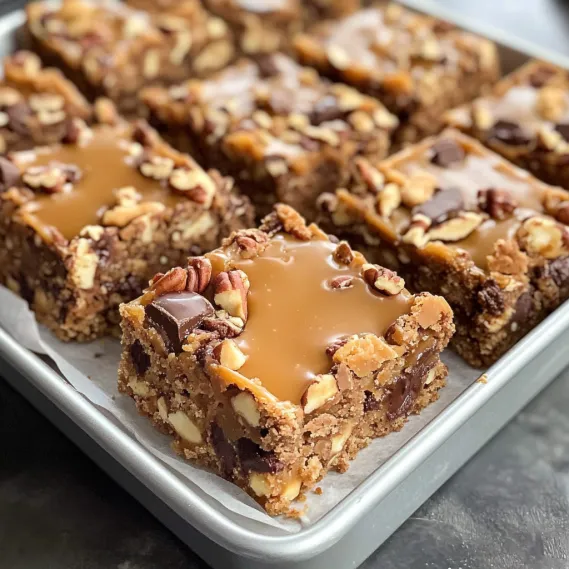
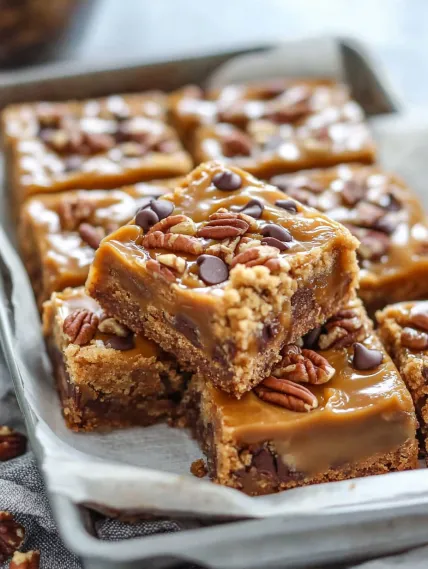
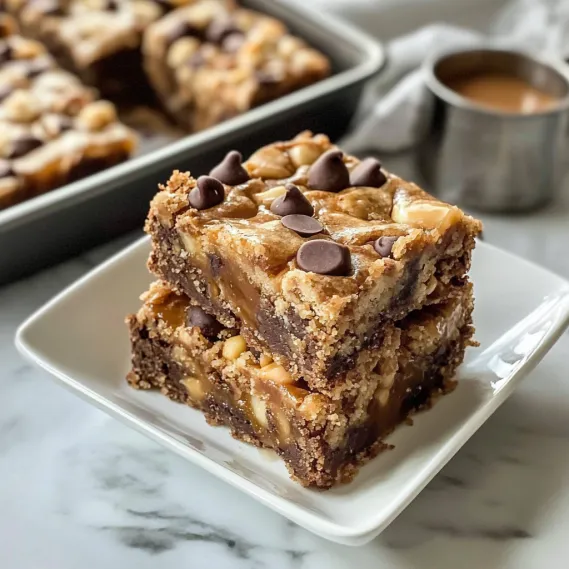
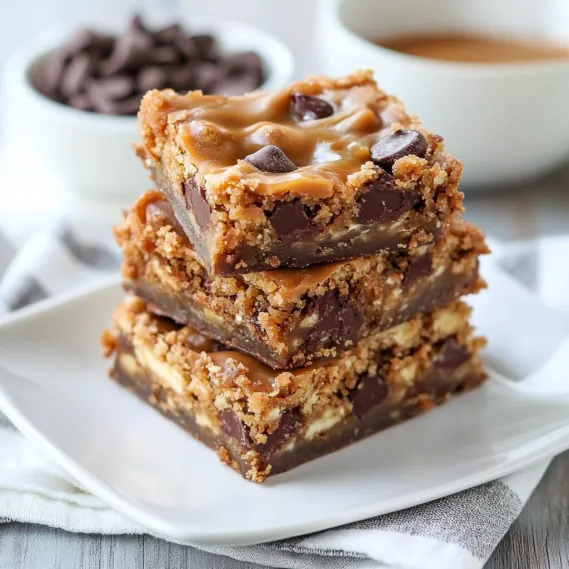
These mouthwatering layered treats feature a soft cookie foundation topped with melty caramel, chocolate chips, and a touch of peanut butter for a sweet that truly lives up to its daring name. With a mouth-pleasing mix of textures and tastes, you'll have an unforgettable treat that'll wow everyone at your next gathering. I bumped into this gem at a local block party and had to grab the instructions after just one taste.
The first time I whipped these up for my family, my teen boy called them "the tastiest thing you've ever put in the oven" and secretly tucked away two pieces for his school lunch. There's just something about that caramel-chocolate combo nobody can turn down.
Key Items and Shopping Advice
- Butter - Pick unsalted to manage how salty the whole thing turns out
- Caramels - Go for those soft ones in wrappers; unwrap them while your base cooks
- Chocolate Chips - Semi-sweet hits the sweet spot but milk or dark work too
- Peanut Butter - Smooth blends best in the caramel part; grab natural or regular as you like
- Evaporated Milk - Gets your caramel just the right thickness
The real wonder happens as the hot caramel hits that partly baked cookie layer, making a gooey middle that gets even tastier as it sits and cools down.
Step-by-Step Baking Guide
- Step 1:
- Set Things Up Get your oven going at 375°F and really grease up a 9×13 baking dish. Having everything measured out makes putting it all together way easier.
- Step 2:
- Mix Your Base In a big bowl, whip soft butter with both kinds of sugar till it's fluffy, about 2-3 minutes. Toss in vanilla, then add eggs one after another, mixing well each time. Mix flour, baking soda, and salt in another bowl, then slowly dump it into the butter mix. Stir in chocolate chips just enough to spread them around.
- Step 3:
- Start Baking Push half that cookie mix flat across your greased pan. It'll be thin, so try using a flat spatula or wet spoon to help spread it out. Bake 8-10 minutes till it's set but not too brown yet.
- Step 4:
- Make Your Caramel While that's in the oven, unwrap all those caramels and put them in a double boiler with the evaporated milk. Melt on medium, stirring lots so it doesn't burn. Once it's smooth, mix in peanut butter till you can't see any streaks.
- Step 5:
- Add Caramel Layer When your cookie base comes out, right away pour that warm caramel mix over top, spreading it out evenly. Work fast since it starts hardening as it cools.
- Step 6:
- Finish The Layers Drop spoonfuls of your leftover cookie dough on the caramel. Don't worry about covering every spot - the gaps let the caramel peek through and look pretty when it's done.
- Step 7:
- Finish Baking Put the pan back in and bake another 15-20 minutes till the top looks light gold. The middle might seem a bit soft but will firm up as it cools down.
- Step 8:
- Let It Rest Let everything cool in the pan for at least 1-2 hours before cutting. For super clean cuts, stick it in the fridge for 30 minutes after it reaches room temp.
- Step 9:
- Slice It Up Use a sharp knife dipped in hot water and wiped off between cuts for the cleanest look. Cut into 24 squares for regular servings or smaller for bite-sized morsels.
- Step 10:
- Enjoy And Store Eat at room temp for the best gooey texture. Keep them in a sealed container with parchment paper between layers.
 Pin it
I figured out how important it is to grease the pan properly after my first batch stuck horribly. Now I use both cooking spray and parchment paper hanging over the sides for easy lifting out.
Amazing Do-Ahead Sweet Treat
These bars get even better overnight as all the flavors blend together. I usually make them a day before I need them for the best taste. For weekend get-togethers, I throw them together Friday night, giving them plenty of time to cool properly. The texture gets just right overnight while the caramel part develops an even richer flavor. This makes them great for busy folks who want awesome desserts without last-minute rushing around.
Wrapping and Display Suggestions
When giving these as holiday gifts, I cut them smaller and pack them in pretty tins with parchment lining. I put waxed paper between layers so they don't stick together. With a ribbon and handwritten note, they make fancy homemade presents that friends ask for year after year. At bake sales, I wrap each one in parchment and stack them on an old wooden board to catch everyone's eye.
 Pin it
Fun Party Twists
I like to change these up depending on the celebration. For Valentine's Day, I sprinkle some pink salt on the caramel part. Summer birthdays get a drizzle of melted white chocolate on top after cooling. During winter holidays, I mix crushed candy canes into the top layer. For fall gatherings, I add a bit of cinnamon and a tiny pinch of nutmeg to the cookie dough for those warm autumn flavors.
Kid-Friendly Changes
When I make these for events with kids, I sometimes swap out peanut butter for cookie butter to avoid allergy problems. Tiny chocolate chips make the texture more even for picky kids. Setting up a "decorate your own bar" spot with toppings like sprinkles, mini marshmallows, or crumbled cookies lets kids fix up their own pieces, turning dessert into a fun activity everyone can join in on.
Pro Baking Advice
- Put parchment paper in your pan with extra hanging over the sides for easy lifting
- Cook the base a little less than you think for that perfect chewy bite
- Throw in a cup of chopped pecans to the cookie dough for extra yum
- Always melt caramel using a double boiler to stop it from burning
- Cool in the fridge for 30 minutes before cutting for clean edges
I've worked out these tricks after many batches, especially after finding that using a double boiler makes the caramel way smoother than direct heat ever does.
These amazing bars have become what I'm known for at potlucks and family events. There's just something about how the textures work together - that slight crunch on the outside giving way to gooey caramel and melted chocolate inside - that makes everyone come back for seconds.
 Pin it
Last-Minute Tricks
- Add a spoonful of espresso powder to the cookie dough for a grown-up flavor twist
- Swirl the caramel around with a knife before adding the top layer for a pretty pattern
- Try mixing up your chips - butterscotch or white chocolate work great
- Use a plastic knife to cut chilled bars for surprisingly clean slices
- Let the bars warm up to room temp before serving for the best texture
These rich treats show that sometimes the most impressive sweets don't need fancy methods or weird ingredients - just the right combo of flavors and textures stacked together with a little love.
Frequently Asked Questions
- → Is caramel sauce a good substitute for melted caramels?
- Caramel sauce tends to be runnier and might not set properly. Using melted caramel pieces gives the best results.
- → How do I tell if the bars are cooked enough?
- Look for a lightly golden top and edges that slightly pull away from the pan.
- → Can these bars be kept in the freezer?
- Definitely! Let them cool completely, slice, and layer in an airtight container with parchment paper. They’ll stay good for up to three months.
- → What can I use instead of peanut butter?
- Feel free to use almond butter or cookie butter to change up the flavors.
- → Why’s the name ‘Knock You Naked’ bars?
- It’s just for fun! The idea is they’re so delicious, they’ll almost ‘knock your socks off’.