
 Pin it
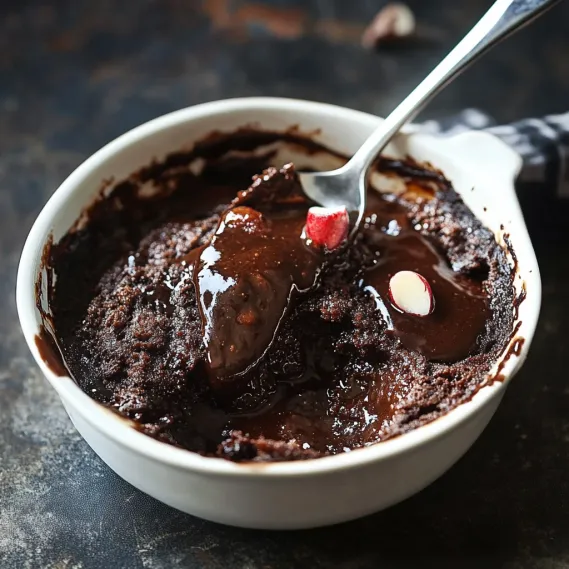
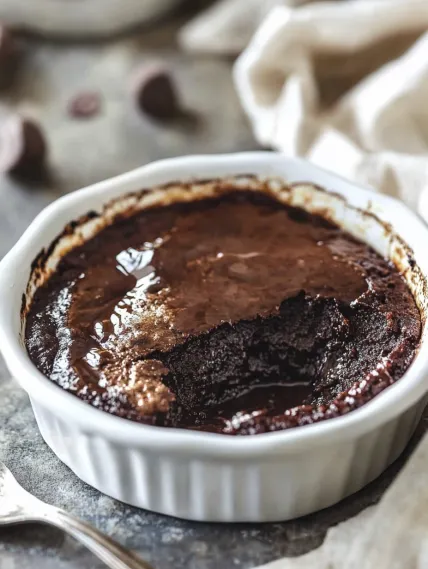
This amazing chocolate self-saucing pudding works its own magic by creating two fantastic layers in one dish – a soft, fluffy chocolate cake sitting on top of a smooth chocolate sauce that happens all by itself. The mix of cakey top and silky sauce underneath makes for a warm, cozy treat that hits the spot when you're craving chocolate without much work. You can whip it up in less than an hour using stuff you probably already have at home, and it'll wow everyone whether it's just family night or you're having friends over. Once you break through that slightly crisp top and find the hidden sauce waiting below, you'll get why this simple pudding has stayed a favorite for so long.
I first threw this together when some friends popped over and I couldn't get to the store. What really caught me off guard was how everyone thought I'd done something super fancy – when really one simple mix had turned into two different layers! My buddy's kid (he's seven) said it was "way better than what we get at restaurants" and now asks for it whenever they stop by. What's great about this pudding is that it looks really impressive but doesn't take much effort at all.
Key Ingredients and Smart Picking Tips
- Cocoa Powder: Go for unsweetened cocoa for true chocolate taste. Dutch-processed gives you a deeper, darker result, but regular cocoa is totally fine too.
- Brown Sugar: Adds richness and moisture to the sauce. You can use light or dark brown sugar, just depends how deep you want the flavor.
- Butter: Melted butter makes the cake part soft. Using unsalted lets you control how salty the final dessert is.
- Milk: Adds wetness to the mix. Whole milk gives the best richness, but any kind works fine.
- Boiling Water: This is what creates the magic sauce. Make sure it's really boiling hot when you use it.
After trying this many times, I've found that how much water you use compared to sugar in the topping really matters. Using a bit more water makes a properly runny sauce instead of something too thick, which I think tastes much better when you're eating it.
Easy Cooking Steps From Start to Finish
- Step 1: Get Your Dish Ready
- Heat your oven to 170°C (335°F) and put lots of butter on a 1.5-liter baking dish. The size matters a lot - too big and your sauce will be thin; too small and it might spill over. A dish about 25cm x 20cm (10" x 8") with sides at least 5cm (2") high does the job right.
- Step 2: Mix Up Your Batter
- In a big bowl, mix 1 cup plain flour, 2½ teaspoons baking powder, ⅓ cup white sugar, ¼ cup cocoa powder, and a pinch of salt. In another bowl, mix ½ cup milk, 50g melted butter, 1 egg, and 1 teaspoon vanilla extract. Pour the wet stuff into the dry stuff and stir until it's just mixed into a thick batter, then spread it evenly in your buttered dish.
- Step 3: Sprinkle The Magic Stuff
- In a small bowl, mix 1 cup brown sugar and ¼ cup cocoa powder, then sprinkle this mix evenly over your batter. Gently shake the dish so the sugar mix spreads out evenly. The sugar and cocoa will do their thing while baking to make your sauce.
- Step 4: Add The Water That Makes It Work
- Pour 1¼ cups boiling water over the back of a spoon onto the sugar-cocoa layer, trying to get it spread out all over. This might seem weird, but the hot water is what makes the sauce under the cake as it bakes. Don't stir it - the layers need to stay separate.
- Step 5: Bake It Just Right
- Bake for 30 minutes until the top feels set and bounces back when you touch it lightly. The top should be a bit crackly, kind of like brownies, but the cake should still feel soft underneath. Let it sit for just 2-3 minutes, then serve it right away while the sauce is still runny under the cake part.
 Pin it
The first time I tried making this pudding, I almost ruined it by mixing the water into the topping, which messed up the separate layers. Now I know that not stirring is super important if you want to get that awesome two-texture result.
Mastering The Hot Wok Method
You need super hot temperatures for real fried rice. My grandma always told me to heat the wok till it smokes before adding oil. Keep the food moving all the time to get that special "wok hei" flavor. Don't put too much in at once—cook in smaller batches instead. This way of cooking made my fried rice taste just like what you'd get at a restaurant.
 Pin it
Turning Extras Into Something Special
This dish is perfect for using up what's left in your fridge. I've used leftover roast chicken, holiday ham, and even turkey from Thanksgiving with great results. Just cut all the meat into small same-sized pieces so they spread out well. Leftover grilled steak adds amazing flavor with its smoky bits. Even roasted veggies bring a nice sweet caramelized taste.
Getting Tastes And Textures Just Right
Good fried rice needs balanced ingredients. Char siu gives richness, prawns add sweetness, eggs make it silky, while veggies keep it fresh. The order matters—start with aromatics to build flavor, add eggs in the middle so they stay distinct, veggies later so they stay crisp. Always put spring onions in last to keep their bright flavor for that restaurant-style finish.
Changing It For Different Diets
This dish can work for almost any diet. For vegetarians, I skip the meat, use more eggs and add extra veggies. People watching carbs like my cauliflower rice version that holds flavors really well. For folks who can't have gluten, I use tamari instead of soy sauce and make sure the chicken powder doesn't have gluten. Everyone can enjoy this favorite dish no matter what their needs are.
What To Serve With Your Pudding
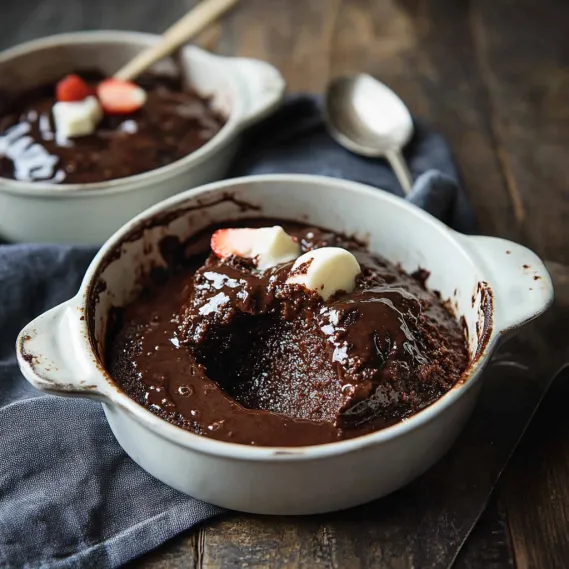
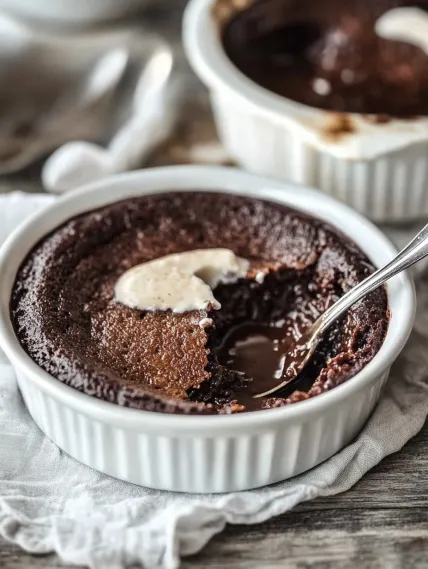
This pudding tastes great by itself, but adding the right sides turns it from good to amazing. A scoop of vanilla ice cream makes a perfect hot-cold mix as it melts into the warm pudding. When friends come over, I add lightly whipped cream and fresh berries, which cut through the rich chocolate with a nice tang. In fall and winter, I've served it with poached pears and a little caramel drizzle for a fancy dessert that still feels homey. Coffee fans in my family love having it with a small espresso, which makes the chocolate taste even better. For big get-togethers, I set up a topping bar with crushed nuts, chocolate shavings, and fresh mint, so everyone can make their own version.
Try These Tasty Twists
While I still love the classic chocolate version most, I've played around with some changes that have become hits at my house. For coffee lovers, just add 1 tablespoon of instant espresso powder to the mix. If you like orange and chocolate together, throw in 1 tablespoon of orange zest to the cake part. For grown-up parties, I sometimes add 2 tablespoons of Baileys or Kahlúa to the batter and another tablespoon to the sauce mix. My most over-the-top version includes mixing in ⅓ cup of chocolate chips before baking, which creates little pockets of melted chocolate throughout the cake. All these changes follow the same basic steps but give you different flavors to try.
Getting Ready Ahead Of Time
This pudding tastes best right out of the oven, but I've found some tricks for when you're busy hosting. You can mix the dry stuff for both the batter and topping separately and keep them in sealed containers up to a week ahead. You can even butter your dish early and keep it covered in the fridge. When company shows up, just mix in the wet ingredients, combine with your pre-measured dry mix, put it together, and bake. The pudding only takes about 10 minutes to prep when you've planned ahead, which makes entertaining way easier. For really last-minute situations, I've made the whole thing up to the baking part, stuck it in the fridge for up to 2 hours, then just added 5 more minutes to the baking time and it came out great.
 Pin it
This chocolate self-saucing pudding has been my go-to when I need a quick but impressive dessert for family dinners and get-togethers. My favorite part is watching people's reactions when they dig in and find that hidden sauce under the cake – that look of surprise and joy never gets old. The mix of basic ingredients, easy steps, and magical outcome has made this simple pudding a must-have in my dessert collection, showing that sometimes the tastiest treats are also the easiest to make.
Frequently Asked Questions
- → How do I fix watery sauce?
- If your sauce seems runny, try baking it a bit longer. The sauce thickens as it cooks. Also, double-check the amounts of cocoa powder and sugar you added to the topping – they're essential for making the sauce turn out right.
- → Can I prepare this dish early?
- This dessert is best enjoyed fresh while the sauce is still gooey. If you need to prep ahead, keep the batter and topping separate, and only add the hot water before it goes in the oven.
- → Can I swap cocoa powder for dark chocolate?
- No, stick with cocoa powder! This recipe is designed for it, and using melted chocolate could throw off how the sauce forms. For the best result, use unsweetened cocoa powder.
- → How to reheat leftovers?
- Warm individual portions in the microwave for about 20-30 seconds. While you might not get as much sauce as when freshly baked, adding a spoonful of hot water before reheating can help recreate it.
- → Can I bake these in ramekins?
- Absolutely! Split everything into 6 ramekins. Sprinkle the cocoa-sugar topping on each, pour hot water gently, and bake for 15-20 minutes. They're done when the tops bounce back when touched.
- → Why didn't I get a sauce layer?
- This usually happens if you pour the hot water too quickly and it mixes into the batter. Next time, try pouring it over the back of a spoon to avoid disturbing the layers.