
 Pin it
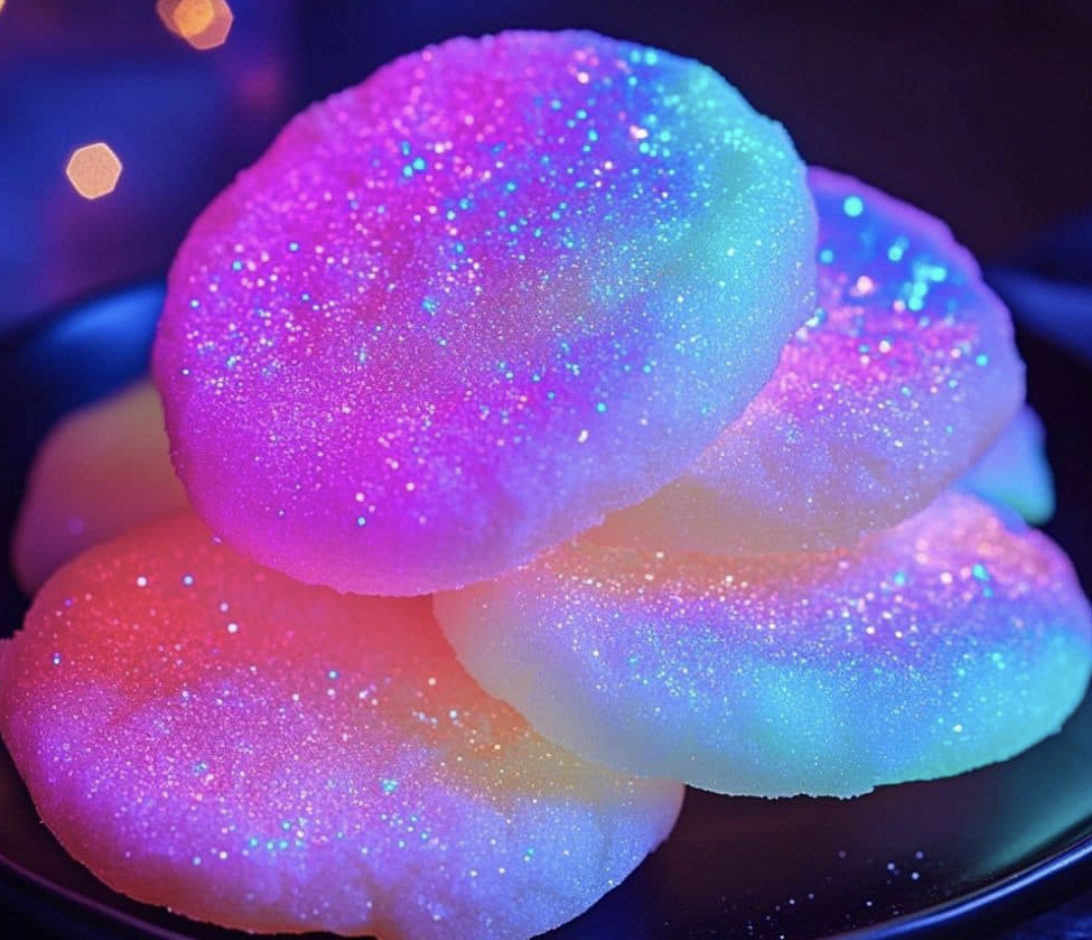
This fun-filled glowing cotton candy cookie turns everyday baking into something extra special that'll wow kids and grown-ups alike. The sweet fairground flavor mixed with that surprising glow-in-the-dark trick makes them awesome for get-togethers, kid sleepovers, or when you just want something playful on your treat table.
I whipped these up for my niece when she had her science party, and boy, when we turned off the lights and flipped on that blacklight, everyone went wild! They've now become our go-to treat whenever we have movie nights or Halloween parties.
What You'll Need
- All-purpose flour: makes the base for these soft, yummy cookies
- Baking powder: adds just enough puff without making them too fluffy
- Salt: cuts through the sweetness and makes the cotton candy taste pop
- Unsalted butter: gives that rich, creamy feel and lets you add just the right amount of salt
- Granulated sugar: makes those edges crispy while keeping the middle nice and sweet
- Large egg: keeps everything stuck together and adds moisture
- Vanilla extract: gives more flavor behind the cotton candy taste
- Cotton candy extract: brings that real fairground flavor everybody loves
- Tonic water: has quinine in it that makes everything glow under UV light
- Neon food coloring: turns your cookies into bright carnival-style treats
- Edible glitter or luster dust: adds that extra magic sparkle to catch everyone's eye
Easy Directions
- Get Your Oven Ready:
- Set your oven to 350°F and put parchment paper on your cookie sheet. This temp gets you cookies with slightly crunchy edges but soft middles. The paper stops them from sticking and helps them brown evenly.
- Get Dry Stuff Together:
- Stir the flour, baking powder, and salt in a bowl. This puts air in the dry ingredients and spreads everything out evenly so your cookies rise the same all over.
- Mix Butter and Sugar:
- Beat your soft butter with sugar until it looks lighter and feels fluffy. You'll need about 3-4 minutes with a mixer. This puts air bubbles in your dough which makes your cookies turn out soft.
- Add Wet Stuff:
- Put in the egg, both flavor extracts, and tonic water into your butter mix. The egg helps hold everything together, the extracts give that cotton candy taste. Don't skimp on the tonic water if you want them to glow properly.
- Mix Everything:
- Slowly add your flour mix to the wet stuff, stirring just until you can't see dry flour anymore. Don't mix too much or your cookies might get tough. If you want different colors, split the dough now before adding food coloring.
- Make Cookie Balls:
- Roll tablespoon-sized bits of dough and coat them in that sparkly edible glitter. Put them on your cookie sheet about 2 inches apart since they'll spread out. Press extra glitter on top if you want them super sparkly.
- Cook Them:
- Put your cookies in the hot oven for 10-12 minutes. Look for edges that look done but middles that still seem a bit soft. They might look not quite finished in the middle but they'll keep cooking after you take them out.
- Cool and Show Off:
- Let them sit on the hot pan for 5 minutes, then move them to a cooling rack. Once they're cool, put them on a plate and shine a blacklight on them to see them glow!
What I love most about making these cookies is seeing everyone's faces when they first notice the glow. Even my brother-in-law, who usually doesn't care about sweets, actually clapped when I brought these out at our family party. That alone made it worth figuring out this recipe.
Why They Glow
These cookies glow because of quinine in the tonic water. When blacklight hits it, the quinine gets excited and gives off blue-white light. This cool effect, called fluorescence, happens naturally without any weird chemicals. The bright food colors help too, since many have things in them that make the glow even better.
Keeping Them Fresh
These cookies stay yummy for about 5 days if you keep them in a sealed container at room temp. They'll still glow for 2-3 days after baking, but it gets weaker over time. You can freeze them for up to 3 months if you want. Or freeze the unbaked dough balls and cook them straight from frozen, just add 2-3 more minutes to the baking time.
Swap-Out Ideas
Can't find cotton candy extract? Try using 1 teaspoon vanilla and ¼ teaspoon almond extract for something similar. Need dairy-free? Just use the same amount of plant butter instead. You must use tonic water for the glow, but if you don't care about glowing, club soda works fine for just the cotton candy taste. Use whatever food coloring you prefer, natural or regular.
Fun Party Display Ideas
Make these the star of your next party with a special glow corner. Set up a table with a blacklight and put the cookies on white plates so they really stand out. Hand out glow sticks and neon stuff for everyone to wear. Want something interactive? Leave some cookies plain and put out different colors of edible sparkles and small brushes so everyone can decorate their own cookie before seeing it glow.
Frequently Asked Questions
- → Why do the cookies glow?
The tonic water in the recipe has quinine, which lights up under UV light to create the glow.
- → Can I leave out tonic water?
You can skip it, but the cookies won’t glow under blacklight. They’ll still taste fantastic!
- → What kind of food coloring should I use?
Gel or neon food coloring works wonders for bright and vivid cookie colors.
- → Is edible glitter necessary?
Glitter adds a sparkly finish but isn't required if you'd like a simple look.
- → Can I prepare these cookies ahead?
Sure, make them a day or two early and keep them fresh in an airtight container.
- → Are neon food colors safe?
Absolutely, as long as you stick to food-safe, edible neon colorings.