
 Pin it
These treats were born during our after-holiday cleanup when our kitchen shelves were crammed with half-used snack bags from countless parties. Staring at the mounds of opened chips, pretzels, and candy packages, a lightbulb went off during our yearly pantry tidy-up. After several test batches, mixing top-quality butter with everyday munchies, carefully watching for the right mix of ingredients and cooking times, we nailed the perfect formula. Our first tries gave us some interesting outcomes - a few were overly sweet, others just didn't feel right - but sticking with it paid off. The game-changer happened when we found just the right mix of salty snacks and sweet bits, making that can't-stop-eating combo that has everyone grabbing another. With each new batch, we learned more about how ingredients work together and better baking methods.
What Makes These Cookies Special
What really sets these apart is how the sweet and salty elements work together in each cookie. High-quality butter makes for an incredibly soft crumb, while the smashed snack pieces create wonderful texture changes throughout. White chocolate is carefully added to bring richness without taking over the delicate flavor balance. Every bite offers something different - sometimes you'll get the salty crunch from pretzels, other times the sweet pop of chocolate. Bits of potato chips add a light saltiness that makes all flavors more interesting. The mix-ins are spread out evenly for the same great taste in every cookie, while still keeping them from falling apart during baking. The final product has that perfect mix of crispy edges and soft centers.
Key Ingredients
- Main Components:
- top-shelf unsalted butter, try European-style for better fat levels and taste
- dark brown sugar, pressed down firmly for good moisture and caramel flavor
- regular sugar, just the normal kind works fine for the right texture
- eggs at room temp, super important for good mixing
- real vanilla extract, Madagascar bourbon type if you can get it
- all-purpose flour without bleach, measured carefully without pressing down
- baking powder without aluminum and fresh baking soda to help them rise
- fine sea salt to make flavors pop
- choice mix-ins including dark and white chocolate chunks, broken kettle chips, snapped pretzels, and whatever seasonal candy you've got
Making Method
- Getting Ready
- Start by setting up your work area with everything measured and at the right temperature. Put parchment on your baking sheets for better results. Break up the snacks into good-sized pieces that'll spread evenly through the dough.
- Making The Base
- Beat the butter with both sugars until it's fluffy and light. Add eggs one at a time, letting each mix in completely before adding the next. Pour in vanilla slowly while mixing steadily.
- Adding Dry Stuff
- Mix in the flour combo bit by bit, don't overmix or you'll end up with tough cookies. Gently fold in your prepared snacks and treats so they don't break up too much.
- Cooling Time
- Let the dough chill in the fridge for at least two hours so flavors can get friendly. Use a scoop to make same-sized portions.
- Baking Time
- Put them in your preheated oven with plenty of space between. Watch them closely near the end. Take them out when the edges look golden but the middles are still a bit soft.
Pro Tips
We learned some key things after making many batches. Keeping an eye on temperature matters a lot, especially how soft your butter is and when you add the eggs. How you measure can really change the final cookie - spoon flour gently into your measuring cup instead of scooping directly. Knowing how ingredients work together helps avoid common problems: too much moisture from mix-ins can make cookies spread too much, so you might need to adjust baking time. Watch them closely while baking to avoid burning while making sure they're done inside. Letting them cool right on the baking sheet helps them get the perfect texture.
 Pin it
Tasty Twists
This basic recipe can handle lots of fancy changes while keeping the main method the same. Try different chocolates for new flavor combos - dark chocolate adds depth, while milk chocolate makes them sweeter. For seasonal treats, you can throw in smashed candy canes in winter or toasted nuts in fall. Different chip flavors open up cool possibilities: BBQ chips add a smoky hint, while salt and vinegar ones bring an unexpected tang. Your pretzel choice matters too: skinny pretzels give a light crunch, while sourdough ones pack more flavor punch. Each change might need small tweaks to keep the dough just right.
Keeping Fresh and Serving Ideas
How you store these cookies really matters for keeping them fresh and crunchy. Containers that seal tight stop them from drying out. They'll stay better at room temp than in the fridge. You can freeze balls of dough for later - just wrap them well so they don't get freezer burn. When it's time to serve, how you arrange them on a plate makes a difference. Making different sizes works for different occasions. If you've frozen some, know the right way to thaw them out for best results. A quick warm-up before serving can bring back that fresh-baked feel when you want it.
Frequently Asked Questions
- → Why isn't the dough sticking together?
Keep mixing! It might look dry at first, but it will slowly come together. Be patient.
- → When should I roll them in sugar?
Roll them while they're warm but comfortable to handle. For more sweetness, roll again when they're cool.
- → Can any spices be left out?
Feel free to tweak, but don't skip ginger or cinnamon—they make the flavor pop.
- → Why choose unsalted butter?
It helps control how salty the cookies are. If using salted butter, skip adding salt.
- → How should I store these?
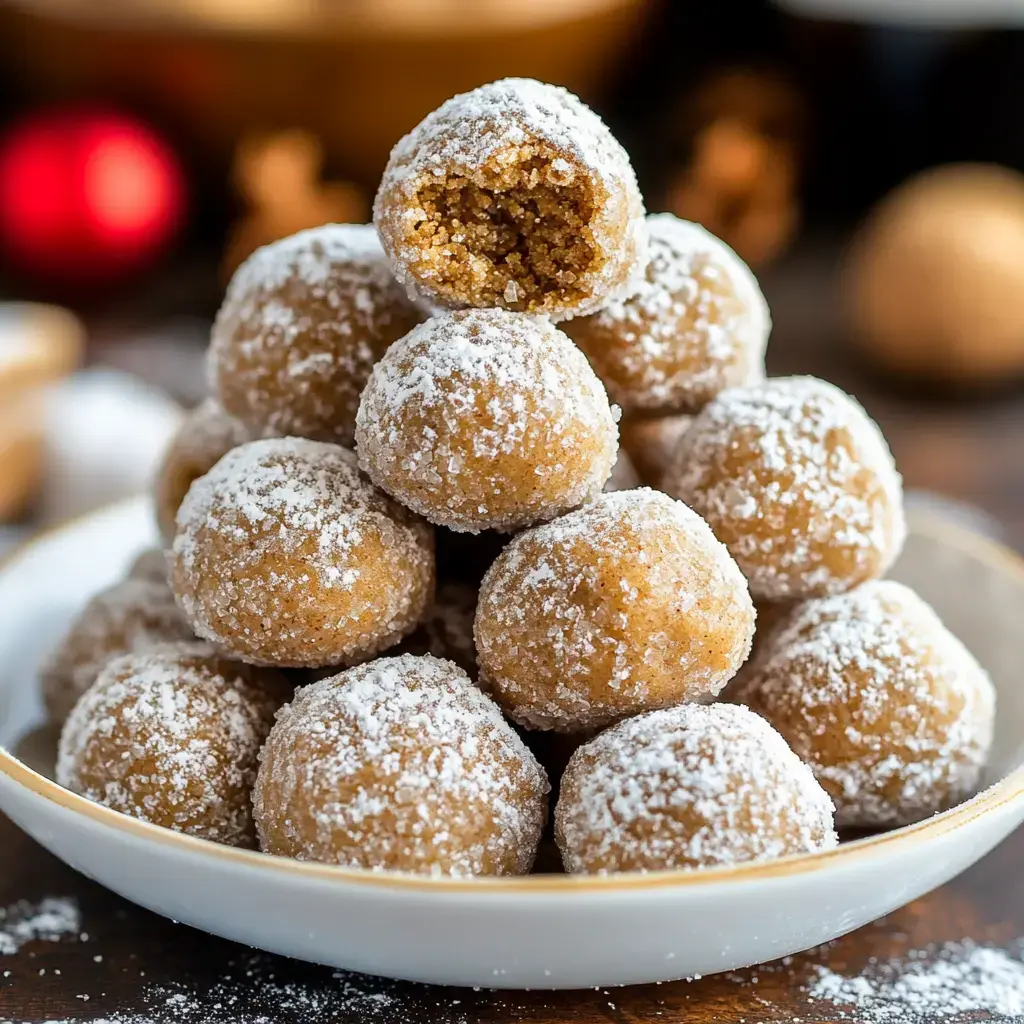
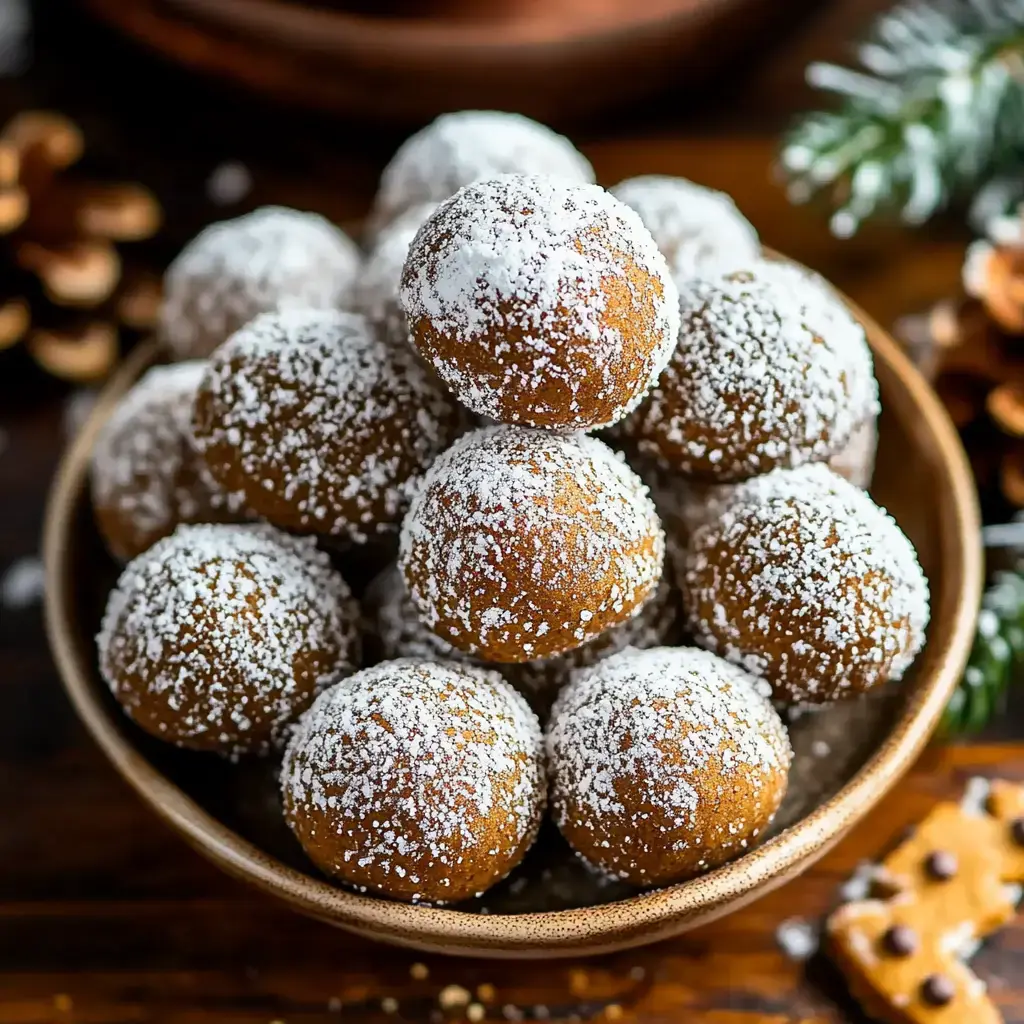
Keep them in a sealed container and dust with more powdered sugar if needed before serving.
Conclusion
Warm and spiced cookies with a snowy sugar coat. A festive favorite to gift or enjoy at gatherings.