
 Pin it
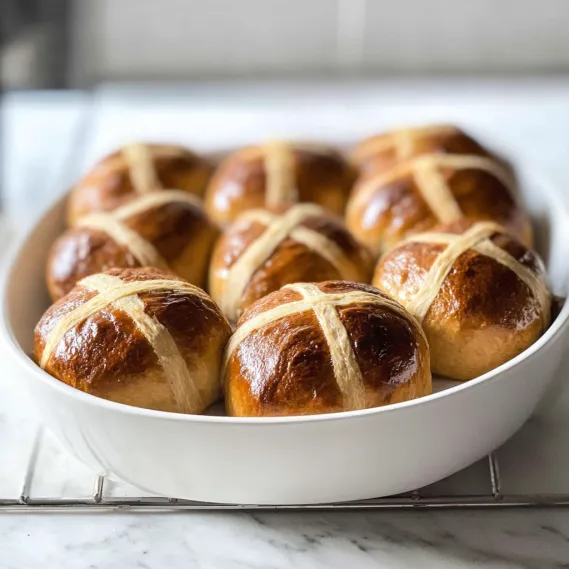
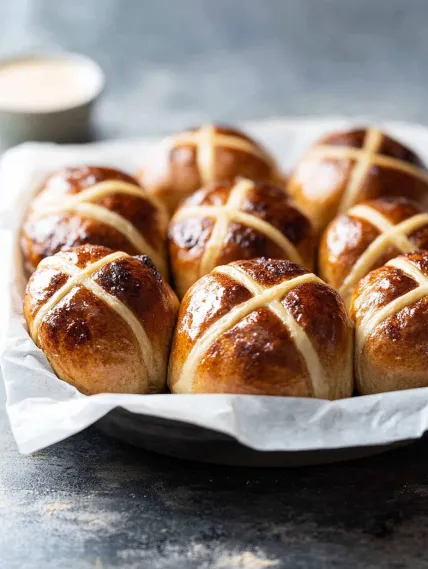
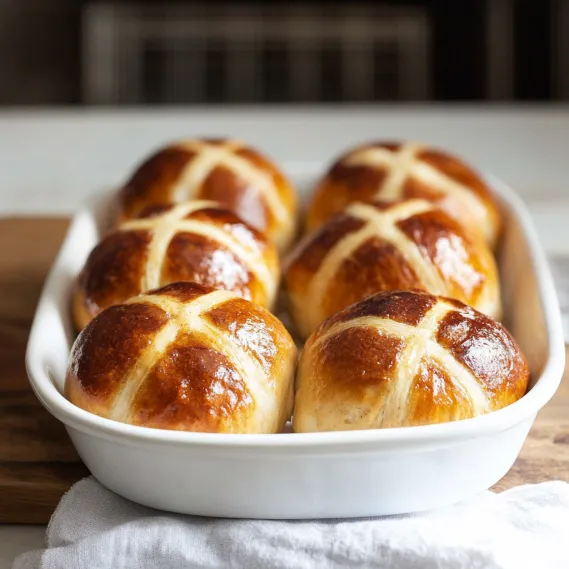
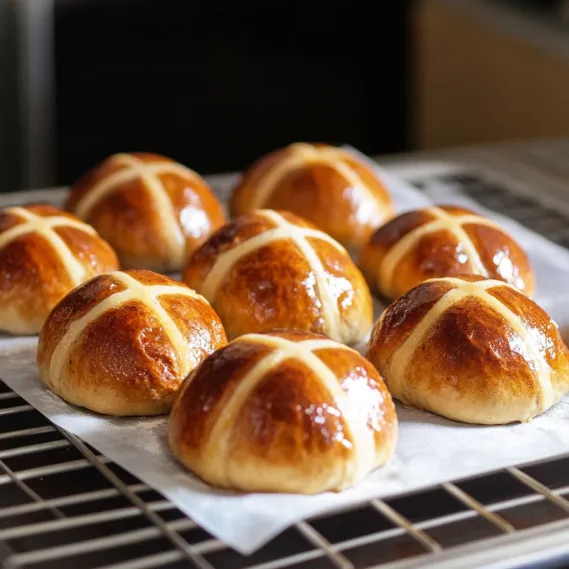
These DIY hot cross buns give you everything you want in an Easter classic – super soft texture, just the right spices, juicy fruit, and that shiny top with the iconic crosses. The amazing smell that takes over your kitchen while they bake is enough reason to make them yourself. Many folks worry about working with yeast, but this surefire approach gives you bakery-quality results that'll make you a believer in homemade. You can go with the classic kneading method or try the super easy no-knead version – either way, these buns will make your Easter gathering extra special.
I started making these buns after being let down by supermarket ones that never came close to what fresh bakery hot cross buns should be. The first time my family tried my homemade version, they couldn't believe the difference – how soft they were, the fragrant spices, and none of that weird artificial taste you get in mass-produced ones. Now making these has turned into our special Easter family custom.
Key Components and Shopping Advice
- Yeast: Pick any kind (active dry, instant, or fresh). Just check it hasn't expired, as old yeast is why most bread recipes fail.
- Bread Flour: Helps build stronger gluten for fluffier results, though regular all-purpose works fine too.
- Spices: Go for fresh, fragrant ones for best flavor. The mix of cinnamon, allspice, and nutmeg brings that real traditional taste.
- Dried Fruit: Old-school recipes call for currants, but you can use raisins, dried cranberries, or fruit mixes with great results.
- Apricot Jam: This creates that classic shiny look. You can swap in other jams or honey if that's what you have.
I've found through lots of testing that your spices' freshness really changes the end flavor. I now buy new ground spices right before Easter to make sure these once-a-year treats have the strongest smell and taste possible.
Step-By-Step Baking Guide
- Step 1: Mix Your Dough Base
- Put 4¼ cups flour, ¼ cup sugar, 2 tsp instant yeast, 1½ tsp cinnamon, ½ tsp each allspice and nutmeg, and ½ tsp salt in a big bowl. In another container, mix 1½ cups warm milk, 50g melted butter, 1 egg, and ¾ cup dried fruit. Pour the wet stuff into the dry stuff, then stir until it comes together.
- Step 2: Work the Dough Until Stretchy
- If you've got a stand mixer, run it for 5 minutes on medium until the dough gets smooth and stretchy. If doing it by hand, fold and push the dough on a lightly floured counter for about 10 minutes. You might need to add up to ¼ cup more flour – the dough should pull away from the sides but still feel soft and a bit sticky.
- Step 3: Let It Grow Bigger
- Put the dough in a lightly oiled bowl, cover with plastic, and keep it somewhere warm for 1-1½ hours until it doubles in size. A warm clothes dryer (run empty for 3 minutes then turned off) works great for this. After it rises, punch the dough down and dump it onto a floured surface.
- Step 4: Shape Into Buns
- Form the dough into a log and cut into 12 equal pieces. Take each chunk, pull the edges to the middle like you're closing a bag, then flip it over. Roll between your hands to make a smooth ball. Place on a parchment-lined 9×13" baking pan, arranging in 3 rows of 4 with small gaps between buns.
- Step 5: Make the Crosses and Bake
- After they rise again for 40 minutes, mix ½ cup flour with about 5 tablespoons water to make a thick paste that holds shape but can still be squeezed out. Put it in a piping bag or zip-lock bag with a tiny corner cut off. Pipe crosses on top of each bun, then bake at 350°F/180°C for 22 minutes until golden brown. Brush with warmed, strained apricot jam while they're still hot to make them shine.
 Pin it
When I first tried making hot cross buns, I put in too much flour and ended up with tough, heavy buns. Now I know that slightly sticky dough makes the softest, fluffiest results. Don't worry if your dough feels a bit tacky – that's exactly what you want for buns that taste like they came from a fancy bakery.
Mastering The Wok For Amazing Results
You need serious heat for real fried rice. My grandma always said to heat the wok till it smokes before adding oil. Keep everything moving all the time for that special "wok hei" taste. Don't dump too much in at once—do it in batches instead. This trick turned my homemade fried rice into something you'd pay good money for.
 Pin it
Smart Ways To Use Up Extra Food
This meal works wonders with leftovers. I've thrown in leftover roast chicken, holiday ham, and even Thanksgiving turkey with great results. Just cut the meat into small even chunks so it spreads out nicely. Leftover grilled steak adds amazing flavor with those charred edges. Even roasted veggies bring a nice sweet caramelized taste to the mix.
Getting Tastes And Textures Just Right
Good fried rice needs a mix of different elements. Char siu brings richness, prawns give sweetness, eggs add softness, while veggies provide crunch. The order matters too—flavor builders go in first, eggs in the middle stay distinct, veggies keep their snap. Adding green onions at the very end keeps their fresh taste for that real restaurant finish.
Adjusting For Different Diets
This dish easily fits various food needs. For vegetarians, I skip the meat, use more eggs and throw in extra veggies. People watching carbs love my version with riced cauliflower that carries all the flavors really well. For folks who can't have gluten, I use tamari instead of soy sauce and make sure the chicken powder doesn't have gluten. Everyone gets to enjoy this favorite no matter what their diet is.
Easy No-Knead Version For First-Timers
If kneading scares you or you don't have a mixer, my no-knead version has been a game-changer for many folks. Just throw 4 cups flour, ¼ cup sugar, 1 tbsp instant yeast, spices, and salt in a big bowl. Add your warm milk, melted butter, eggs, and dried fruit, then stir with a wooden spoon until you get a thick, sticky mix. Cover and let it sit for 1.5-2 hours (it grows slower than kneaded dough), then shape into buns. The dough will be stickier to handle, so flour your hands and work surface well. While these don't rise quite as high and might dry out a bit faster the next day, they're still way better than store-bought and take almost no effort.
Prep-Ahead Options
I often make the dough the night before and let it have its first rise in the fridge overnight. This slow, cold rising actually makes the flavor even better. Next morning, I take the dough out to warm up for about 30 minutes, then shape the buns and do the second rise. For busy holiday mornings, this trick is a lifesaver – most of the work happens the day before, but you still get freshly baked buns. Or you can bake them completely a day ahead, then warm them up covered with foil in a low oven for about 10 minutes before serving.
Tasty Twists Worth A Try
While old-school hot cross buns are amazing, I've come up with some variations that my family now asks for. For chocolate fans, swap half the dried fruit for dark chocolate chunks. For a tropical feel, use dried pineapple and coconut instead of traditional fruits and add some cardamom to the spice mix. My orange-cranberry version uses orange zest in the dough and dried cranberries instead of currants, topped with orange marmalade instead of apricot jam. These tweaks keep the basic idea of hot cross buns but bring in exciting new flavors for people who like trying different things.
 Pin it
These homemade Hot Cross Buns have completely changed how we celebrate Easter. There's something really fulfilling about keeping this hundreds-of-years-old tradition going in my kitchen, especially knowing I'm making something much better than what you can buy in stores. The whole process – kneading, waiting for it to rise, the wonderful spicy smell filling the house – has become just as meaningful as enjoying them together around our Easter table.
Frequently Asked Questions
- → Do I need bread flour?
- It’s ideal, but all-purpose is fine too.
- → How do I know if it’s risen?
- The first rise doubles, the second puff grows by about 75%—just keep an eye on it!
- → Can I leave out the fruit?
- Yep, or swap it for chocolate chips instead!
- → Any tips for making ahead?
- After shaping, pop them in the fridge and let them rise just before baking.
- → How do I keep them fresh?
- Warm them up in the microwave for about 15 seconds.