
 Pin it
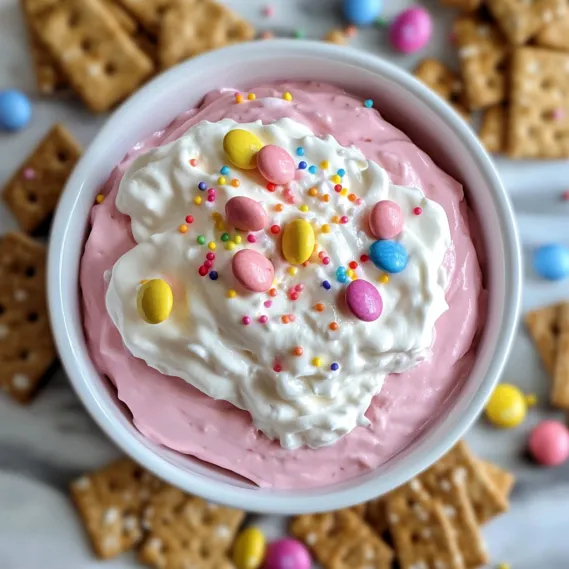
Light and fluffy cream cheese mixed with whipped topping creates a dreamy dessert dip with subtle vanilla notes and bright pastel candy pieces throughout. This eye-catching Easter delight delivers stunning presentation with hardly any work, making it just right for springtime get-togethers when you want something impressive but don't have time for fancy baking projects.
I came up with this Easter dip when I suddenly needed a quick dessert for a last-minute family visit. With kids wanting something sweet and zero baking time available, I threw together stuff I already had in my fridge. The soft pink color instantly grabbed the children's attention while grown-ups loved the creamy, not-too-sweet taste.
Key Ingredients and Shopping Advice
- Cream Cheese: Forms the rich, tangy base that cuts through sweetness. Go for full-fat for the best texture, but lighter versions will do if needed.
- Whipped Topping: Gives that cloud-like softness without having to whip cream yourself. Make sure it's fully thawed for easy mixing.
- Powdered Sugar: Melts right in for silky smooth sweetness. Give it a quick sift if you spot any clumps.
- Vanilla Extract: Brings warm, homey flavor that lifts the whole dish. Real extract tastes noticeably better.
- Pink Food Coloring: Turns a basic dip into a festive Easter treat. Gel colors pack more punch with just a tiny amount.
- Pastel Sprinkles/Candies: Bring fun looks and crunchy contrast. Pick Easter shapes like little eggs and bunnies for extra holiday charm.
I've learned that your choice of cream cheese really matters for the end result. Philadelphia always gives me the smoothest finish, while cheaper brands sometimes leave little lumps even after lots of mixing. When I'm making this for something special, I don't cut corners and always grab the premium stuff for guaranteed smoothness.
Step-By-Step Making Instructions
- Step 1: Whip Up Your Base
- Put 8 ounces of softened cream cheese in a big mixing bowl and beat it with electric beaters until it's completely smooth with no lumps at all. Don't rush this important part - keep scraping the sides of the bowl often, because any small lumps now will stay that way in your finished dip.
- Step 2: Sweeten And Flavor It
- Mix in 1 cup powdered sugar and 1 teaspoon vanilla extract with the smooth cream cheese. Start slow to avoid sugar puffs everywhere, then speed up to medium until everything looks light and fluffy. For extra goodness, now's when you can fold in 1/2 cup marshmallow fluff if you want.
- Step 3: Get The Perfect Fluffiness
- Carefully fold 8 ounces of thawed whipped topping into the mixture using a rubber spatula with slow, gentle movements. Take your time to keep all the air in while making sure no white streaks are left. Your mix should look like a fluffy cloud that holds its shape when you lift the spatula.
- Step 4: Add Color And Fun Bits
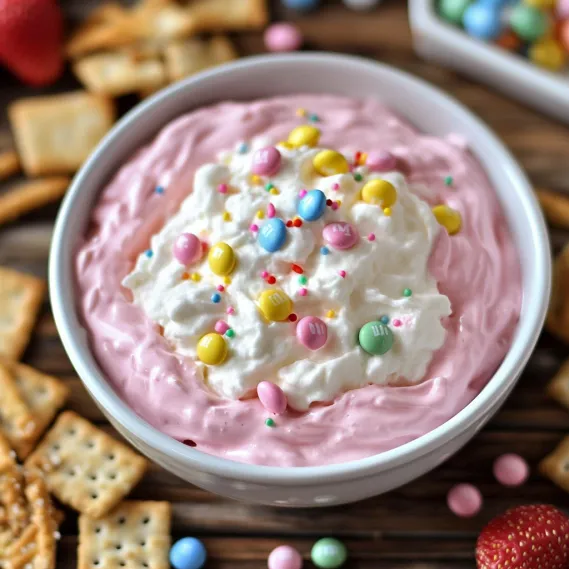
- Drop in 3-4 spots of pink food coloring and fold just enough to make an even light pink throughout. Then carefully mix in 1/4 cup of pastel sprinkles or tiny candies, saving some for the top. Going slow with your folding keeps everything airy while spreading the colorful bits around.
- Step 5: Cool It Down
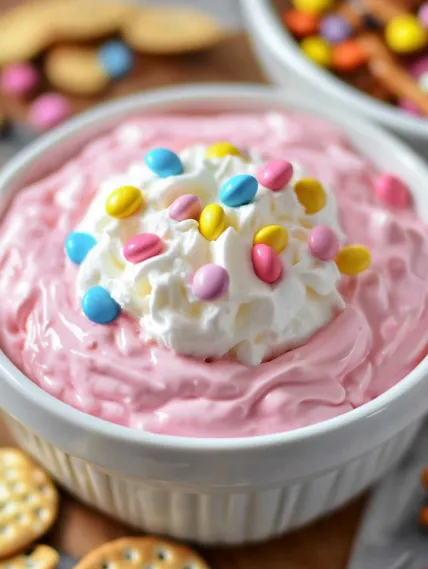
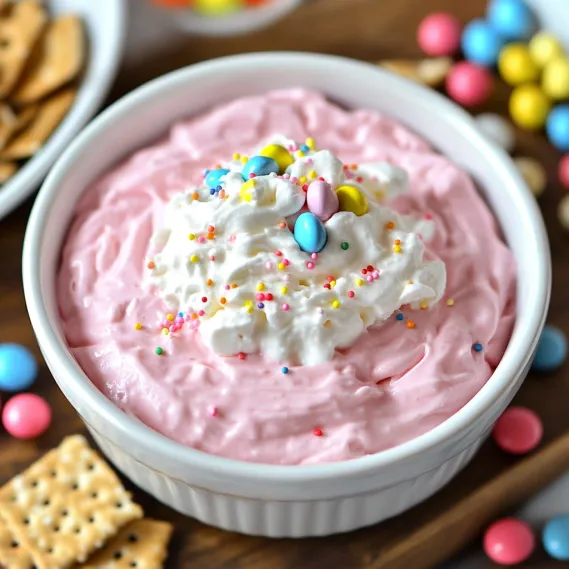
- Spoon the dip into a serving dish, smooth the top, and sprinkle the rest of your candies on top. Cover it with plastic wrap and stick it in the fridge for at least 30 minutes or up to a full day. This waiting time lets all the flavors come together and gives the dip the right consistency for dipping.
 Pin it
My family loves eating this Easter dip best with honey graham crackers and fresh strawberries. My husband can't get enough of the sweet dip paired with salty pretzels, while my kids go crazy for adding extra sprinkles to marshmallows before dipping them in. What makes this treat so wonderful isn't just how good it tastes but watching everyone gather around the plate, sharing their favorite ways to eat it and making sweet memories together.
Amazing Wok Skills Made Simple
What makes these cookies so special is how they've got both crispy bottoms and soft, tasty fillings. I've found that managing moisture is crucial at every point. First, you've got to really squeeze that salted cabbage to get extra water out or your filling will turn mushy. Then, the cornstarch doesn't just hold everything together - it soaks up any leftover wetness too. Last but not least, the cooking method - fry, then steam, then fry again - gives you that awesome crispy bottom while making sure the filling cooks all the way through.
 Pin it
Clever Prep Ideas for Party Planning
The best thing about this dish is how you can make it ahead of time. When I'm hosting, I often work in stages: I shape and freeze the balls up to a month early, bread them the day before (keeping them covered in the fridge), then just pop them in the oven before guests show up. The smell that fills the house as they bake gets everyone excited for what's coming. For bigger parties, I always double up, keeping the second batch warm in a low oven until the first one disappears.
New Life for Your Leftovers
If you somehow end up with extra cookies (which hardly ever happens at my place!), you can turn them into completely different meals. Break them up into scrambled eggs for a French-style breakfast mix, or cut them up and toss into a simple green salad with spicy dressing for a quick lunch. My favorite trick is putting halved cookies on top of creamy grits for a breakfast that carries all those yummy flavors into the next day.
 Pin it
Smart Cooking Shortcuts
- Let the balls cool about 5 minutes after baking before you dig in - this helps the inside set up just right
- Want more flavor? Try adding a teaspoon of smoked paprika to your panko mix
- Can't find cookies in your local stores? Check out online places like Bourgeois Meat Market or The Best Stop
- Put out several dipping options - spicy remoulade and cool ranch alongside the Louisiana sauce
- For a fancy presentation, arrange everything on a platter with bits of chopped parsley, purple cabbage, and yellow bell pepper to show off the traditional green, purple, and gold colors
Frequently Asked Questions
- → Can this dip be prepared before the big day?
- Of course! You can make it a day ahead. Just refrigerate it in a tightly sealed container, and for the best look and crunch, add sprinkles right before serving. If it looks slightly separated, gently mix it up before bringing it out.
- → What if I don’t want to use whipped topping?
- Instead of whipped topping, you can switch it out with 2 cups of freshly whipped heavy cream (whip 1 cup of liquid cream until it forms stiff peaks). Though the consistency may vary a bit, it’ll still taste amazing. Keep in mind, homemade whipped cream holds best if consumed within the day.
- → How can I customize the color for other occasions?
- It’s so easy! For Christmas, add red and green shades with holiday sprinkles. Go with orange for Halloween, or try red and blue for Bastille Day or Fourth of July. You can even color it white with rainbow sprinkles for birthday parties. Want a rainbow effect? Divide the batch and color each part differently!
- → My dip didn’t mix smoothly. What went wrong?
- If you’re spotting lumps, the cream cheese probably wasn’t softened enough. To quickly soften it, slice it up, put it on a microwave-safe plate, and give it 10-second bursts in the microwave until it feels soft. If lumps persist, beat the mixture again with a mixer or give it a whirl in a food processor.
- → How can I tone down the sweetness?
- Want it less sweet? No problem! Drop the powdered sugar to just 1/4 cup. You could even leave out the marshmallow fluff altogether if you want the flavor to lean more towards the cream cheese. Reducing or replacing candies and sprinkles with something like crunchy nuts or bittersweet chocolate chips would work too!
- → What snacks go great with this dessert dip?
- Think outside the box! Some tasty ideas include vanilla cookies, mini madeleines, apple slices, shortbread biscuits, French palmiers, or cinnamon-dusted pita chips. Arrange them in a pretty circle around the dip, mixing up shapes and colors to make it pop on the table!