
 Pin it
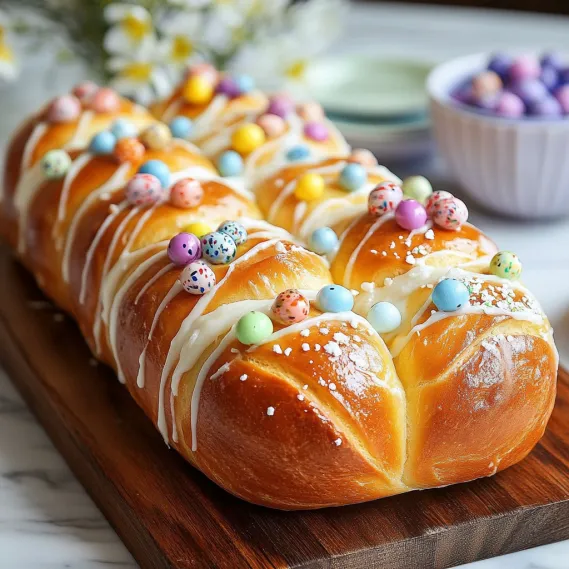
This eye-catching braided Easter bread blends the smooth, creamy taste of traditional enriched dough with playful holiday decorations that make it just as gorgeous to display as it is tasty to enjoy. Soft, airy bread twisted into an amazing braid holds brightly colored eggs, while a sugary coating and fun sprinkles give it the best final touch. What you get is a conversation-starting centerpiece that adds both meaning and happiness to your Easter spread. With its gentle sweetness and soft inside, this bread perfectly complements all the chocolate eggs and candy, becoming a treasured element of Easter gatherings for years to come.
I tried making this Easter bread after watching my grandma create something similar every spring during my childhood days. What really caught me off guard was how simply twisting the dough turned basic bread into something magical. The first time I brought it to an Easter get-together, everyone couldn't stop talking about how beautiful it looked – I didn't tell them how easy it was! Now it's become what I'm known for at holiday meals, and family can't wait for it year after year.
Key Ingredients and Smart Picking Tips
- Active Dry Yeast: The key player for any yeast bread success. Double-check it's not expired for the best rise.
- Milk and Butter: They're what makes the bread so wonderfully soft. Grab whole milk for extra richness.
- Eggs: They pump up the richness and give that sunny golden color. Plus, colored eggs make it look super festive.
- All-Purpose Flour: Creates just the right texture. You can swap half with bread flour if you want more chew.
- Sugar: Rounds out the flavors and gets the yeast bubbling for a good rise.
Getting your liquid temps right can make or break your bread. I've learned that using a quick-read thermometer to check your milk and water hit about 110°F works best – warm enough to wake up the yeast but not so hot you kill the poor things.
Step-by-Step Baking Guide
- Step 1: Wake Up Your Yeast
- Mix ¼ cup warm water (around 110°F) with 1 tablespoon active dry yeast in a small bowl. Wait till it gets foamy, about 5 minutes. This shows your yeast is good to go. In your mixer bowl, throw in this yeast mix with ¾ cup warm milk, ½ cup sugar, 6 tablespoons melted butter, and 2 beaten eggs, giving it a quick mix on medium-low for half a minute.
- Step 2: Get Your Dough Just Right
- Dump in 4½ cups all-purpose flour and 2½ teaspoons salt to your wet stuff, first mixing with a spatula until it looks rough. Then switch to a dough hook and mix on medium for about 5 minutes until your dough feels smooth, stretchy, and slightly tacky but not sticky enough to coat your fingers. Plop it into a greased bowl, cover with plastic, and let it puff up somewhere warm until it doubles, usually 1 to 1½ hours.
- Step 3: Nail The Braiding Part
- Dump your puffy dough onto a lightly floured counter and cut it into 3 equal chunks (about 12 ounces each). Roll each chunk into a rope about 18-20 inches long. Line them up side by side and pinch the ends together. Start braiding by crossing the right rope over the middle one, then the left rope over what's now the middle one. Keep going until you reach the end, then pinch and tuck the ends under so it looks neat.
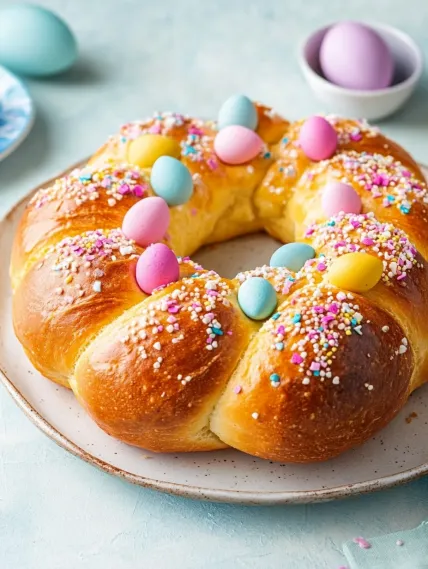
- Step 4: Set Up Your Holiday Showpiece
- Move your braid to a baking sheet lined with parchment. If you're using colored eggs, gently push them into the gaps of your braid, spacing them out evenly. Cover loosely with plastic and let it puff up again for 30-45 minutes until it looks noticeably bigger. Heat your oven to 350°F during the last half hour of this second rise. Before it goes in the oven, brush the bread (not the eggs) with beaten egg so it'll get nice and shiny.
- Step 5: Bake And Dress It Up
- Bake your loaf for 28-32 minutes until it turns a deep golden brown. Let it cool completely on a wire rack, about 1½ hours. For the final touch, mix 1 cup powdered sugar with 2 tablespoons milk until smooth, drizzle it all over your cooled bread, and quickly scatter colorful sprinkles on top before the sugar mix hardens.
 Pin it
When I first tried making this bread, I was so worried about messing up the braiding. I found out the trick is keeping the dough ropes the same thickness all the way through and braiding firmly but not super tight. The dough will get bigger during the second rise and baking, so a slightly loose braid actually ends up looking the best.
Meaningful Easter Bread Traditions
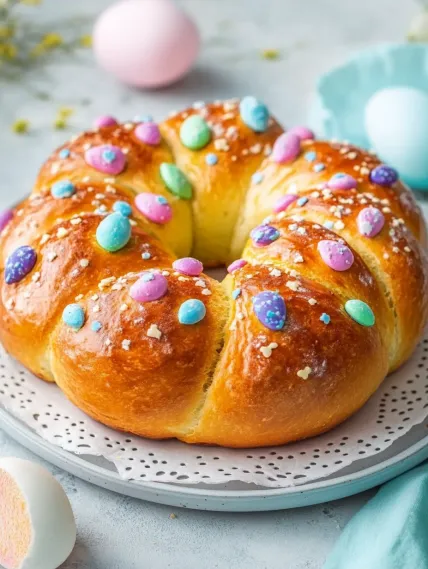
My favorite thing about this bread is all the beautiful meaning it brings to our holiday table. The braided shape has traditionally stood for the Holy Trinity in Christian belief, while making it into a circle (if you join the ends) represents forever and the crown of thorns. The eggs tucked into the bread stand for new life and rebirth, big themes in Easter celebrations. I love sharing these traditions with kids as we bake together because it helps them understand Easter beyond just bunnies and candy hunts. My grandma always told me that sharing bread means building community, so this recipe isn't just about making food but about bringing loved ones together to share something meaningful.
 Pin it
Fun Project For The Whole Family
This Easter bread has turned into one of our best family traditions because everyone can help make it. I give out jobs based on how old the kids are – little ones can color the eggs the day before and shake sprinkles on the finished bread, while bigger kids can help measure stuff and even try braiding the dough. My husband, who swears he "can't bake to save his life," has gotten really into perfecting how he brushes on the egg wash to make it super golden. What started as just making bread has grown into a special family activity we look forward to every spring, with everyone feeling proud when they see their work on the table.
Planning Ahead and Keeping It Fresh
After years of making this bread for different gatherings, I've figured out some tricks to fit it into crazy holiday schedules. You can mix the dough and let it rise once the day before – just punch it down, cover it tight, and stick it in the fridge overnight. Next morning, let it warm up for about 30 minutes before cutting and braiding. Or you can bake the whole bread a day early (with or without eggs), wrap it well, and keep it at room temperature, adding the sugar drizzle and sprinkles right before serving. If you put eggs in it, take them out if you're not eating the bread within a few hours, or put the whole thing in the fridge. I've found the bread stays good for about two days if wrapped up tight, but it's really at its best the same day you bake it.
Tasty Twists to Explore
While the classic version of this bread looks amazing, I've played around with several changes over the years that my family now loves. For more interesting flavor, try adding 1 tablespoon of orange zest and ½ teaspoon of cardamom to the dough. For a version that goes great with coffee, mix in ½ cup of golden raisins and 2 tablespoons of anise seeds before the first rise. I've even made a savory version by skipping the sugar and drizzle and instead adding 1 cup of grated parmesan and 2 tablespoons of fresh rosemary to the dough, then finishing with coarse salt instead of sprinkles. The basic method stays the same, but these little changes can start whole new traditions that match what your family likes.
 Pin it
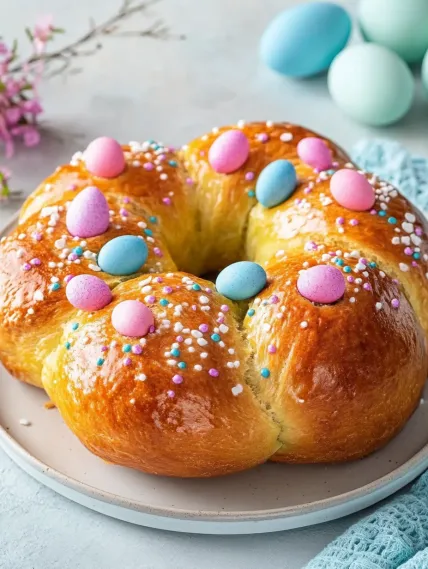
This Easter bread has grown from just another thing I bake to a meaningful tradition that marks springtime for us. The whole process – getting the yeast going, braiding the dough, and decorating the finished bread – gives us moments of happiness and togetherness. The way it makes the house smell like sweet, fresh bread lets everyone know it's a special day. And when it finally sits in the middle of our Easter table, golden and beautiful with colorful eggs nestled in it, it's not just tasty food but really captures what holidays are about – coming together to create and share something that matters.
Frequently Asked Questions
- → Do I need to cook the eggs before adding to the loaf?
- Nope, raw dyed eggs cook while the bread bakes. They’ll get a soft-set yolk. Hard-boiled eggs work too, but they can overcook. Either way, use room-temperature, dry eggs.
- → Can I leave out the eggs on top?
- Sure thing! The bread will still be tasty and good-looking. The braid, paired with glaze and sprinkles, is festive on its own. Just skip adding eggs to the dough.
- → How can I keep the dye from staining the bread?
- A little staining is normal and adds character, but to reduce it: dry the eggs completely, use room-temperature ones, and opt for lighter colors. Cover any bleed with glaze and sprinkles post-baking.
- → Can this bread be made ahead?
- Yes, plan carefully. It's best fresh, but you can prep it one day before. Refrigerate if using eggs, or store at room temperature—without eggs. Add glaze right before serving.
- → Why didn’t my dough rise?
- It’s likely the yeast didn’t activate. Ensure water or milk is warm (not hot), around 110°F. Heat kills yeast if too high, and expired yeast also won’t work. Keep dough in a warm spot to rise.
- → What if I don’t have a stand mixer?
- No problem! Mix everything by hand, then knead dough on a floured surface for 8-10 minutes until it turns smooth and elastic. It’ll still be a bit sticky but improves as you knead.