
 Pin it
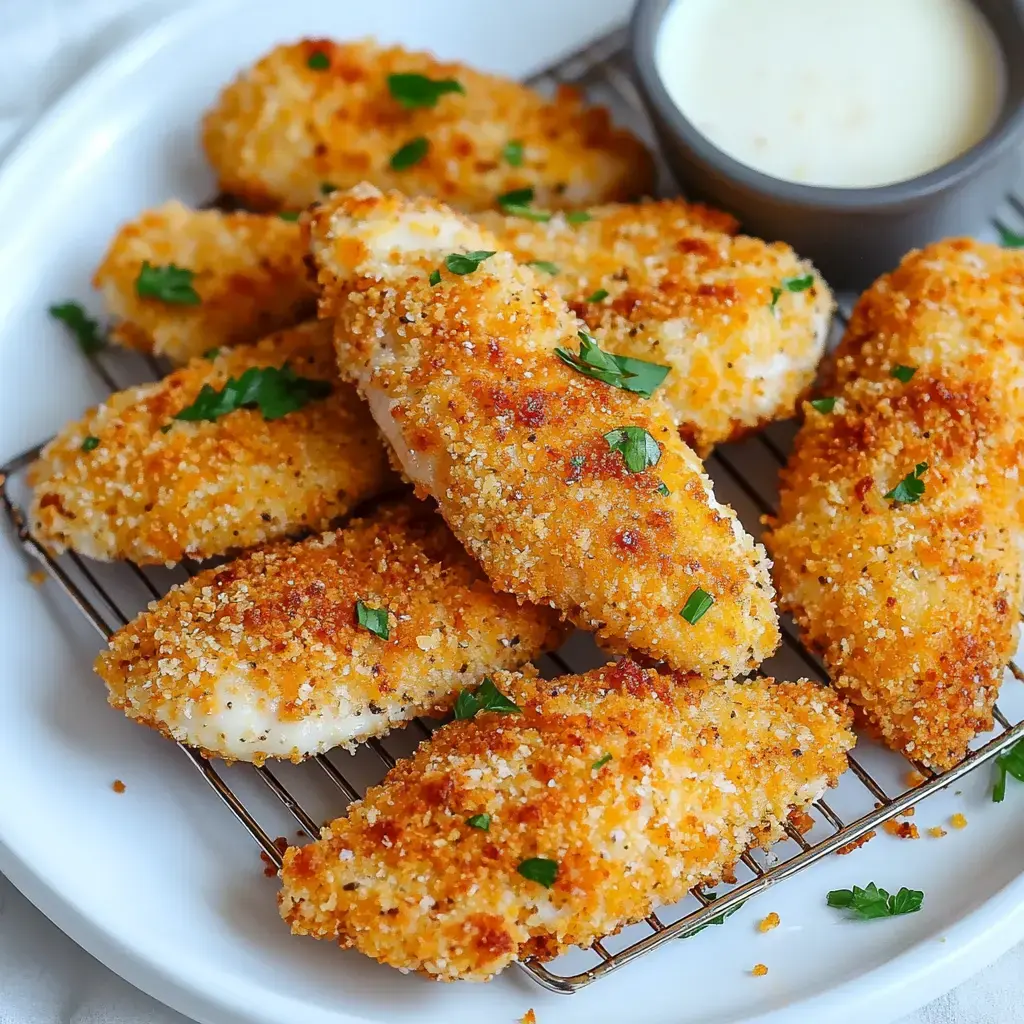
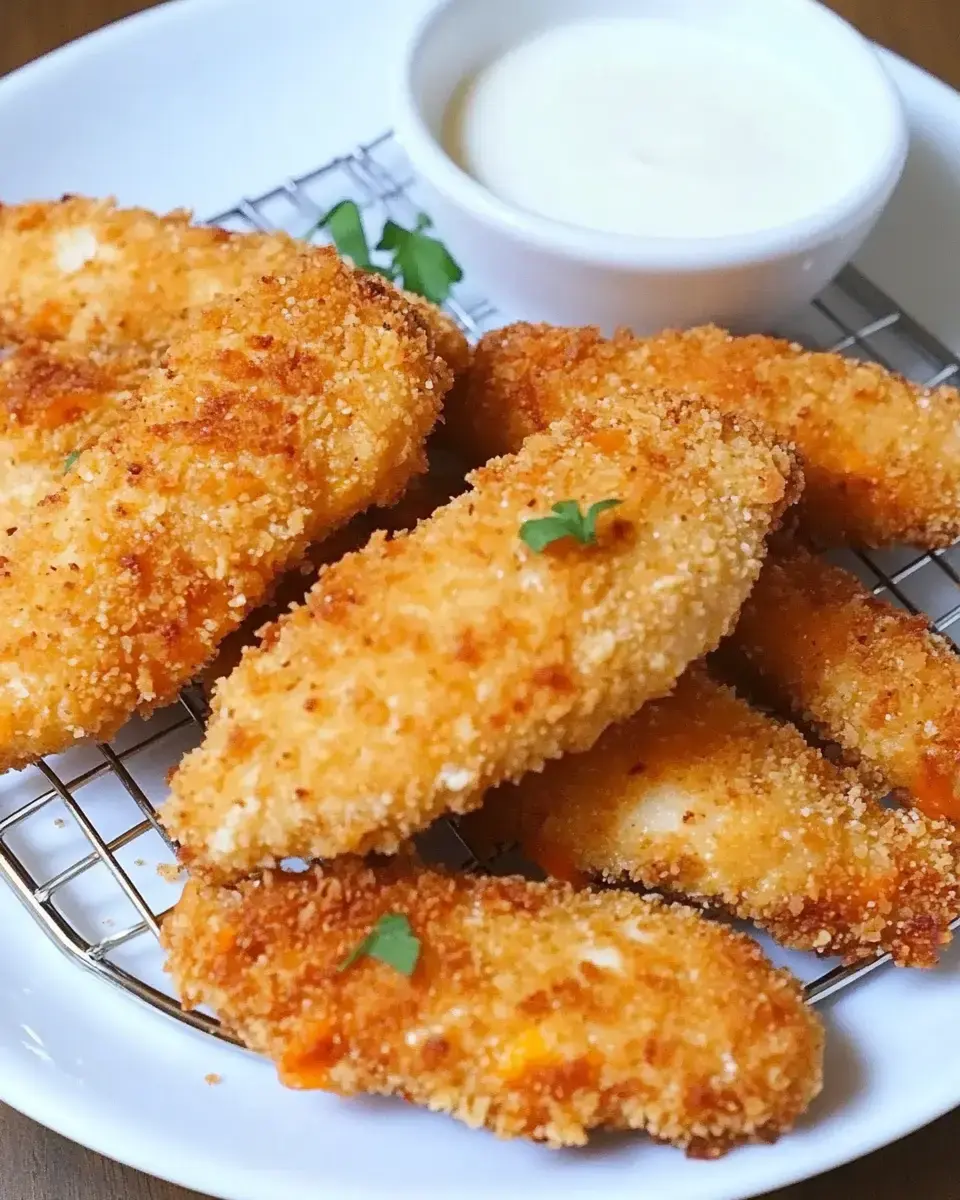
Mouthwatering Cheesy Chicken Strips Everyone Will Beg For
Whenever I whip up these crunchy, cheese-coated chicken strips, my home gets filled with an irresistible smell. The mix of tangy cheddar and parmesan makes this amazing golden outer layer that had my children arguing over who gets the final piece. I promise, this turns plain chicken into something extraordinary without any tricky steps or hard-to-find stuff.
How This Method Saves Your Dinner Time
My fussy nephew eats these without complaining. They're great when I'm rushed on weeknights after late sports training. Since they're oven-baked, I don't worry about oil splatters everywhere. And they're fantastic cold in lunchboxes next day - if we actually have any left, which almost never happens at my place.
Your Ingredients List
- Chicken: Go for chicken tenderloins as they cook evenly and stay much juicier than cut-up breast pieces.
- Cheeses:
- 2 cups sharp cheddar cheese that's just been grated works way better
- 1/2 cup parmesan cheese grated adds that wonderful savory flavor
- Coating Ingredients:
- 1½ cups all-purpose flour for your first layer
- 1½ cups panko breadcrumbs for that super crunch factor
- 2 large eggs to make everything stick together
- Seasonings:
- 1 teaspoon salt
- ½ teaspoon black pepper
- 1 teaspoon garlic powder
- ¼ cup milk to thin out your egg mixture
- Equipment:
- Baking sheet
- Aluminum foil
- Wire rack but you can skip it if needed
- Cooking spray
Quick Steps Anyone Can Follow
- Get Everything Ready
- Start by heating your oven to 400°F. While waiting, cover your baking sheet with foil and put a wire rack on it if you've got one. Spray everything with cooking oil so nothing sticks.
- Make Your Coating Bowls
- Set up three containers: First one mix flour with salt pepper and garlic powder. Second one beat eggs with milk till smooth. Third one stir together panko and both cheeses really well.
- Coat Your Chicken
- Dry each chicken piece completely with paper towels. Use one hand for the flour bowl, other hand for egg wash, then back to first hand for the cheese-panko mix. Cover each piece fully.
- Put Them On The Pan
- Lay your coated strips on your prepared tray with gaps between them. Lightly spray the tops with cooking oil to help them brown nicely.
- Cook Them Right
- With a wire rack, cook for 15-20 minutes without turning. Without a rack, cook 8 minutes, flip them over, then another 7-12 minutes. They're done at 165°F inside with a nice golden coat.
- Last Touches
- Let them sit for 5 minutes after coming out of the oven to keep all the juicy goodness inside. Eat while still warm for the best stretchy cheese and crunch.
Tricks For Perfect Results
Using a wire rack really matters as it lets air flow all around the chicken for complete crunchiness. Don't hold back on the cooking spray as it helps get that beautiful golden color. Making sure your flour has plenty of seasoning makes a huge difference in taste. Always cut into the thickest strip to check it's fully cooked through.
 Pin it
Great Side Dishes To Serve
These taste amazing with a side of gooey mac and cheese. Honey-glazed carrots go wonderfully with the savory chicken flavor. When I want something lighter, I toss some zucchini on the grill. For extra special meals, I make my garlic butter potatoes which pair perfectly with these strips.
Extra Tricks For Better Results
Those small strips from under the chicken breast are actually tenderloins and they're naturally softer than regular breast meat. I sometimes prepare a large batch in the morning and keep them refrigerated until dinner. We love dipping them in ranch while my daughter goes for honey mustard and my husband mixes his own hot mayo as a side.
Frequently Asked Questions
- → Q: Why’s a cooling rack useful here?
A: It raises the chicken so it browns evenly. If you don’t have one, just use a baking tray with foil.
- → Q: Is pre-grated cheese okay to use?
A: Grating fresh cheese is better—it melts nicer and sticks to the chicken more evenly.
- → Q: What’s the deal with one hand wet, one dry?
A: It stops the breadcrumb mixture from getting all clumpy and makes the process much less messy.
- → Q: Can I prepare these in advance?
A: They’re best when fresh for that crisp texture, but you can reheat them if needed.
- → Q: Why season the chicken before coating it?
A: So the flavor gets deep into the meat, not just stuck on the outside layer.