
 Pin it
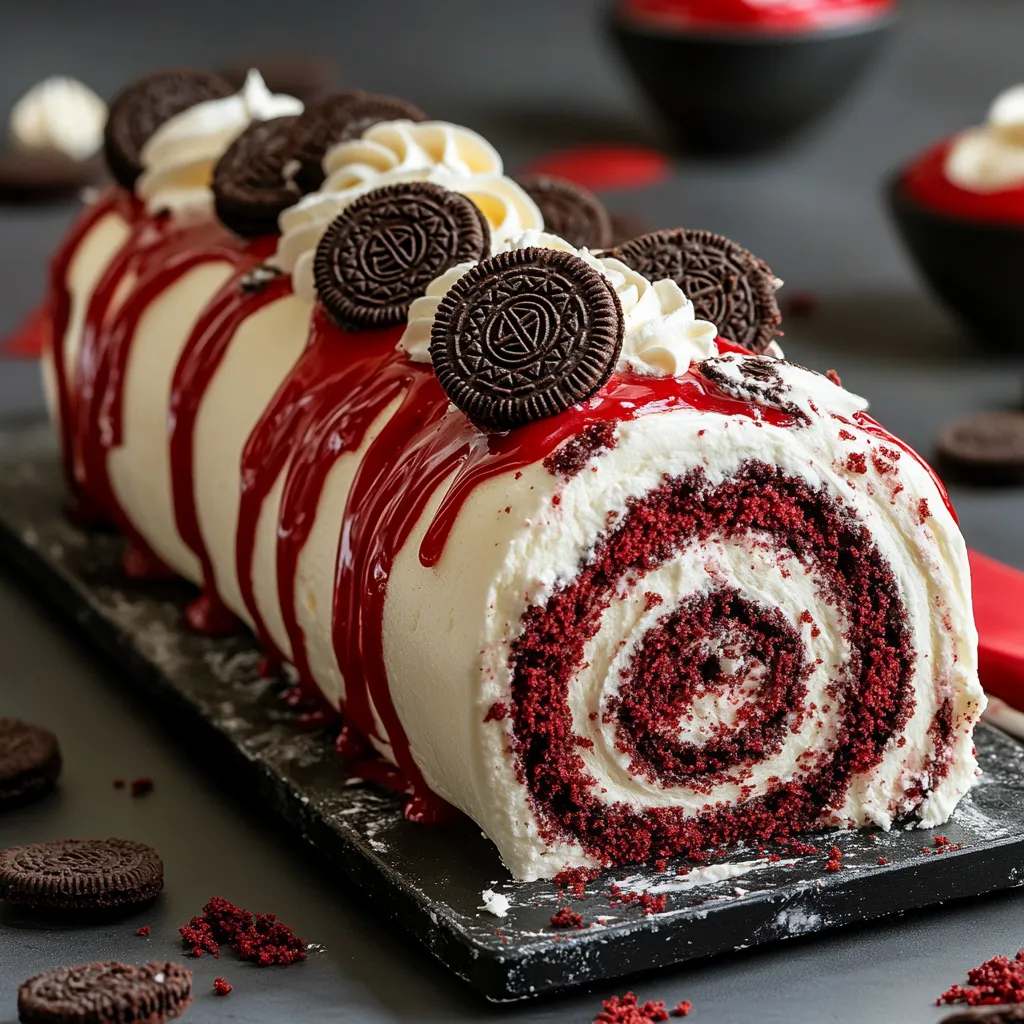
This stunning Red Velvet Oreo Cake Roll brings together two fan favorites in one eye-catching dessert. The velvety, bright red cake wraps around a dreamy cookies-and-cream filling, all covered in smooth chocolate ganache. When you cut into it, the beautiful red spiral makes everyone stop and stare before they dive in for a taste.
The first time I whipped this up for my daughter's party, I couldn't stop smiling at everyone's reactions when they saw the inside. That moment when they noticed the bright red cake against the white filling made all the work totally worth it.
Key Ingredients:
- All-purpose flour - grab unbleached for the softest texture possible
- Dutch-process cocoa powder - gives deeper color and better chocolate taste than regular cocoa
- Buttermilk - makes the cake super soft and boosts the red color
- Red food coloring - go for gel type for the brightest look without making the batter runny
- Cream cheese - stick with Philadelphia for the smoothest filling that won't get watery
- Oreos - the original kind works better than Double Stuf for the right cookie-to-cream balance
- Heavy cream - pick one with at least 36% fat to make your ganache perfectly smooth
Step-By-Step Guide:
- Set Up Before Starting
- Get everything out so it's room temperature
- Ready a clean towel dusted with powdered sugar
- Put your oven rack right in the middle
- Make sure your jelly roll pan is spotless and totally dry
- Nail The Cake Mixture
- Whip eggs and sugar until they drop off your beater in thick streams
- Use gentle figure-eights when adding dry stuff
- Mix just until everything comes together to keep the cake tender
- Push batter all the way to the pan edges when spreading
- Get The Roll Right
- Don't wait - roll while it's still hot
- Press firmly but don't squash it
- Keep everything snug without squeezing too hard
- Let it cool completely inside the towel to hold its shape
- Whip Up The Filling
- Beat cream cheese till there's not a single lump before adding sugar
- Break Oreos into different-sized pieces for more interesting texture
- Don't go too thick with filling at the edges
- Leave some space around the border so nothing spills out
- Put It All Together
- Unroll the cake carefully to avoid breaking
- Roll it back up with smooth, even pressure
- Put it in the fridge before adding ganache
- Pour the ganache when it's just the right thickness
 Pin it
My grandma always told me that you can't rush a good cake roll. She was spot on - hurrying through any part can lead to problems like cracks or uneven shapes. I've learned that going slow, especially during that first hot rolling step, really makes all the difference in how pretty it turns out.
More Thoughts:
While mixing red velvet with Oreos feels modern, it actually builds on classic American dessert traditions. My family goes crazy for this version because it's got that fancy spiral cake vibe but with the fun of everybody's favorite sandwich cookie. My eight-year-old nephew - who turns his nose up at most desserts - took one bite and called it "the best cake ever," which is pretty much the highest praise possible!
I've made tons of cake rolls over the years, but this red velvet one always stands out. It's that rare treat that looks super fancy but tastes like everyone's childhood favorites, making it perfect for anything from Christmas dinner to summer birthday parties.
 Pin it
Holiday Decoration Ideas:
Switch up this dessert throughout the year to match any occasion. For winter holidays, try mint Oreos topped with crushed candy canes. During fall festivities, drizzle with orange-tinted white chocolate and use Halloween Oreos. Spring gatherings call for fresh edible blooms and white chocolate curls. This basic recipe works as a canvas for any seasonal celebration.
The Rolling Science:
Getting a cake roll just right comes down to moisture level. Too dry and it'll crack, too wet and it gets sticky. The oil and buttermilk combo in this recipe hits the sweet spot for perfect rolling. When you whip the eggs properly, they create a cake that's strong yet bendy. That's why it matters so much to beat those eggs until they're really light and fluffy.
Prep-Ahead Tips:
This treat actually gets tastier if you make it a day early. The flavors mix together nicely, and the filling firms up just right. You can make the whole roll without the chocolate coating up to two days ahead and keep it wrapped tight in your fridge. Just add the ganache within a day of serving so it looks fresh and glossy.
Fixing Common Problems:
Got cracks in your cake? Don't worry! Small ones can be hidden with some extra filling, while bigger cracks will disappear under ganache. If your chocolate coating seems too thick, warm it up in tiny 5-second microwave bursts. Too runny? Just let it sit at room temp, giving it a stir now and then until it thickens up.
Ways To Serve It:
Use a warm sharp knife for the cleanest slices. Put each piece on its side to show off the swirl pattern. A little dusting of powdered sugar or a fresh raspberry on top makes it look fancy. For special times, serve with a scoop of real vanilla ice cream or some fresh whipped cream on the side.
 Pin it
How To Store It:
Keep your cake roll in a sealed container in the fridge. Need to store it longer than three days? Wrap individual slices in plastic and freeze them. Let frozen pieces thaw overnight in the fridge for the best texture. Don't leave them out on the counter to thaw or your filling will get too soft and mushy.
Try Different Flavors:
The standard Oreo filling is great, but don't be afraid to play around. Mint Oreos add a cool fresh twist, while golden Oreos bring a milder, sweeter taste. Some folks in my family like it better with chocolate cream cheese filling instead of vanilla - it really brings out the red velvet taste.
Picture-Perfect Slices:
The trick to gorgeous slices is getting the temperature just right. Your cake should be cold but not frozen solid. Grab your sharpest knife, dip it in hot water, wipe it dry, and cut straight down in one smooth move instead of sawing back and forth.
The Final Touch:
A smooth ganache coating takes this from homemade to bakery-quality. Both your cake and chocolate need to be just the right warmth. Your ganache should pour easily but not be so hot that it runs right off. Try a little test drip on the edge of your bowl or some parchment paper before covering the whole cake. When done right, ganache adds that wow factor and locks in moisture to keep everything fresh.
After baking for many years, I can say this Red Velvet Oreo Cake Roll never fails to get compliments. It mixes the comfort of cookie nostalgia with the wow-factor of a fancy cake roll. Whether you're making it for Christmas, a birthday bash, or just because it's Tuesday, this dessert will quickly become a family favorite.
Frequently Asked Questions
- → Can I prepare this cake days before serving?
- Absolutely! Store it in the fridge for up to 3 days. The flavors actually get better with time.
- → What if my cake cracks during rolling?
- Roll the cake while it's warm to avoid cracks. Minor cracks will disappear under the filling and chocolate layer.
- → Is freezing an option for this cake?
- Yes! Wrap it tightly in plastic and freeze for up to 2 months. Defrost overnight in the fridge.
- → Do I have to use red food dye?
- Nope! Skip the dye if you'd like. It's all about the classic look, but the flavor stays the same.
- → Can I replace Oreos with another cookie?
- Of course! Change it up with any cream-filled cookie you enjoy.