
 Pin it
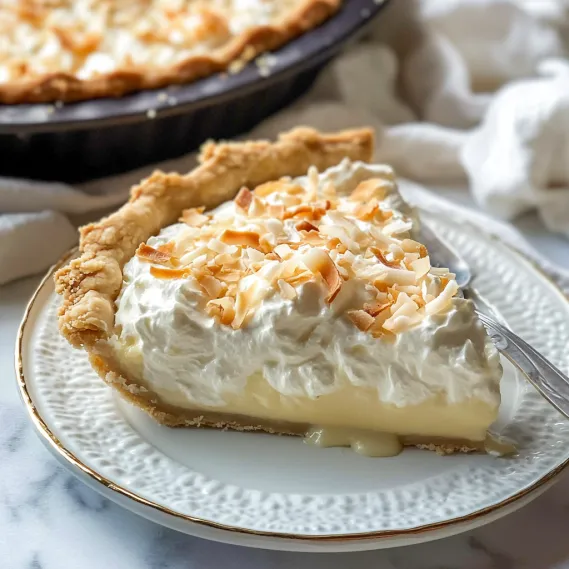
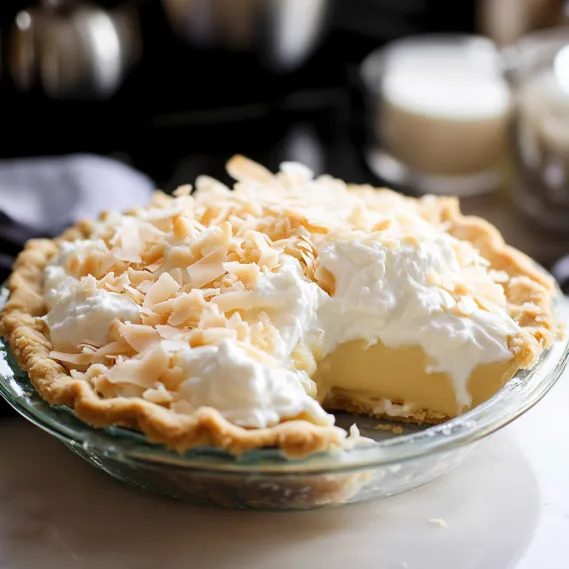
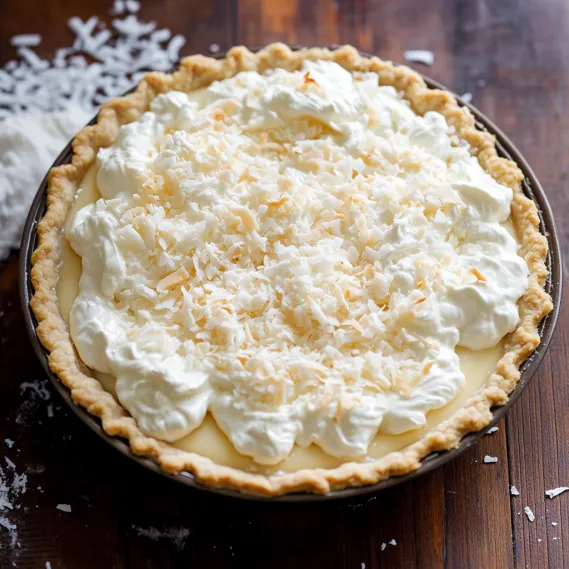
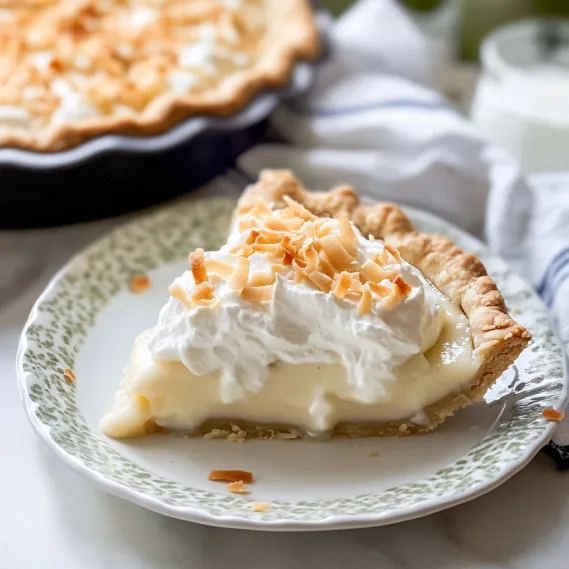
Take a vacation with every forkful of this dreamy coconut pie. The buttery, crisp base holds a velvety coconut filling, all topped with fluffy whipped cream. You won't find fake flavors here—we're talking real coconut in every component from the smooth center to the crunchy topping. It's the perfect mix of fancy and comforting. This pie brings tropical vibes to your table whether you're hosting a big holiday dinner or just treating yourself to something special. One bite and you'll be hooked!
The first time I whipped up this coconut pie for my family, I wasn't expecting much attention. Boy, was I wrong! It vanished faster than all other sweets, with everyone begging for my secrets—including my coconut-hating uncle! I've learned most coconut doubters have only tried fake stuff. When they taste the genuine article in this well-balanced pie, they switch teams right away. It's now a must-have at our gatherings, and I've made it so many times I could probably do it blindfolded.
Key Components and Shopping Advice
- Canned Coconut Milk: Grab the full-fat kind for the best taste. You'll find it with international foods, not with dairy alternatives.
- Half-and-Half: Gives just the right creaminess without going overboard. You can use whole milk if needed, but your filling won't be quite as lush.
- Sweetened Shredded Coconut: Adds both coconut kick and nice texture. The sweetened type blends into the filling better than plain.
- Vanilla and Coconut Extracts: Skip the fake vanilla and go for real. The coconut extract boosts flavor but isn't absolutely necessary.
- Pie Weights: You'll need these for pre-baking the crust. Dry beans work great if you don't have the ceramic ones.
After countless pies, I've found that regular canned coconut milk works better than coconut cream. The cream makes everything too heavy and dense, while coconut milk gives you that perfect smooth texture that sets up just right.
Simple Step-by-Step Process
- Step 1: Get That Crust Ready
- Take your cold pie dough and roll it out to fit your 9-inch dish. Trim edges and make them pretty with your fingers. Put it in the fridge for 30 minutes, then cover with parchment and fill with weights. Bake at 375°F for 15 minutes, take out the weights, poke holes with a fork, and bake about 12 minutes more until it's golden. Let it cool completely before you add anything else.
- Step 2: Mix Up Your Amazing Filling
- Beat 4 egg yolks with 1/4 cup cornstarch in a bowl until they're smooth. In a pot, heat up 1 can coconut milk, 1 cup half-and-half, 2/3 cup sugar, and 1/4 teaspoon salt until it starts to bubble. Slowly pour about 1 cup of the hot mixture into your eggs while whisking like crazy, then pour everything back into the pot and keep stirring until it gets thick.
- Step 3: Amp Up The Coconut Flavor
- Take the pot off the heat and mix in 1 cup sweetened shredded coconut, 2 tablespoons butter, 1 teaspoon vanilla extract, and 1/2 teaspoon coconut extract. Pour this warm mixture into your cool crust, then press plastic wrap right on top of the filling so it doesn't form a skin. Put it in the fridge for at least 3 hours or overnight.
- Step 4: Whip Up Your Topping
- In a cold bowl, beat 1 1/2 cups cold heavy cream with 3 tablespoons sugar and 1 teaspoon vanilla extract until it forms peaks but isn't too stiff. Watch it carefully—you want it firm enough to stay put but still smooth, not grainy. For extra coconut flavor, throw in 1/4 teaspoon coconut extract.
- Step 5: Put It All Together
- Take your chilled pie from the fridge and remove the plastic. Pile that whipped cream on top and make it look pretty with the back of a spoon or fancy it up with a piping bag. Sprinkle lots of toasted coconut on top (toast it in a 350°F oven for 5-8 minutes until golden) just before you serve it.
 Pin it
My first try at this pie looked great but the filling was too soft. Now I know the mixture needs to come to a full boil to wake up the cornstarch. You should see at least one big bubble pop before you take it off the heat. Since learning this trick, every pie sets up perfectly—firm enough to slice cleanly but still melts in your mouth.
Mastering Your Wok Skills
You can't make good fried rice without serious heat. My grandma always said to heat the wok till it smokes before adding oil. Keep stirring everything non-stop to get that special smoky taste. Don't try cooking too much at once—do smaller batches instead. These little tricks turned my homemade fried rice into something you'd pay good money for.
 Pin it
Smart Ways To Use Extras
This meal shines at giving leftover food a second life. I've thrown in leftover roast chicken, holiday ham, and even turkey with amazing results. Just cut your meat into same-sized bits so they spread out evenly. Leftover steak is actually my favorite—those charred edges add so much flavor. Even day-old roasted veggies bring their sweet caramelized taste to the party.
Getting The Mix Just Right
Good special fried rice needs everything in balance. The char siu brings fat, prawns add sweetness, eggs make it silky, and veggies keep it fresh. The cooking order matters too—start with your aromatics to build flavor, cook eggs partway through so they stay visible, add veggies last so they stay crisp. Tossing in green onions at the very end keeps that bright taste you get at restaurants.
Adjusting For Different Diets
Anyone can enjoy this dish with a few tweaks. For my veggie friends, I skip the meat and double up on eggs and veggies. If you're watching carbs, my cauliflower rice version carries all the same flavors. For folks avoiding gluten, I swap in tamari for soy sauce and make sure my chicken powder doesn't have gluten. These simple changes mean nobody has to miss out on the fun.
How To Handle Hot Eggs Like A Pro
The toughest part of coconut pie is mixing hot liquid with egg yolks without making scrambled eggs. I've got a trick that works every time: use a 2-cup glass measuring cup for your egg yolks and cornstarch, then slowly drizzle in the hot coconut mixture while whisking non-stop. The handle and spout make it way easier to pour everything back into the pot. Also, I've found that room temperature eggs work much better than cold ones straight from the fridge. This little change has taken all the stress out of making custard fillings.
Planning Ahead And Travel Tricks
This pie has become my go-to for potlucks because it travels so well and I can make it in stages. I often do the crust and filling a day early, then add the whipped cream just before I head out. When I need to transport it with the topping, I've got a neat hack: stick toothpicks around the pie and drape plastic wrap over them. The toothpicks hold the wrap up so it doesn't mess up your pretty cream. For summer gatherings, I stick the whole pie in a cooler with ice packs to keep it perfect even during long car rides. These little tricks have saved many desserts from disaster!
Fun Twists You Might Like
The classic recipe is great, but I've played around with some changes that turned out awesome. For Christmas parties, I sometimes add 2 tablespoons of dark rum to the filling for a grown-up kick. In summer, mixing in 1/2 cup of tiny diced fresh mango creates a tropical combo that's out of this world. For the chocolate fans in my family, I sometimes put a layer of 1/3 cup toasted coconut mixed with 2 tablespoons mini chocolate chips between the filling and cream. And when friends who don't like things too sweet come over, I cut the sugar by 1/4 in both the filling and cream without messing up the texture or balance.
 Pin it
This coconut pie has grown beyond just a dessert in our family—it's now what we bring out when something good happens. From Easter lunch to birthday parties, seeing this pie on the table means we're celebrating something special. I love watching everyone's faces light up when they spot it, and how the talking stops during those first few bites. It reminds me why making desserts from scratch is worth the effort. It's not just about following steps; it's about making those moments people remember long after the last bite is gone.
Frequently Asked Questions
- → Can I use pre-made crust?
- Yep, just bake it first.
- → Which coconut milk works best?
- Go for full-fat canned—it's the creamiest.
- → How long does it need to chill?
- Leave it at least 3 hours, or overnight if you can.
- → Is freezing an option?
- Totally! Just freeze after filling—3 months tops.
- → Crowd-friendly dessert?
- Everyone loves it—perfect for all ages!