
 Pin it
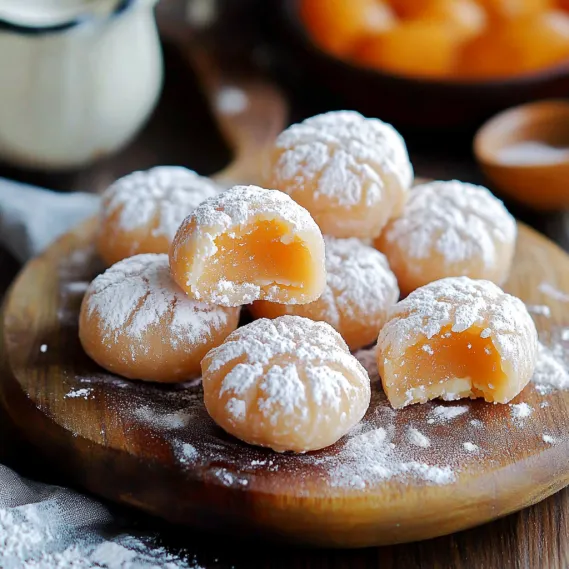
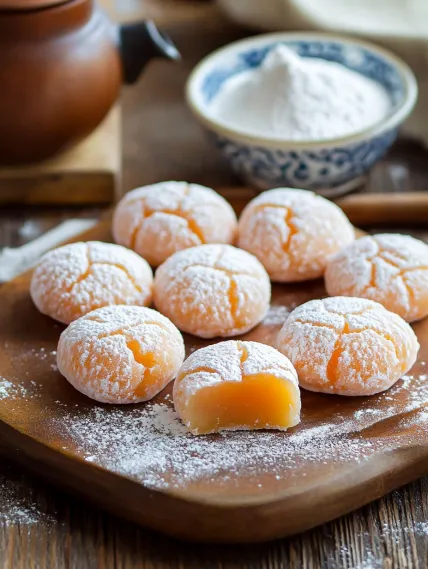
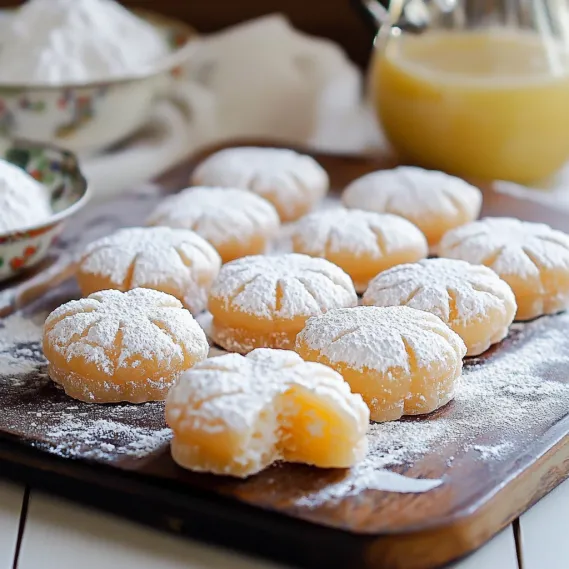
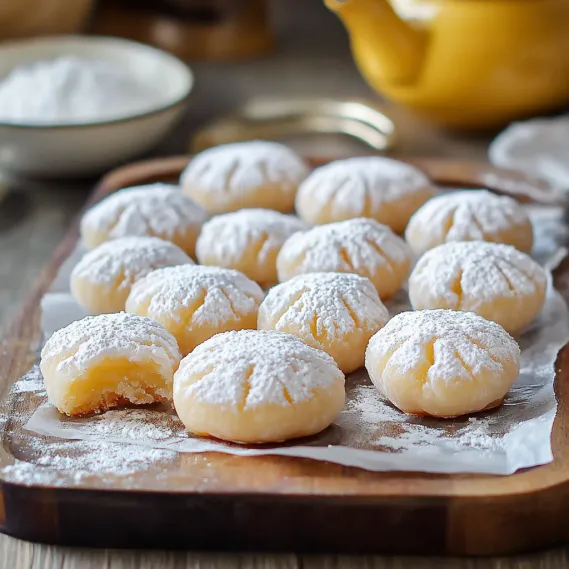
When you crunch into one of these ThaiTea Mochi Crinkle Cookies, you'll feel like two worlds collide in the yummiest way possible. The rich Thai tea flavor wrapped in a soft cookie shell leads to a chewy mochi middle, making a combo that you'll want again and again.
I took a batch to our block party recently, and they vanished in minutes with everyone crowding around me for the instructions. Even my buddy's picky kiddo, who usually says no to anything unfamiliar, gobbled up three straight and called them her top pick. Something about the normal cookie look mixed with unexpected flavors and that stretchy middle seems to win over even the fussiest eaters.
Must-Have Ingredients and Shopping Advice
- Thai Tea Mix: Go for the real stuff with those bright orange-red leaves. Try to grab Pantai or Number One brands for the most genuine taste.
- Glutinous Rice Flour (Mochiko): This is a must-have that can't be swapped out. It's what gives you that signature stretchy, gummy center.
- Fresh Milk: Grab whole milk to really soak up the Thai tea flavors. The fat helps pull out all those tasty notes.
- Quality Butter: Don't skimp here—good unsalted butter makes all the difference. European kinds with more fat will make your cookies extra tender.
- Powdered Sugar: This creates that pretty cracked look and sweetens without any gritty feel. Make sure it's fresh with no lumps.
I've learned that using real Thai tea makes a huge difference in how these cookies look and taste. That bright orange color and unique spiced flavor only comes from actual Thai tea, not plain black tea with some color added in, which some recipes might tell you to use.
Step-by-Step Baking Guide
- Step 1: Make Your Mochi Filling
- Mix up 1 cup glutinous rice flour, 2 tablespoons cornstarch, 1/4 cup sugar, 1 tablespoon coconut oil, and 3/4 cup milk in a bowl safe for the microwave. Heat it for 30 seconds at a time, giving it a good stir between rounds, until it turns see-through and sticky. Sprinkle some cornstarch on your counter, dump out the mochi, and split it into 12 same-sized balls.
- Step 2: Get Your Thai Tea Flavor Ready
- Turn 3 tablespoons of loose Thai tea leaves into powder using a spice grinder, then sift out any big pieces. Warm up 1/3 cup milk just until it starts steaming, throw in 2 tablespoons of your tea powder, and let it sit for 10 minutes. Strain it through a fine sieve, pushing down to get all the flavor out.
- Step 3: Put Together Your Cookie Mix
- Stir 1¾ cups all-purpose flour, 1½ teaspoons baking powder, and ½ teaspoon salt in a bowl. In another bigger bowl, mix ½ cup melted butter, 1 cup sugar, 1 egg, 1 teaspoon vanilla extract, and your Thai tea milk. Slowly add the dry stuff to the wet stuff just until they're combined. Let the dough chill for at least 2 hours.
- Step 4: Make Your Stuffed Cookies
- Scoop out tablespoon-sized chunks of cold dough. Flatten each one, stick a mochi ball in the middle, and wrap the dough all around it, making sure it's totally sealed. Roll each ball in regular sugar first, then coat it heavily with powdered sugar. You need both sugar layers to get that cool cracked look.
- Step 5: Bake Until They Crack
- Put your cookies on a baking sheet lined with parchment, keeping them at least 2 inches apart. Bake them at 350°F for 11-13 minutes until the edges set but the middles stay soft. Let them cool on the sheet for 5 minutes before moving them to a rack. Those pretty cracks will show up as they bake and cool down.
 Pin it
When I first tried making these, I worried about getting the wrapping just right. After some wonky-looking attempts, I realized that messy folds taste just as good as perfect ones. These days my kids join in, each creating their own wrapping style, which has become our special family thing.
Getting That Amazing Texture Just Right
What makes these cookies so good is how they're crunchy on the bottom but soft and flavorful inside. I've figured out that managing moisture is super important. First, you need to really squeeze out that salted cabbage so your filling won't turn soggy. Then, the cornstarch doesn't just hold everything together—it soaks up any extra wetness. Last, the cooking method—frying, then steaming, then frying again—gives you that awesome crispy bottom while making sure the inside cooks properly.
 Pin it
Prep-Ahead Tricks for Parties
The best thing about this recipe is you can do it in stages when you're having people over. I often shape and freeze the balls up to a month early, coat them the day before (keeping them in the fridge), and just pop them in the oven right before guests show up. The smell of these babies cooking fills your home with an amazing scent that gets everyone hungry. For bigger crowds, I just double up on batches and keep the second batch warm in a low oven until needed.
New Ways to Use Any Extra Cookies
On the rare chance you have leftover cookies, they can become totally different dishes. Break them up into scrambled eggs for a French-style breakfast hash, or cut them up and toss them in a green salad with spicy dressing for a light lunch. My favorite trick is putting halved cookies on top of creamy grits for a breakfast that carries the yummy flavors into the next day.
 Pin it
Pro Cooking Tricks
- Let your balls sit for 5 minutes after they come out of the oven—it helps the insides set up for the perfect bite
- Want more flavor? Try adding a teaspoon of smoked paprika to your panko mix
- Can't find cookies in stores nearby? Order them online from places like Bourgeois Meat Market or The Best Stop
- Put out several dipping choices—maybe a spicy remoulade and cool ranch alongside your Louisiana sauce
- For a pretty party display, lay out the balls with sprinkles of chopped parsley, purple cabbage, and yellow bell pepper bits to match the traditional green, purple, and gold colors
Frequently Asked Questions
- → What’s Thai tea, and where can I get it in France?
- Thai tea is made from black tea brewed with spices like cardamom, star anise, and tamarind. You can grab it from specialty tea vendors, Asian supermarkets, or online stores around France. If unavailable, try replacing it with fragrant black tea and a dash of star anise powder, though the flavor might not be identical.
- → Can I prepare the mochi in advance?
- Absolutely! You can make the mochi a day ahead but keep it tightly wrapped in plastic to stop it from drying out. Leave it at room temperature. If it feels sticky when you’re ready to use it, just dust it with a bit of cornstarch to make handling easier.
- → Why do the cookies need both granulated and powdered sugar coatings?
- The first layer of granulated sugar prevents the powdered sugar from melting into the dough. This trick keeps that bright, snowy look on the cookies' surface as they bake. Skipping this step might cause the powdered sugar to vanish while baking.
- → Can regular rice flour replace glutinous rice flour?
- Nope, they’re not interchangeable. Glutinous rice flour (also called sweet rice flour) is what gives mochi its stretchy, chewy texture. Regular rice flour can’t replicate that. Don’t worry—glutinous rice flour is gluten-free, despite the name!
- → Why don’t my cookies have as many cracks?
- The crackles form when the cookie’s exterior sets while the inside keeps expanding. Make sure your dough is well-chilled, coat it generously in sugar, and verify that your oven is preheated properly. Also, shape the cookies into round balls—don’t flatten them!
- → How long will these cookies stay fresh, and how should I store them?
- Keep the cookies at room temp in a sealed container. They’ll stay good for about 3 days, but the chewy mochi center means they’ll soften a bit over time. Want them at their freshest? Eat 'em the same day. You can also freeze them for a month, then let them thaw before eating.