
 Pin it
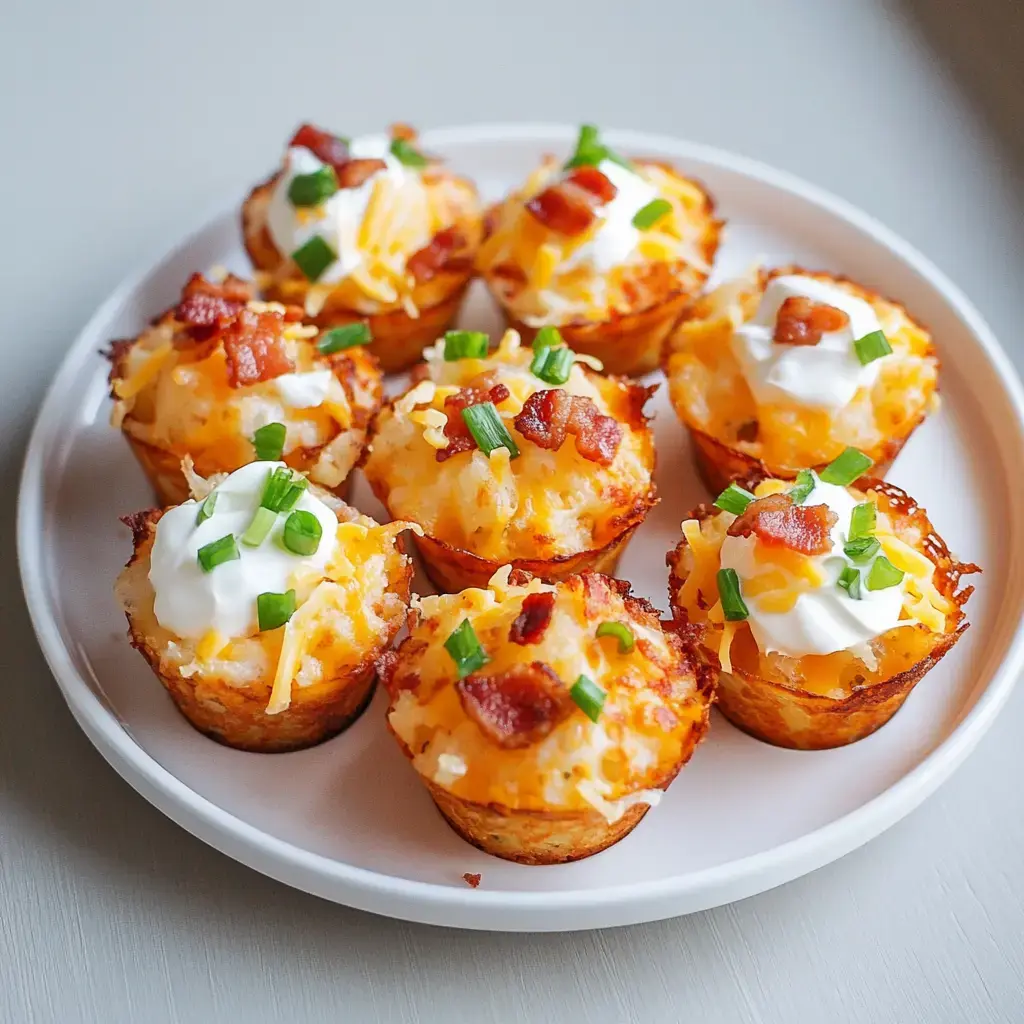
Wow, let me share my crowd-pleasing favorite: crunchy, cheese-filled tater tot cups that make any get-together extra special. This all began when I played around with some leftover tots, and now I can't host without making them. The first batch I ever made had my husband's buddy Mike practically camping by my oven, waiting for more. Picture this: super crisp potato shells packed with melty cheddar, crumbled bacon on top, finished with a cool spoonful of sour cream—they're absolutely incredible. These potato cups have transformed simple game nights into memorable gatherings, and people literally follow me around begging to know how I make them!
What Makes These Tasty Cups The Main Attraction
These vanish within seconds whenever they appear. At my kid's graduation celebration last spring, I had to whip up four separate batches because everyone wanted more. Even my typically food-avoiding mother-in-law grabbed three for herself! What makes them so popular? They're super adaptable and incredibly enjoyable. Everyone loves picking their own toppings—some folks add jalapeños for heat, others go for BBQ sauce to get that smoky taste, while many stick with the tried-and-true bacon and cheese combo. They look impressive but they're so simple that my teenage boy has figured them out. He now makes them when friends visit, and they vanish just as quickly!
Shopping List Essentials
- The Basics: Buy a jumbo bag of frozen tater tots (grab extra—you'll thank me later!), sharp cheddar cheese you've grated yourself, premium thick-cut bacon for amazing crunch, authentic sour cream or Greek yogurt for tanginess, green chives for garnish, plus your go-to condiments like ranch, hot sauce, or BBQ for extra kick.
- Kitchen Tools: You'll need a muffin tin (this transforms ordinary tots into cups), a solid shot glass or small tumbler for shaping, and some parchment paper to make cleanup super easy. These tools will definitely make your cooking experience smooth!
 Pin it
Creating Kitchen Wonders
- First Steps With Tater Tots
- Get your oven nice and hot at 425°F—that's how you'll get maximum crispiness. Give your muffin tin a good spray with cooking oil to avoid sticking. Next, place 5-7 tots in each cup, arranging them carefully around the sides to form cup shapes. I figured out early that taking time with this step really pays off. Bake them for about 10 minutes until they start getting soft.
- Creating Your Potato Vessels
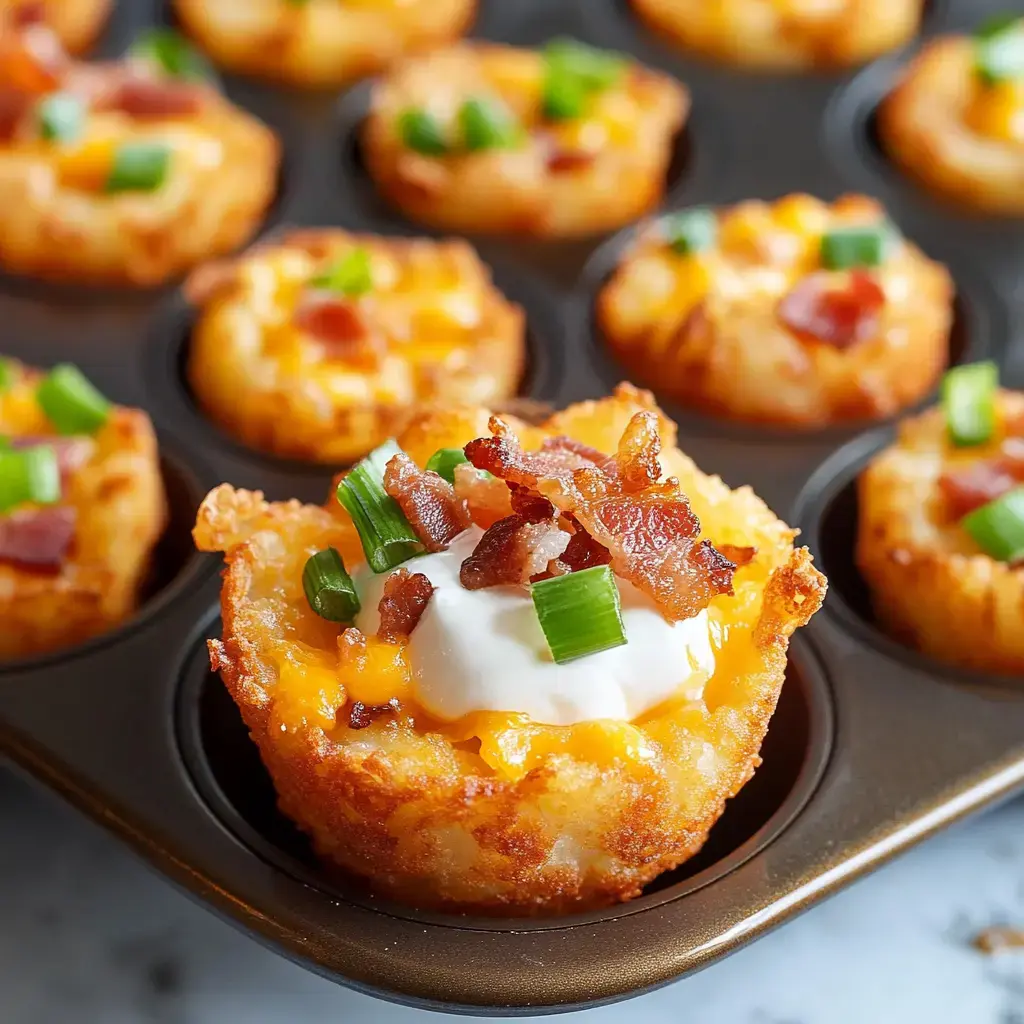
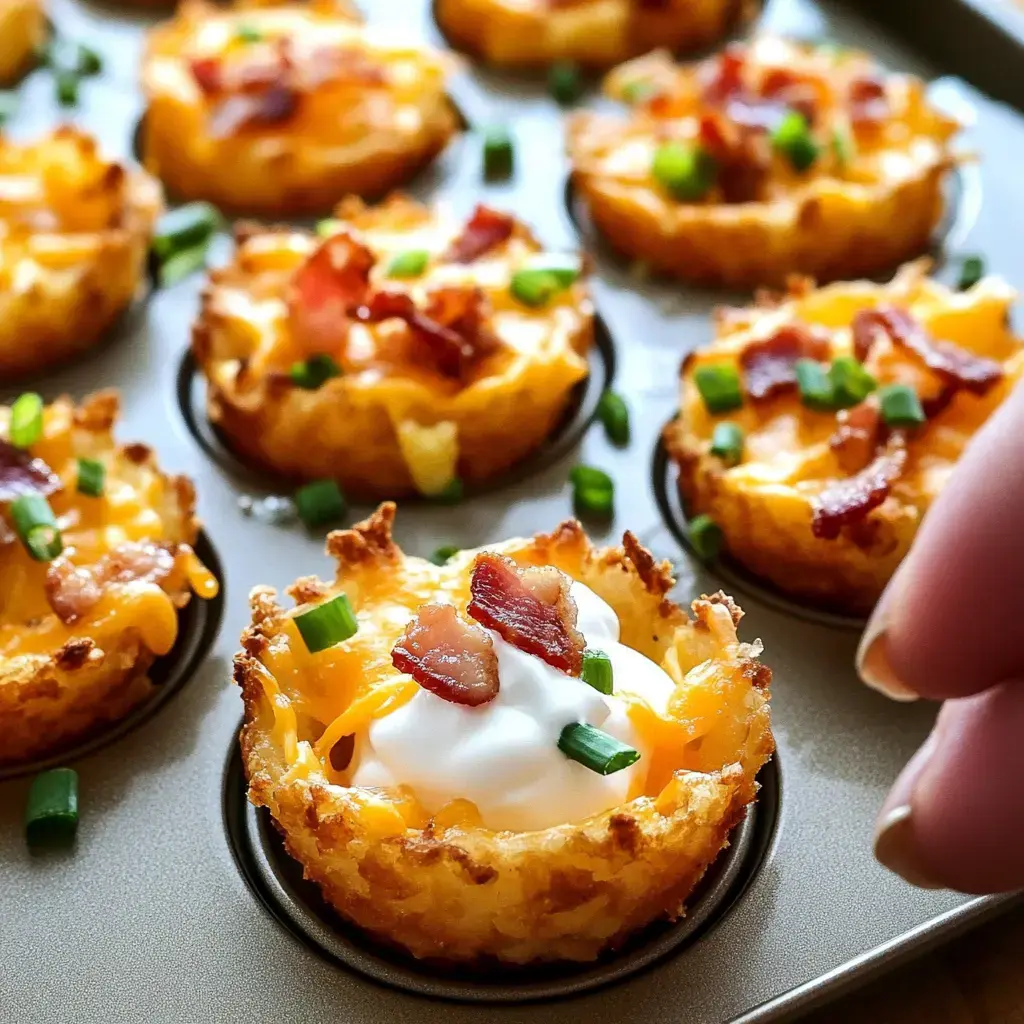
- Now comes the cool part: molding time! Let them cool a bit, then take a small glass (I use this cute shot glass I got in New Orleans) and push down gently but firmly into each section to shape the tots into perfect little bowls. This step turns them into their famous form, all set to hold that yummy cheese.
- Adding Cheesy Goodness
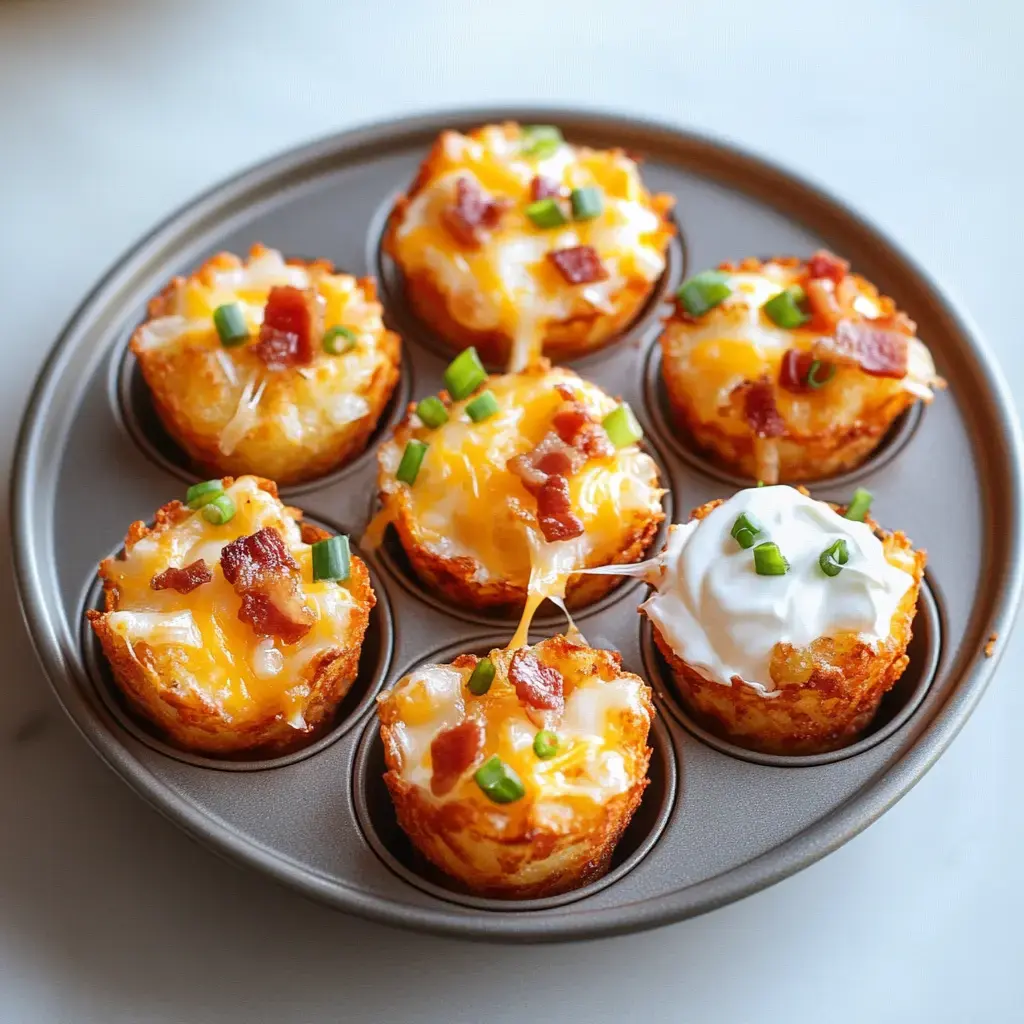
- Add plenty of freshly grated cheddar into each cup, making them full but not overflowing. Put them back in the oven for another 10-12 minutes until you see the cheese bubbling and turning golden. There's nothing better than watching that cheese melt into those crunchy edges!
 Pin it
Taking Them To Party Level
Throwing a big bash? Here's my tried-and-true plan. Bake the cups ahead so you're not rushed when guests arrive. Keep them warm in a low-temp oven, then add toppings and melt cheese just before you serve. I always set up a topping station—it's such a winner! During last year's Super Bowl, I created themed sections like 'Breakfast Style' with eggs and sausage bits, 'Spicy Lovers' with jalapeños and hot sauce, and 'Pizza Style' with marinara and pepperoni pieces. It's so fun watching everyone build their own creations. And trust me, the aroma of baking tots and sizzling bacon brings everyone running to the kitchen!
Create Your Custom Variations
These tot cups work with almost any flavor combo you can dream up. One day I had a flash of inspiration and turned them into morning treats with fluffy eggs, crumbled sausage, and a touch of maple syrup—it was amazing! For my plant-eating friends, I've loaded them with sweet caramelized onions, colorful roasted peppers, and earthy mushrooms, calling them 'Garden Cups.' My boy makes what he calls 'Dragon Cups' with spicy pepper jack and tangy pickled jalapeños. During Christmas, I dress them up with fancy prosciutto and fresh herbs—they went so fast last year that I promised to double the batch for New Year's. No matter what toppings you choose, they always deliver that perfect mix of crunchy and cheesy goodness.
Hosting Like A Pro
I learned the hard way about tot cup planning—during Super Bowl 2023, I only had a single muffin tin for 40 hungry guests. Big mistake! Now I keep three tins going at once, so fresh cups come out every 15 minutes. I prep by cooking bacon ahead, grating all the cheese beforehand, and setting up toppings in small cute dishes. For larger crowds, I pre-bake the cups and keep them warm, then add cheese and finish them as needed. My friend Lisa loved this system so much she bought muffin tins specifically for making tot cups! And always keep backup tots in your freezer for unexpected requests. You'll be glad you did!
Foolproof Success Secrets
Getting these just right comes down to small but important details. After pressing the cups, brush their edges with melted butter for an extra golden, crunchy finish. Always add your sour cream or Greek yogurt last—nobody wants it warm! Keep your chopped chives fresh in a damp paper towel throughout your party. For a fun touch, make a small sign for your topping bar with suggestions like 'Classic Bacon Cheddar,' 'Spicy Jalapeño,' or 'Pizza Marinara.' Your guests will love having ideas to work with, and it makes everything more enjoyable. With these simple tricks, your tot cups will become legendary at every gathering.
 Pin it
The Joy These Tiny Treats Bring
The real magic of these tot cups isn't just how good they taste—it's the connections they help create. Every time they appear, I watch people gather around my kitchen counter, trading stories, suggesting toppings, and enjoying themselves. During our recent block party, I saw a quiet teen start chatting and making new friends while waiting for the next hot batch. My daughter even made me promise to serve them at her graduation celebration, saying, 'We can't properly celebrate without your tot cups, Mom.' These simple bites bring folks together, start conversations, and leave everyone happy. Just one tip—always make more than you think you'll need because they'll vanish in no time!
Frequently Asked Questions
- → What does the shot glass do?
It shapes the tots perfectly. Just spray it so nothing sticks and give it a light twist for the best results.
- → Can these be prepped early?
Yep! Make and chill up to the cheese step. Heat at 400°F with foil on top, and add fresh toppings right before eating.
- → Why bake on the lowest rack first?
The bottom rack makes sure they crisp up underneath, so the cups turn out sturdy enough for toppings.
- → What muffin tin size works?
Either mini or regular tins are fine. Minis need 2-3 tots, while regular ones take 4-5. Adjust your toppings for the size.
- → How do I keep them from getting soggy?
Wait to add cool toppings until you’re serving them. To re-crisp, pop them in the oven or air fryer at 350°F.
Conclusion
These little potato cups are the ultimate party dish! Bake tots in muffin pans, add some fun toppings, and you'll have an appetizer everyone will want more of!