
 Pin it
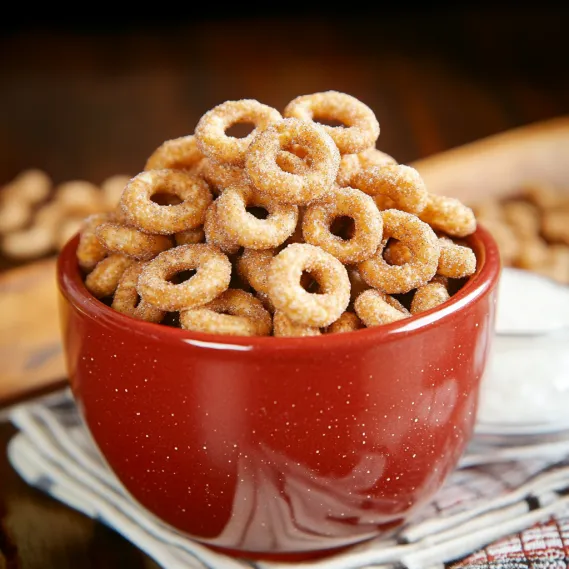
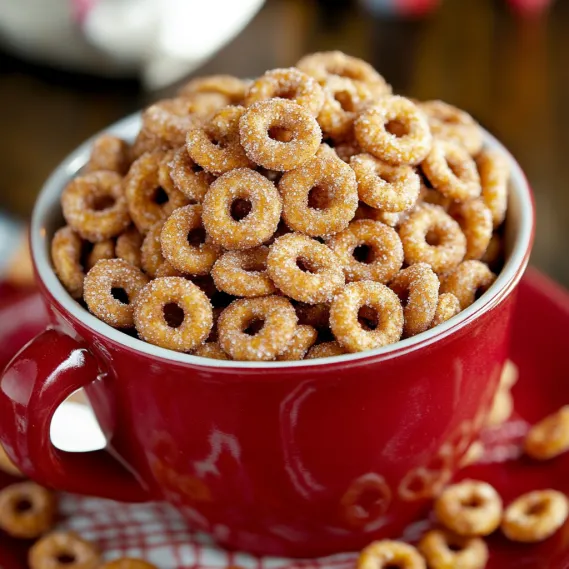
These tiny cereal donuts turn boring breakfast Cheerios into a mouthwatering sweet snack that'll remind you of those fair food mini donuts we all love. The transformation happens when you toast regular Cheerios with butter and vanilla, then coat them in a yummy cinnamon-sugar mix. What you get is a crunchy, fragrant treat with hints of caramel and warm spice that you won't stop grabbing by the handful. Great for watching movies, snacking in the afternoon, or giving as DIY presents, this super-simple five-ingredient creation shows that the easiest recipes often make the most addictive munchies.
I came across buttered Cheerios after I got married to my husband who'd grown up munching on them as a family favorite. When I got a box of Cinnamon Cheerios with a recipe suggestion, I figured I'd try it out, thinking it'd be nothing special. Boy was I wrong about how amazing they'd turn out – changing an ordinary cereal into something that vanished from the bowl in minutes. The butter and vanilla-coated Cheerios with their dusting of cinnamon and sugar took me right back to those little donuts you grab at carnivals, but with a satisfying crunch that had me saying "just one more handful" over and over.
Key Ingredients and Smart Selection Advice
- Cheerios: Regular or Cinnamon Cheerios both work great. The plain ones let the added flavors really pop, while Cinnamon Cheerios kick up the cinnamon-sugar coating even more.
- Butter: Go with actual butter, not margarine, for the fullest taste. Salted butter makes a tasty sweet-salty combo.
- Vanilla Extract: Real vanilla extract (skip the fake stuff) brings a richness that works wonderfully with cinnamon.
- Cinnamon: Good, fresh cinnamon is crucial. If yours has been sitting around longer than six months, you might want to get a new jar.
- Sugar: Plain white sugar does the job perfectly, but you can play around with turbinado or light brown for different taste notes.
I've learned that fresh stuff and good technique really make this snack shine. When I once made these with old cinnamon that didn't smell much anymore, they turned out okay but missed that amazing smell that makes everyone want to grab a handful.
Step-by-Step Cooking Guide
- Step 1: Get Your Butter Base Ready
- Grab a big skillet and melt 3 tablespoons of butter on low heat, making sure it doesn't brown. After it melts, mix in 1 teaspoon of vanilla extract, which will make your kitchen smell amazing right away. Keep that heat turned down – this helps the Cheerios toast slowly and evenly without burning.
- Step 2: Toast With Care
- Pour 4 cups of Cheerios (regular or cinnamon flavor) into your skillet with the melted butter and vanilla. Stir gently until all pieces get coated. Keep cooking and stirring for about 5 minutes until the Cheerios look a bit darker gold and smell really good. Watch them closely – they can go from perfectly toasted to burnt in no time.
- Step 3: Make Them Sweet And Spicy
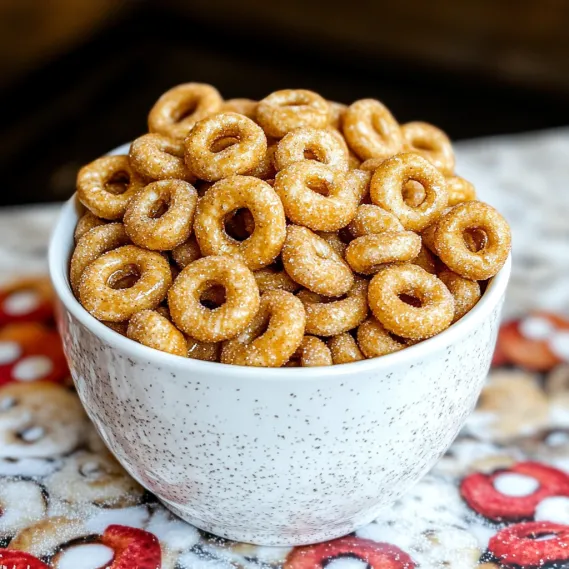
- While they're still hot, dump the Cheerios into a big bowl. Right away, sprinkle them with a mix of 1/4 cup white sugar and 1 teaspoon ground cinnamon. Toss everything together so all pieces get covered with cinnamon-sugar. The warmth and butter from toasting will help the sweet mix stick to each Cheerio.
- Step 4: Let Them Get Crunchy
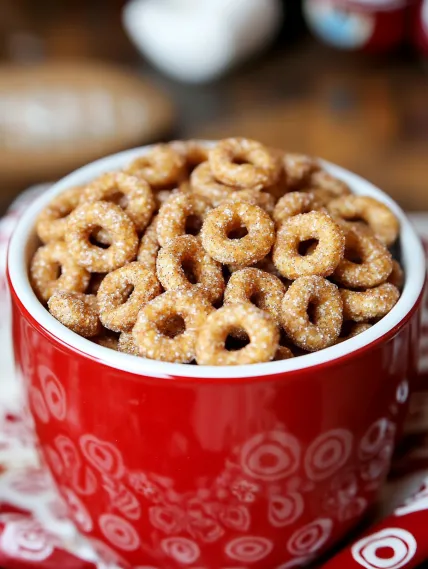
- Lay out the coated Cheerios in one layer on a baking sheet with parchment paper. Let them cool completely for about 15-20 minutes. This cooling time is super important because it lets the coating set and brings back that signature Cheerio crunch. Once they're cool, they're ready to eat or save for later.
- Step 5: Keep Them Fresh
- After they've cooled completely, put your toasted Cheerios in an airtight container. They'll stay crunchy and tasty for up to a week, though at my house they're usually gone within a day or two. For gifts, put them in pretty cellophane bags with ribbons or fill small mason jars for a cute look.
 Pin it
The first batch I ever made, I walked away from the stove for just a second and came back to slightly burnt Cheerios. Now I know you can't take your eyes off them while they're toasting – but trust me, those five minutes of watching the pan are totally worth it when you taste the final product.
Tasty Flavor Twists To Explore
The regular cinnamon-sugar version is super yummy, but I've tried lots of different versions that my family now loves too. For chocolate fans, mix a tablespoon of cocoa powder into the sugar and throw in some mini chocolate chips while the Cheerios are still warm (they'll get a bit melty and create awesome chocolate-covered pieces). During Christmas time, I add a tiny bit of nutmeg and ground cloves to the cinnamon-sugar mix for a holiday flavor that tastes like Christmas cookies. For grown-ups, try adding just a pinch of cayenne to the sugar mixture for a surprising sweet-spicy kick that's super addictive. My kids go crazy for a version with half a cup of mini marshmallows tossed in while the Cheerios are still warm – they partly melt and make gooey s'mores-like clusters throughout the mix.
 Pin it
Fun Ways To Serve And Gift
These buttery Cheerios have become my favorite for casual snacking and thoughtful homemade presents. On movie nights, I serve them in paper cones made from pretty scrapbook paper – just like those paper bags they put mini donuts in at the fair. They're perfect for lunch boxes in small containers as a sweet surprise. For holiday gifts, I fill clear plastic ornaments with the mix to create edible decorations you can hang on the tree, then open and enjoy later. When I have friends over for brunch, I use them as toppings for yogurt parfaits, where they add the perfect sweet crunch. My biggest hit has been putting them in mason jars with handwritten notes for teacher gifts – simple but always gets tons of compliments and people asking how to make them.
Cook With The Kids
A surprise bonus of this recipe is how great it works as a cooking project with kids. My children love helping with each part, from measuring stuff to the exciting job of stirring the Cheerios in the pan (with me watching closely, of course). It's turned out to be a wonderful first cooking lesson for little ones – they learn about watching closely during the toasting part, see how ingredients change as you cook them, and feel proud making something tasty from simple ingredients. For really young helpers, I let them mix the cinnamon and sugar and do the final tossing of the coated Cheerios, keeping them away from the hot stove. The quick prep and almost instant results make it perfect for kids who can't wait too long.
Grab-and-Go Snacking Made Easy
One thing that's made these toasted Cheerios a must-have in our house is how easily they travel. Unlike many sweet treats that melt, fall apart, or need to stay cold, these hold up great anywhere. I pack them all the time for car trips, hikes, and days spent at the beach or park. They're way less messy than most kids' snacks, with no sticky fingers or crumbs to clean up afterward. I've started keeping some in my car for those hungry moments during errands or after-school activities. The whole grain Cheerios with their sweet coating give you more lasting energy than candy or cookies, making them just right for busy days when you need a quick pick-me-up.
 Pin it
This easy recipe has become more than just a snack for our family – it's now part of our traditions for movie nights, road trips, and Christmas presents. There's something magical about turning everyday cereal into something so special with just a few minutes and ingredients. The warm smell of butter, vanilla, and cinnamon that fills the kitchen while they're toasting tells everyone something delicious is coming soon. And the fact that they disappear so quickly every time I make them really shows just how impossible they are to resist.
Frequently Asked Questions
- → Can I swap Cheerios for a different cereal?
- Absolutely, this recipe works with many cereals! Try Corn Flakes, Chex, or even Rice Krispies. The textures will change a bit, so keep an eye out while toasting since different cereals can cook at different speeds.
- → How long can I keep these homemade cinnamon sugar Cheerios?
- If stored in a sealed container at room temperature, they’ll stay good for about 5 days. Make sure they’re fully cooled first to keep that crunch. If they lose it, quickly toast them again to freshen up!
- → Is there a way to make this without butter for non-dairy eaters?
- Of course! Just swap in coconut oil or a plant-based butter option. Stick to the same quantity (1/4 cup), and you’ll still get a great taste, though slightly different. It'll be just as yummy!
- → How can I make this recipe more fun or unique?
- Mix it up with add-ins! Toss in a handful of chopped nuts, sprinkle in some mini chocolate chips after it cools, or try spices like nutmeg or cardamom for a new flavor twist. A drizzle of melted white chocolate is great too!
- → Why does the cereal sometimes burn during toasting?
- Burning often happens if the stove is too hot or you’re not stirring enough. Stick to low heat as suggested and keep stirring the whole time. If your stove tends to heat up quickly, lower the heat a bit more and monitor carefully.
- → Can I use brown sugar instead of white sugar for this snack?
- Definitely! Brown sugar has a deeper, caramel-like flavor that works great here. Use the same measurement (1/4 cup) or even mix white and brown sugar for a layered sweetness.