
 Pin it
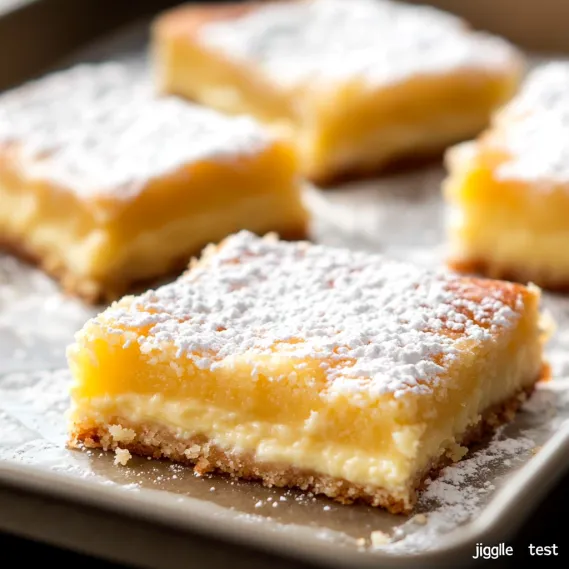
St. Patrick's Day is just around the corner! I've got a tasty treat to mark the occasion. These tiny delights combine fudgy brownie bottoms with smooth Bailey's Irish Cream cheesecake and a velvety chocolate ganache topping. They're so tasty you'll find it hard to stop at just one!
The first batch I whipped up for friends vanished instantly! Everyone loves how the textures work together, and their small size makes them perfect party food.
Key Components and Shopping Advice
- Semi-Sweet Chocolate: Pick quality baking bars instead of chips for smoother melting
- Cream Cheese: Stick with full-fat for the creamiest results
- Bailey's Irish Cream: This gives the special twist these treats are known for
- Instant Espresso: A tiny bit boosts chocolate flavor without tasting coffee-like
- Sour Cream: Brings a nice zip and smoothness to the cheesecake part
- Heavy Cream: Creates the smooth chocolate topping
Step-by-Step Baking Guide
- Mix Up Your Brownie Base: Slowly melt chocolate and butter together on low heat. Take your time - fast melting can ruin the chocolate. While that's happening, mix your eggs with sugar, and sift the dry stuff together to avoid any clumps.
- Let Chocolate Mix Cool: The melted chocolate needs to cool a bit before you add it to the eggs. Don't skip this or you'll end up with scrambled eggs and ruined brownies.
- Complete Your Brownie Mix: After adding the chocolate, gradually mix in dry ingredients in small amounts. You want a thick but smooth batter without lumps.
- Cook Brownie Bottoms: Put about 2 tablespoons of mix into each greased mini mold. Cook at 350°F for roughly 12 minutes until they're just done - a toothpick should come out clean.
- Whip Up Cheesecake Mixture: Beat room-temp cream cheese with sour cream until it's fluffy, then add sugar, salt, and vanilla. Mix in eggs one by one, don't overbeat. Dissolve the coffee powder in warm water, then fold it in with Bailey's and cinnamon.
- Top Brownies With Cheesecake: Turn down oven to 325°F. Add about 2 tablespoons of cheesecake mix on each brownie, filling molds almost to the top.
- Use Smart Baking Method: Bake for 12 minutes, then turn off the oven but keep them inside with door shut for 10 more minutes. This slow cooling keeps them from cracking or sinking.
- Cool Completely: Let them cool at room temp, then put in fridge for at least 4 hours or overnight. This makes them firm up right and come out of the molds easily.
- Create Chocolate Topping: Warm up cream until it's steamy (not boiling), pour over chopped chocolate. Wait 10 minutes, then stir until it's smooth and shiny.
- Top Off Your Treats: Take chilled treats from the molds. Drop a small spoonful of ganache on each one, and if you want, add some chocolate shavings to make them look fancy.
 Pin it
I figured these things out the hard way after making them for a holiday get-together. I tried to rush and take them out of the molds while still warm - total mess! Now I always make them a day early for perfect results.
Wonderful Homemade Presents
These fancy little treats make great gifts for neighbors and friends. During holiday season, I put them in colorful mini cupcake papers inside small boxes with see-through lids so everyone can see how pretty they are. For St. Patrick's Day, I tie the boxes with bright green ribbon and add little shamrock tags. People always think I bought them from a bakery and can't believe I made them myself.
Prep Ahead Convenience
Last-minute cooking can ruin the fun of hosting, but these treats solve that problem. I often make them up to three days before a party and keep them cold until about half an hour before serving. They actually taste better after sitting a day or two as the flavors blend together. I've even frozen them (without the chocolate topping) for up to a month, then thawed them overnight in the fridge before adding fresh ganache.
 Pin it
Tasty Options for Any Time of Year
Bailey's makes the classic version, but I've tried tons of other options too. In summer, try Malibu coconut rum with sprinkled toasted coconut. For fall, swap in bourbon with a dash of cinnamon. Winter holidays are great with peppermint schnapps and crushed candy canes. Spring parties shine with limoncello and lemon zest. The brownie-cheesecake combo works with almost any flavor you can dream up.
Easily Feed Big Groups
When I need to feed a crowd, these little bites always come through. You can double or triple everything without changing anything else. For my sister's engagement celebration, I made 120 of them using an assembly line method: baked all the brownie parts one day, added cheesecake layers the next, and finished with ganache the morning of the party. With a bit of planning, you can make loads of them without stress.
 Pin it
Closing Thoughts
These Bailey's Cheesecake Brownie Bites have become my favorite dessert for special events. There's something special about how the chewy brownie, creamy cheesecake, and smooth chocolate topping work together. The touch of Bailey's and coffee takes them from basic brownies to fancy desserts worthy of any celebration.
Frequently Asked Questions
- → What’s the deal with room temp ingredients?
- They blend easily, helping you avoid overmixing and giving the cake a better texture.
- → Why does my cake dip in the middle?
- A bit of sinking is fine! But if it caves in, you might’ve opened the oven door too soon.
- → How do I know if it’s baked just right?
- The edges should turn golden, and the middle should wobble just slightly. Overbaking makes it less gooey.
- → Can I save leftovers by freezing them?
- Totally. Freeze whole or slice it up for a couple of months. Let it thaw before you dig in.
- → Where does this cake even come from?
- It was a happy accident by a 1930s St. Louis baker, and people have been obsessed ever since.