
 Pin it
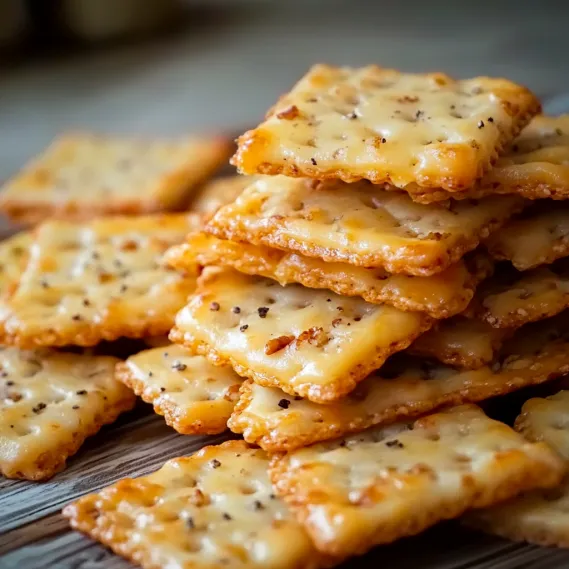
These Southern cheesy bites have become my favorite crowd-pleasing snack that always wows visitors while being incredibly easy to throw together. The blend of tangy cheddar and gentle spices delivers that genuine Southern taste everybody craves.
I originally whipped up these crackers when I had surprise guests coming and couldn't dash to the grocery store. They were such a smash hit that my pals now always ask me to bring them to every gathering and dinner.
What You'll Need
- Sharp Cheddar Cheese: grate it yourself for better taste and texture since packaged shredded kinds have additives that mess with melting
- All-Purpose Flour: gives just the right backbone for crackers that are crunchy but not too hard
- Butter: go with cold unsalted chunks for extra flakiness and better taste control
- Cayenne Pepper: brings a nice warmth that works with the cheese without being too spicy
- Paprika: adds lovely color and a mild smoky flavor that cuts through the sharp cheese taste
- Baking Powder: gives just enough puff for that ideal cracker bite
- Salt: boosts all the flavors and makes the cheese taste even better
- Water: make sure it's super cold to help create those tasty flaky bits
Easy Cooking Guide
- Warm Up Oven:
- Turn your oven to 350°F and put parchment on a baking tray. The paper stops sticking and helps the bottoms brown evenly. Give your oven about 10 minutes to get fully hot before you start baking.
- Prepare Cheese:
- Use the big holes on your grater for the sharp cheddar. Fresh-grated melts way better and makes your crackers tastier. Don't rush by using pre-shredded bags since they contain stuff that keeps the cheese from melting right.
- Combine Dry Stuff:
- Mix your flour, cayenne, paprika, salt, and baking powder in a bowl. Stir really well so all the flavors spread out evenly. This way you won't bite into a super spicy or salty spot in your finished crackers.
- Mix In Fats:
- Chop cold butter into tiny bits and toss into your flour mix with the cheese. Work fast using your fingers or a tool to make a crumbly mix. Keep some butter pieces about pea-sized to get awesome flaky layers.
- Bring It Together:
- Drizzle water bit by bit, lightly mixing with a fork between each splash. Stop adding water when the mix barely sticks when you squeeze it. Don't mix too much or add too much water or you'll end up with hard crackers instead of crispy ones.
- Flatten It Out:
- On a floured counter, roll everything about ¼-inch thick. For super crunchy crackers, go a bit thinner. Keep your rolling pin floured and turn the dough now and then so it doesn't stick and stays even all over.
- Shape Your Crackers:
- Use a knife or cookie cutter for whatever shapes you want. A pizza cutter works great for making neat squares. For classic Southern style, cut 1-inch squares and poke each with a fork so they don't puff up too much while baking.
- Cook Them Right:
- Put your cut dough on the ready baking sheet with small gaps between pieces. Bake for 20-25 minutes until the edges turn golden and the centers feel firm. Turn the pan around halfway through so everything cooks the same.
- Let Them Rest:
- Leave crackers on the hot pan for 5 minutes before moving to a cooling rack. They'll get crunchier as they cool down. This waiting time really matters for getting that perfect snap.
- Enjoy Them:
- Eat them warm or cooled down completely. Any extras can go in an airtight container at room temp where they'll stay crunchy for about a week.
 Pin it
I really love munching on these crackers with a hot bowl of homemade tomato soup. The recipe takes me back to my grandma who'd make cheese crackers every Sunday while sharing tales about her childhood in rural Georgia. I'm keeping that food and storytelling tradition alive in my family today.
Keeping Them Fresh
Pop these crackers in a sealed container with a tiny paper towel at the bottom. The towel grabs extra moisture so your crackers stay perfectly crisp for up to a week. If you want them to last longer, wait till they're totally cool, then put them in a freezer bag with all the air pushed out and freeze them for up to three months. Let them sit at room temp for about 30 minutes before eating to get their crunch back.
Amazing Swaps
This recipe is super flexible for trying new things. You can swap some smoked gouda for part of the cheddar to get richer flavor or use pepper jack for more kick. Try using whole wheat flour for up to half the regular flour if you want a nuttier flavor and extra fiber. For herby crackers, just toss in 1 tablespoon of finely chopped fresh rosemary, thyme, or dill with your dry ingredients before mixing.
Down-Home Tradition
Cheese crackers are deeply rooted in Southern cooking going back many years. They got really popular during the Depression when home cooks needed cheap recipes with few ingredients. These treats became regulars at church gatherings, family meetups, and holiday parties. Families still pass down their special versions today. My take keeps those classic Southern flavors but hits just the right balance of cheese, spice, and buttery crunch.
 Pin it
Perfect Partners
These crackers really shine on a nice cheese board with soft cheeses like brie or camembert that contrast with their crunchiness. For a fancy starter, drop a tiny bit of pepper jelly and a slim slice of country ham on each cracker. They also make tasty croutons when broken up over creamy soups or salads, adding crunch and cheesy goodness to every spoonful.
Frequently Asked Questions
- → Can I swap out the cheddar?
Sure! Try Parmesan, Gouda, or Monterey Jack for a different taste. But sharp cheddar packs the most punch for this recipe.
- → What’s the secret to extra-crispy crackers?
Roll the dough super thin, spread the crackers out a bit on the sheet, and bake until golden brown. Adjust time as needed.
- → How can I turn up the heat?
Add more cayenne or throw in finely diced jalapeños when mixing the dough for an extra spicy bite.
- → What’s the best way to store leftovers?
Pop them into an airtight container and leave them at room temperature. They’ll stay crunchy for up to a week.
- → Can I freeze the dough for later?
Absolutely. Wrap the dough snugly in plastic wrap, freeze for up to 3 months, and thaw in the fridge when you’re ready to bake.
- → Can I make fun shapes with these crackers?
Go for it! Use cookie cutters to create stars, circles, or even themed shapes. A knife works fine for squares, too.