
 Pin it
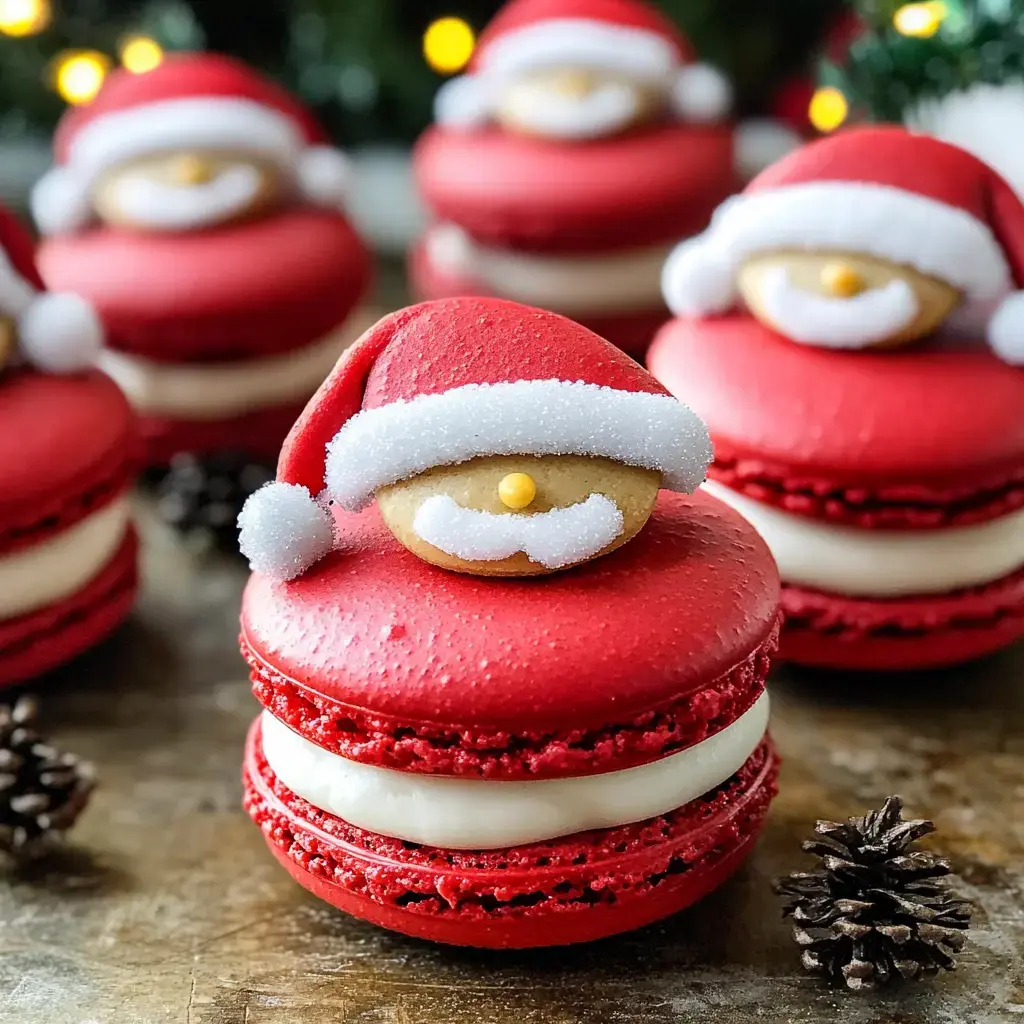
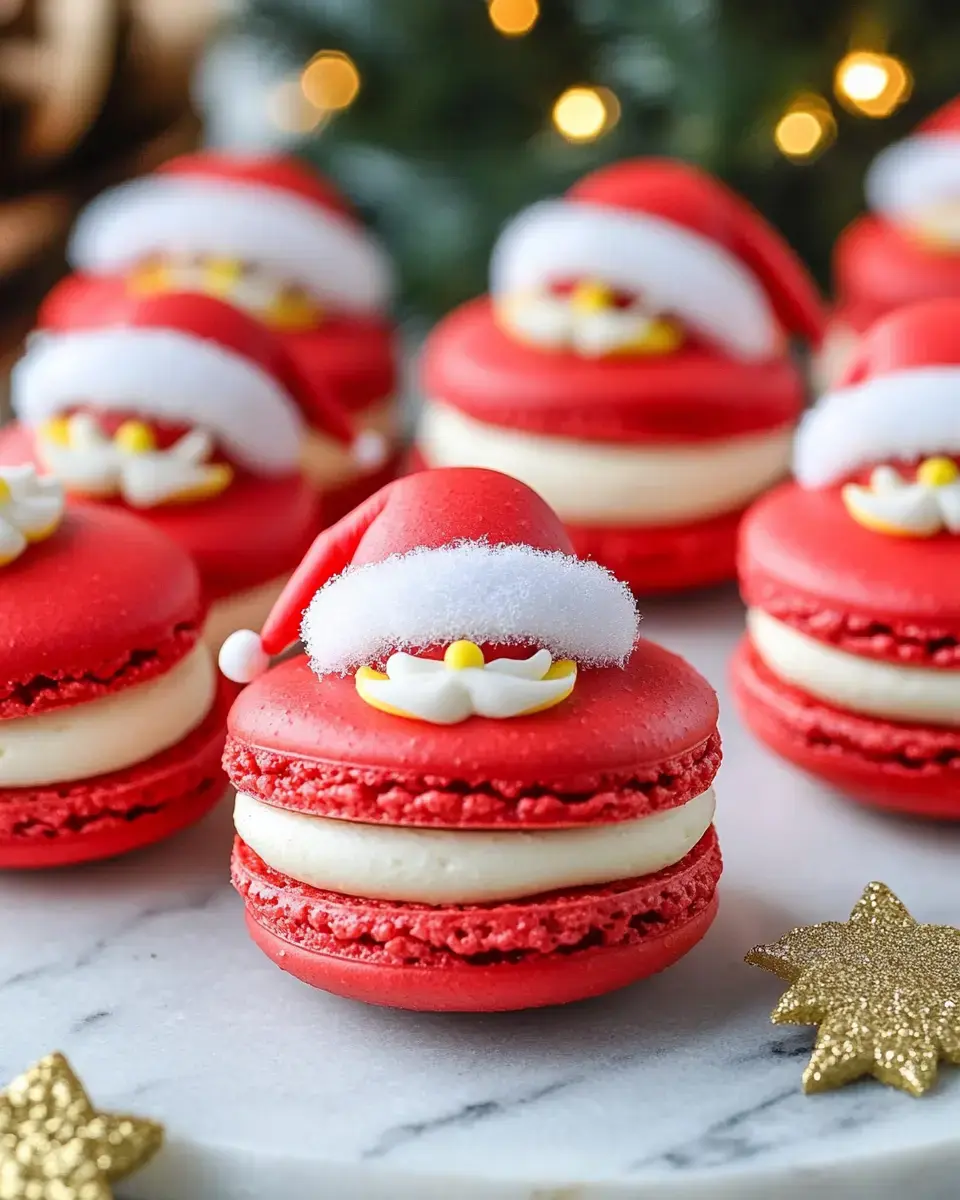
Making festive goodies is my thing and these Santa Claus Macarons are what I'm most proud of when Christmas rolls around. Just imagine: vivid red macarons with tiny royal icing belts and buckles, packed with delicious Sugar Cookie Buttercream and coated in coconut for that snowy look. Whenever I whip these up, everyone grabs their phones for a quick snap before they eat them all up.
What Makes These Special
These aren't regular macarons - they're tiny bites of Christmas happiness. Their bold red shells grab attention and when people notice the cute belt pattern, they can't help but smile. And that sugar cookie filling transforms them from adorable to downright addictive. They're a blast to make and even better to give out.
Main Components
- Almond Flour: Double sift it, you'll thank me for the extra-smooth shells.
- Powdered Sugar: The secret to those shiny, glass-like tops.
- Egg Whites: Must be at room temp for the fullest, fluffiest meringue.
- Red Gel Food Coloring: Go heavy-handed here, we want that true Santa shade.
- Sugar Cookie Buttercream: A dreamy mix of butter, golden sugar and vanilla that tastes like childhood.
- Royal Icing: For drawing those sharp, defined belt lines.
- Shredded Coconut: Creates that fluffy snow effect around the edges.
Easy Method
- Begin with Shell Prep
- Combine your double-sifted almond flour and sugar, then gently incorporate into your stiff egg whites. Don't skimp on the red coloring. Pipe onto parchment-lined trays and wait until they're completely dry when touched, roughly 1-2 hours, then bake at 300°F.
- Create Your Filling
- Get your butter super fluffy, mix in golden sugar and vanilla until it tastes exactly like a sugar cookie. Keep sampling till it's spot on.
- Design the Belts
- Mix royal icing to a thick consistency, carefully pipe those adorable belts and buckles on your fully cooled shells. Let them completely set before moving forward.
- Build Your Macarons
- Drop big spoonfuls of that yummy buttercream onto shells, press them together, then roll the sides in coconut for that perfect snowy finish.
- Patience Pays Off
- Stick them in the fridge overnight – it's tough to wait but they'll taste way better tomorrow.
Tricks for Flawless Results
To nail that Santa red, I blend both gel and powder colorings together. Don't cut corners on drying time – on muggy days I sometimes use a small fan to help out. And here's my trick: store them in the fridge overnight and you'll be amazed how the flavors deepen and the texture gets absolutely dreamy.
 Pin it
Fun Alternatives
- Try Different Fillings: Cream cheese frosting or peppermint ganache work wonderfully too.
- Experiment with Colors: Christmas green or metallic gold look just as cute with the belt design.
- Make Them Shimmer: A tiny bit of edible glitter on the buckle makes them extra fancy.
Perfect Party Showstopper
These tiny Santas always steal the show on my holiday dessert spread. They're fantastic for cookie swaps, make wonderful presents, and bring so much joy to Christmas breakfast. Something about them just brings out smiles in everyone – and isn't that exactly what holiday treats should do?
Frequently Asked Questions
- → Is egg white powder necessary?
You’ll need it only if the surrounding humidity is higher than 30%.
- → Why do the shells need extra drying time?
Adding more food coloring makes them take longer to set properly.
- → Can I pop these in the freezer?
Definitely, keep them frozen for up to 2 months.
- → Why does the flour need heating?
This ensures it’s safe to use in any raw fillings.
- → How long can I keep them fresh?
They’ll stay nice for 5 days in the fridge or frozen for 1-2 months.