
 Pin it
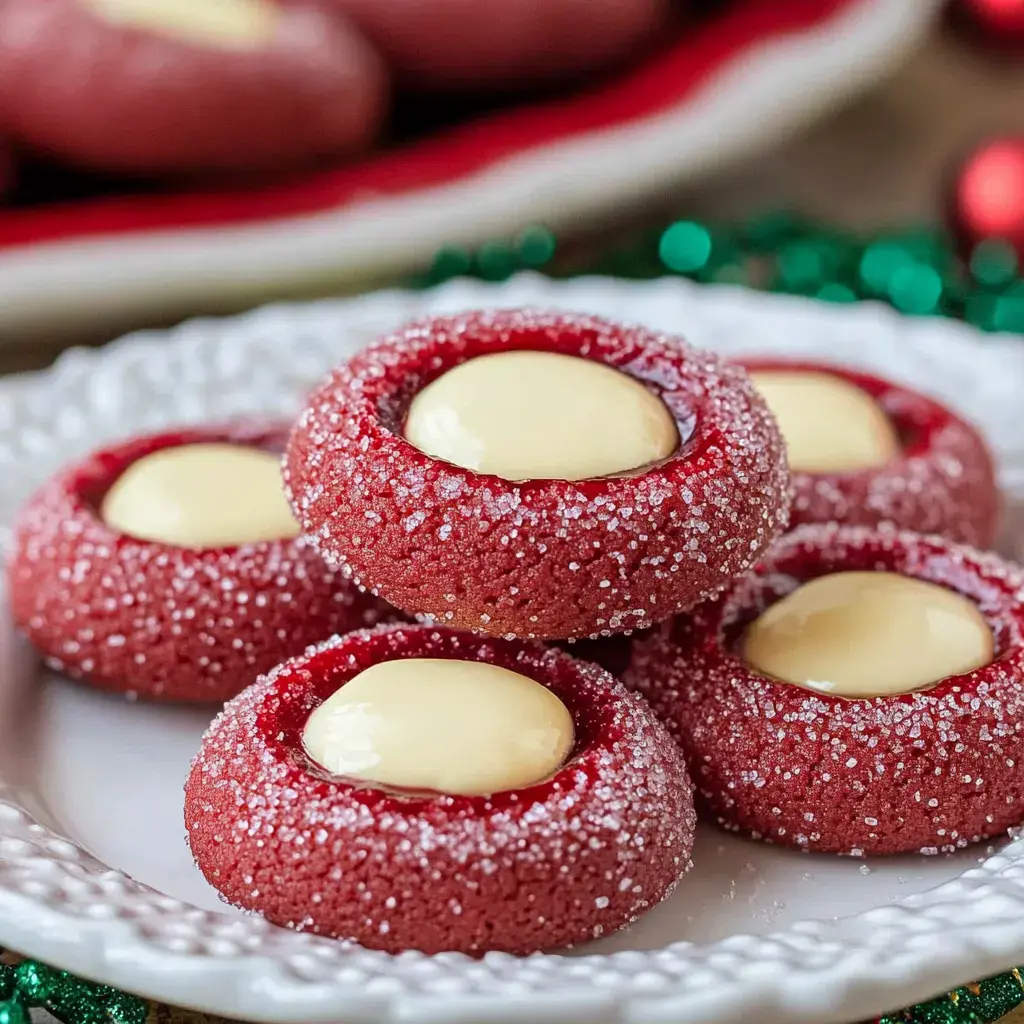
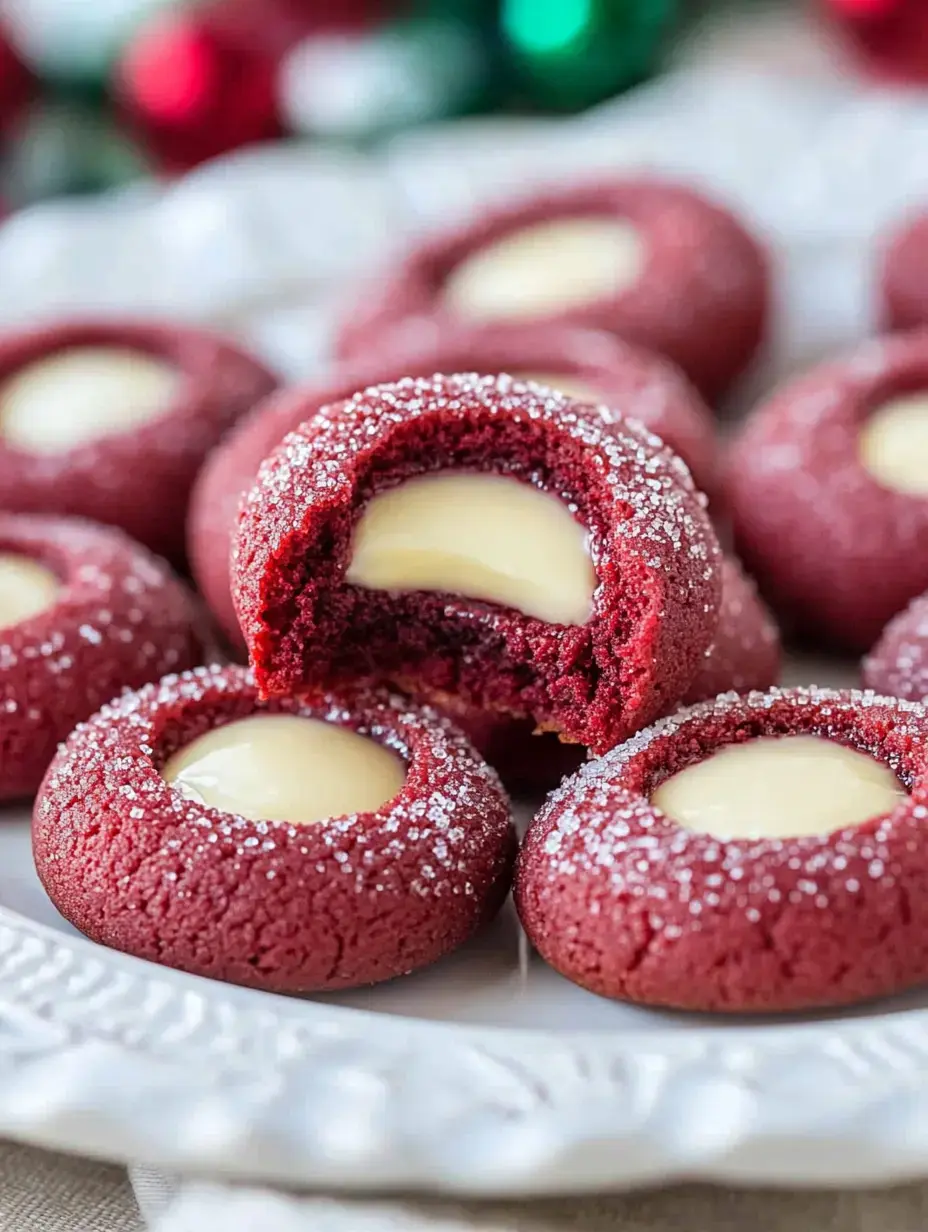
I stumbled upon these Red Velvet Thumbprints during last year's holiday season and they've quickly turned into my go-to festive sweet. There's nothing like biting into that soft red cookie with its creamy cheese center—it just melts away. Everyone's face brightens up when they spot these colorful treats at gatherings. Take my word, these little bites work wonders for Christmas, Valentine's, or whenever you're simply in the mood for something yummy.
Charming and Tasty
The way these cookies mix that iconic red velvet flavor with the cheese filling is simply wonderful. That filling brings a tangy sweetness that keeps you reaching for another. They're surprisingly simple to whip up too—my little ones even enjoy rolling the balls in glittery sugar. No matter what else shows up on my cookie tray, these always vanish first.
Key Components
- Red Velvet Cookies: Grab some butter that's been sitting out—it mixes way better. You'll want plain sugar for sweetness, a big egg from the cooler, and some vanilla for that cozy taste. Don't forget the red gel coloring which is crucial, standard flour, a bit of cocoa for that chocolate hint, plus a smidge of baking soda and salt to bring it all together.
- Cream Cheese Filling: Make sure your cream cheese is really soft, your powdered sugar strained for smoothness, and add a dash of vanilla to make it truly stand out.
- For Rolling: I'm a fan of red and green sugar or fun sprinkles as they add such nice shimmer.
Simple Instructions
- Mix Your Base
- First, whip butter and sugar until it gets airy and light. Add your egg, vanilla, and that gorgeous red color. Separately, combine your dry stuff, then slowly blend everything. Don't stir too much or you'll end up with hard cookies.
- Cool Your Mixture
- Stick your dough in the cooler for 30 minutes. In a rush? The freezer works for 15 minutes too.
- Whip Up Filling
- While waiting, blend your cheese mixture until totally smooth, then keep it cool until needed.
- Form and Cook
- Make small dough balls, coat in sparkly sugar, press a dent, and cook until they're barely done. If middles rise, just push them down while hot.
- Top and Set
- After cooling, drop filling into each indent. Let them sit in the fridge to firm up.
Starring Elements
Each part works together to create these amazing treats. The butter keeps them soft and lush while sugar brings just enough sweetness. That small bit of cocoa? That's the secret to true red velvet flavor. I only use gel coloring because it makes such a deep shade without thinning the mix. But honestly, that cheese topping steals the show—it's like the perfect finishing touch.
 Pin it
Serving Ideas
These treats look amazing next to regular sugar cookies or spicy gingerbread on a holiday plate. When I'm making them as presents, I put them in see-through bags with fancy ribbons. Sometimes I'll add a white chocolate drizzle or extra sparkly sugar for special times. They always look fancy no matter how you dish them up.
Expert Tricks
After loads of batches, I've picked up some handy tips. Always go for gel food coloring as it beats liquid hands down. Don't rush past cooling the dough—it really changes how they turn out. Your cream cheese needs to be super soft before mixing or you'll get chunks. When the mix gets sticky on your fingers, just add a tiny bit of flour to your hands. And don't go overboard with filling or you'll create a big mess.
Frequently Asked Questions
- → Why should the dough be chilled?
This step keeps the dough firmer, making shaping easier and helping the cookies hold their shape in the oven.
- → Which food coloring brightens the most?
Go for gel-based food coloring for a bold red without making the mixture too watery.
- → Can I prep these cookies in advance?
Yep, you can! Keep filled cookies in the fridge for up to 3 days.
- → Why wait to fill the baked cookies?
Filling warm cookies can cause the cream cheese to melt, so let them cool down first.
- → Are these freezer friendly?
You can freeze the cookies before filling them for up to 3 months. Just defrost and fill them fresh.