
 Pin it
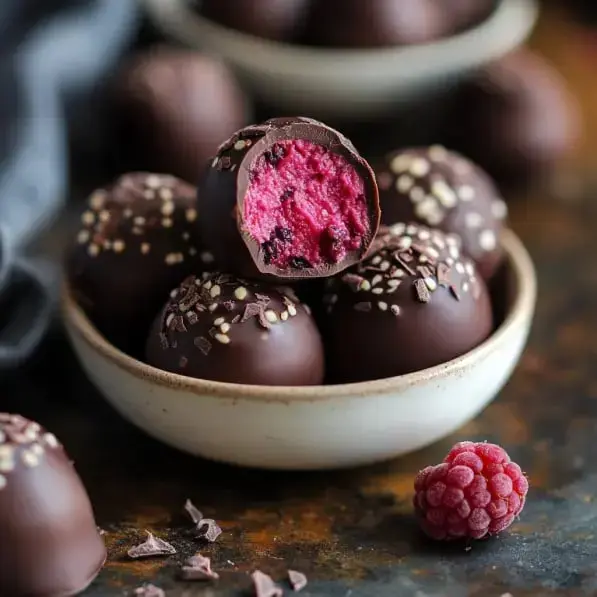
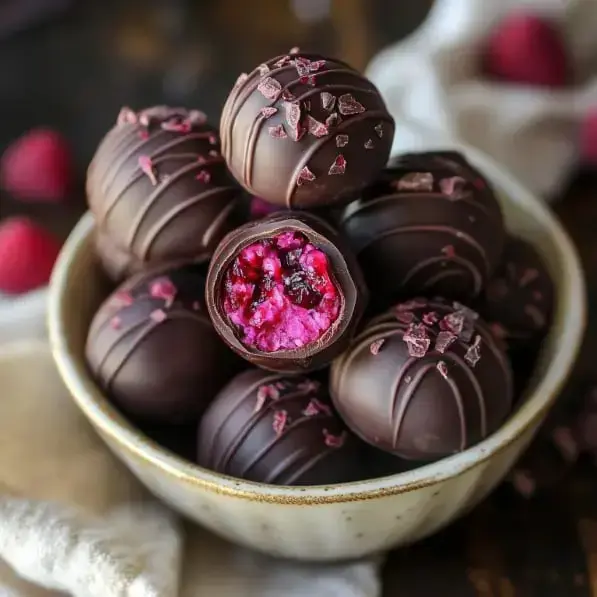
I whipped up these raspberry chocolates for last Valentine's Day when I was in the mood to create something special. After some kitchen experiments, I discovered that mixing dark chocolate with freeze-dried raspberries creates absolutely incredible truffles! The inside has this stunning pink shade, and they taste just like those pricey chocolates from fancy boutiques. My hubby thinks they're even tastier than the ones he used to get me - now that's what I call a win!
Ingredients List
- Freeze-dried Raspberries: These are available at most stores, and I always buy extra to munch on!
- Heavy Cream: Go for the genuine article, don't try anything else here
- White Chocolate: Cut it into tiny pieces for smooth melting
- Dark Chocolate Wafers: Ghirardelli works great for me, they melt wonderfully
- Extra Raspberries: Scatter these on top if you want a fancier look
Simple Truffle Steps
- Creating The Pink Center
- Start by grinding those raspberries up - watch out when opening the food processor, there's pink dust everywhere! Warm your cream until small bubbles form at the edge.
- Mixing Magic
- Dump the warm cream onto your white chocolate chunks, let it sit a minute then mix until everything is smooth. Stir in the raspberry powder and watch as it transforms into a beautiful pink mixture!
- Chill Time
- Stick it in the refrigerator for several hours, that's when I usually catch my TV shows or finish some household tasks.
- Shaping Stage
- Get your fingers a little dirty and shape the pink stuff into small balls. They can be imperfect, that's the charm of homemade treats!
- Chocolate Coating
- Drop each ball into melted dark chocolate, tap off the extra, then quickly sprinkle with crushed raspberries while the coating is still wet.
Handy Tips I've Picked Up
Try to keep your hands cool while forming the truffles or they'll start sticking everywhere. I splash my hands with cold water and dry them between batches. When your dipping chocolate gets too thick, a tiny bit of oil will thin it right out. And don't try to speed up the cooling steps, you'll just mess things up!
Custom Variations
I sometimes use milk chocolate for the outside instead of dark. Or when I want to impress, I'll add some white chocolate drizzle on top, it makes them look straight from a candy shop. You can even put in a tiny bit of raspberry extract for stronger berry flavor, but don't go overboard!
 Pin it
Wonderful Gift Idea
These work so well as presents, just tuck them into a cute box with some tissue. I gave them to my kid's teachers last year and everyone went crazy for them. They're also great for baby showers, particularly for girls since that pink inside is so fitting!
Storage Tips
Keep these goodies in the refrigerator and they'll stay tasty for around a week. If you need longer storage, you can pop them in the freezer, just move them to the fridge overnight before you want to eat them. They're actually really good eaten cold right from the fridge when they've got that nice firmness!
Frequently Asked Questions
- → Are the centers soft?
If they feel too soft, just chill them longer. White chocolate needs some extra time to harden up.
- → Raspberry seeds annoying?
To get rid of seeds, sift the raspberry powder before mixing it in. It'll make everything smoother.
- → How to tidy chocolate coating?
Tap your fork lightly after dipping to get rid of extra chocolate. Work quickly while it's still warm!
- → Raspberry powder flying everywhere?
Just toss a towel over your processor while grinding. It'll save you from a mess.
- → Can these be frozen?
Pop them in the fridge for up to two weeks. Skip the freezer though—it can mess with the texture.