
 Pin it
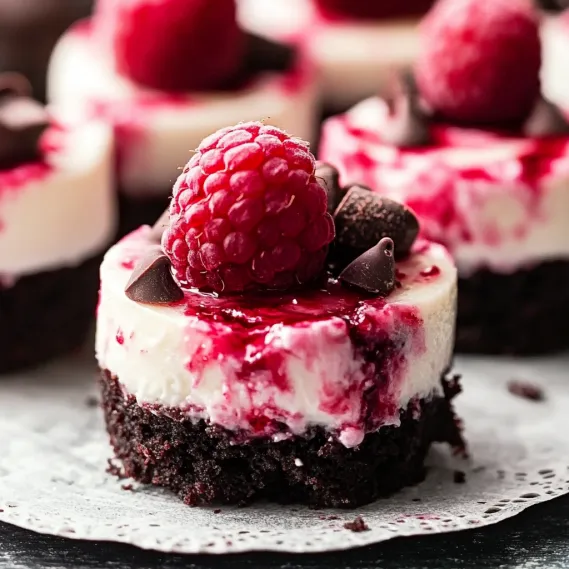
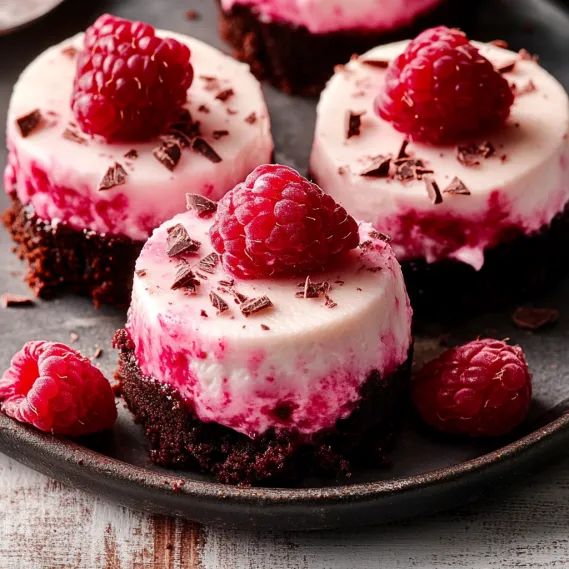
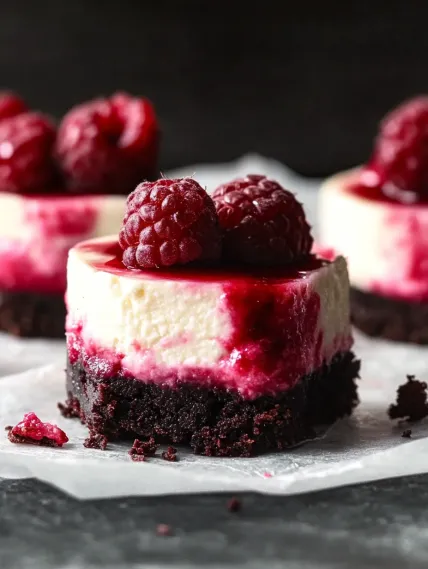
These mini raspberry cheesecake treats turn a traditional favorite into cute, bite-sized goodies that mix smooth, rich cheesecake with tangy fresh raspberries. They sit on a chocolate cookie base, giving you just the right mix of flavors in every tiny, wonderful bite.
I whipped up these little treats for the first time at my sister's wedding shower, and they vanished quicker than everything else we served. Now I pull them out whenever I need something fancy that won't keep me cooking all day.
What You'll Need
- Chocolate cookies: They make up our base with their rich cocoa taste that works great with the tangy topping. Go for something with deep chocolate flavor like scraped Oreos or plain chocolate wafers.
- Unsalted butter: It holds the crust together and adds richness while letting you add salt as needed. Stick with unsalted for sweet stuff.
- Cream cheese: This main player must be completely soft before you start or you'll get lumps. Many bakers swear by Philadelphia for best results.
- Granulated sugar: Adds just enough sweetness without extra moisture. The amount works perfectly with the sour cream cheese and tart berries.
- Large eggs: They give the cheesecake body and a rich feel. Don't forget to let them warm up before mixing.
- Vanilla extract: Makes everything taste better without standing out too much. Pick real extract instead of fake for best flavor.
- Fresh raspberries: They bring bright color, tartness, and different texture. Look for plump, bright ones with no mushy spots.
Tasty Raspberry Cheesecake Bites with Chocolate Crust
- Fix the Base:
- Smash those chocolate cookies until they look like dark sand. You can use a food processor or put them in a bag and crush them with a rolling pin. Mix in the melted butter till it looks like wet sand. Push it down firmly into each mini muffin cup to make a solid bottom. A quick bake helps it set up right.
- Whip Up the Filling:
- Beat that cream cheese with your mixer until it's totally smooth - about 2 minutes should do it. Slowly add sugar while you keep mixing. This puts air in there for a fluffier result. Drop in eggs one at a time, mixing just enough after each. Don't overdo it or you'll get cracks. Gently fold in your raspberries with a spatula so they stay whole but get mixed through.
- Pop Them in the Oven:
- Fill each little crust almost to the top. A small cookie scoop works great for even amounts. Bake them just until they're mostly set but still wiggle a tiny bit in the center - around 20 minutes. They'll finish setting as they cool down. Let them cool all the way at room temp before putting them in the fridge to avoid water drops on top.
- Add the Finishing Touches:
- After they've chilled for at least two hours, put a fresh raspberry on each one and maybe some raspberry sauce if you want. The sauce adds extra flavor and looks pretty too. Use a teaspoon or squeeze bottle for neat drizzling.
 Pin it
I'll never forget watching my raspberry-loving nephew try these for the first time. His face lit up completely, and he gobbled down four in a row while telling everyone they beat birthday cake by miles. That kind of pure happiness is exactly why I love sharing these tiny treats.
Prep Them Early
These cheesecake bites actually taste better when you make them ahead. The flavors get deeper and richer after a day in the fridge. You can make them up to three days before your event - just keep them in a sealed container in the fridge. Don't put the fresh raspberries on top until you're ready to serve so they stay looking fresh and bright. If you need to store them longer, freeze them without toppings for up to three months and let them thaw overnight in the fridge before adding garnish.
 Pin it
Mix It Up
While raspberries and chocolate go together amazingly, you can play around with this flexible recipe. Switch raspberries for strawberries, blackberries, or blueberries based on what's in season. For something more exotic, try mango or passion fruit with coconut mixed into the crust. Chocolate fans might want to toss in tiny chocolate chips or drizzle melted chocolate instead of fruit sauce. White chocolate shavings look fancy on top and go great with the red berries. Every version keeps that perfect balance between the smooth filling and crunchy base.
Quick Fixes
Cheesecake can be tricky, but these small ones are much more forgiving than a big cake. If you see cracks on top, just cover them with extra sauce or fruit and nobody will know. If your crust falls apart when you take off the paper liners, try putting the bites in the freezer for 20 minutes before serving to help them stay together. When your filling seems too runny, add a tablespoon of flour to thicken it up. Remember that cheesecake firms up as it cools, so it's okay if the middle jiggles a bit when you take it out of the oven.
Ways to Serve
These pretty bites look great by themselves, but they really wow people when arranged on a multi-level serving plate with fresh berries scattered between the layers. For a dessert table, put them alongside matching treats like chocolate candies or simple vanilla cookies. They fit perfectly at afternoon tea or as the sweet finish to a dinner with friends. In summer, don't serve them too cold straight from the fridge as warmer temperatures bring out more flavor. Pair with bubbly for celebrations, or try a sweet Riesling for an amazing flavor match.
Frequently Asked Questions
- → What cookies should I use for the crust?
Pick any rich chocolate cookies like Oreos. Just crush them up finely to create a firm base.
- → Can frozen raspberries work here?
Absolutely, just let them thaw and gently pat them dry before stirring into the mix.
- → How can I make the filling totally smooth?
Use room temperature ingredients for the filling to keep it creamy and free of lumps.
- → Why is chilling after baking so important?
This step ensures a firm texture and makes cutting and serving so much easier.
- → Is the raspberry coulis a must?
Nope, it’s optional, but it gives a nice tart kick and extra sweetness if you want it.
- → How do I stop the crust from falling apart?
Mix the crushed cookies and butter well, and press it firmly into your pan before baking.