
 Pin it
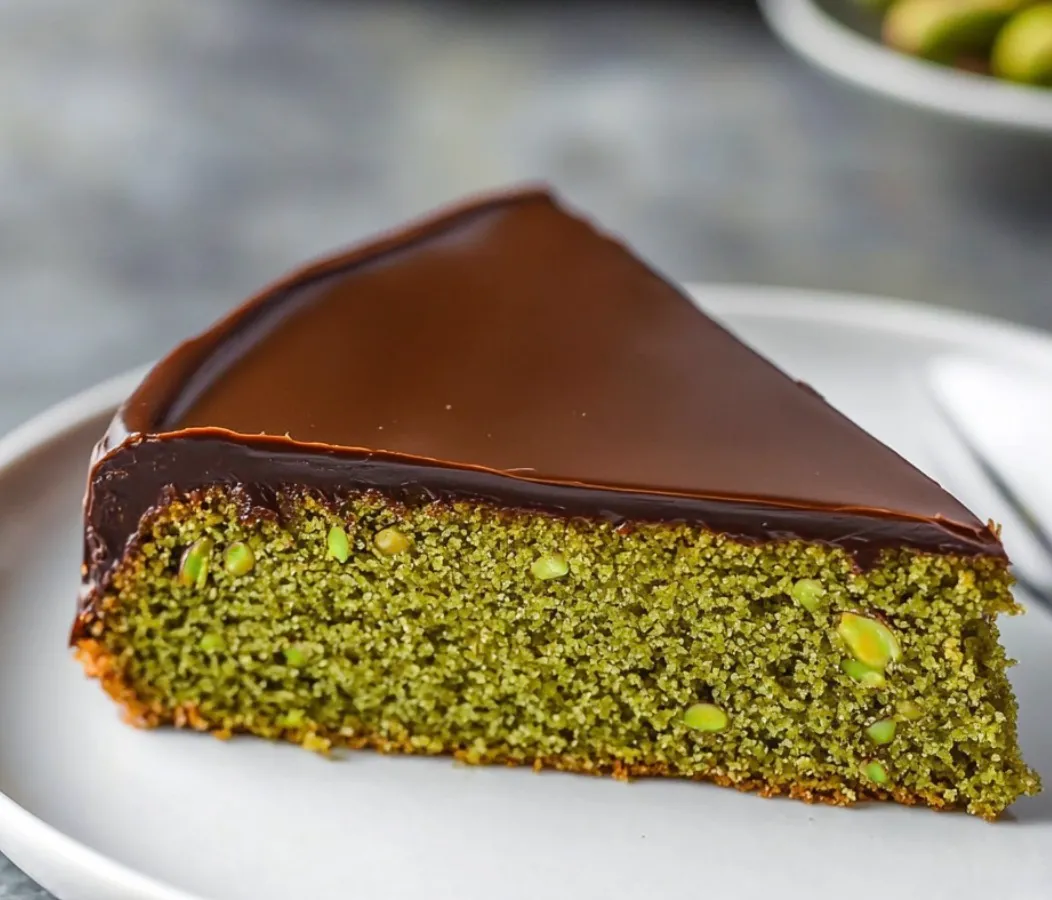
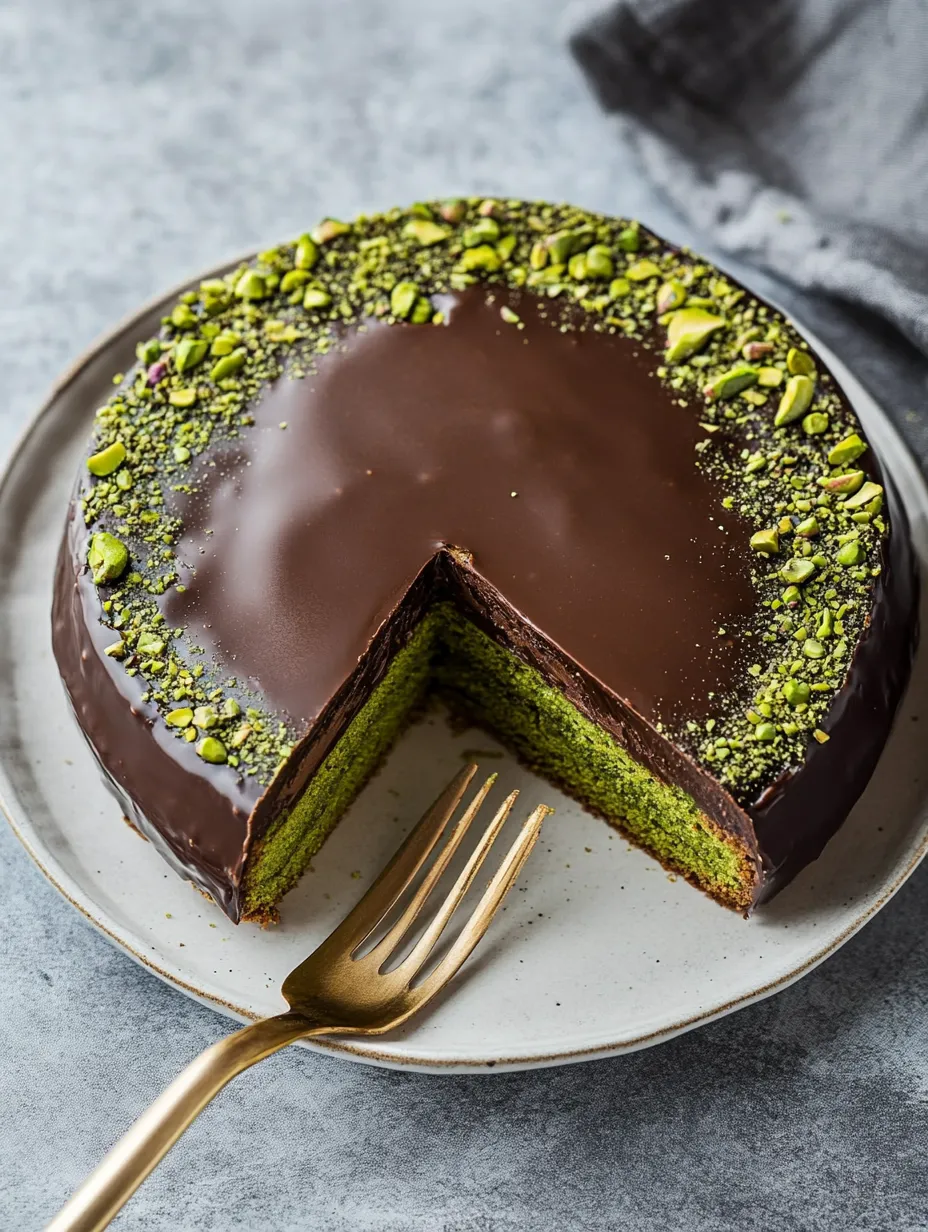
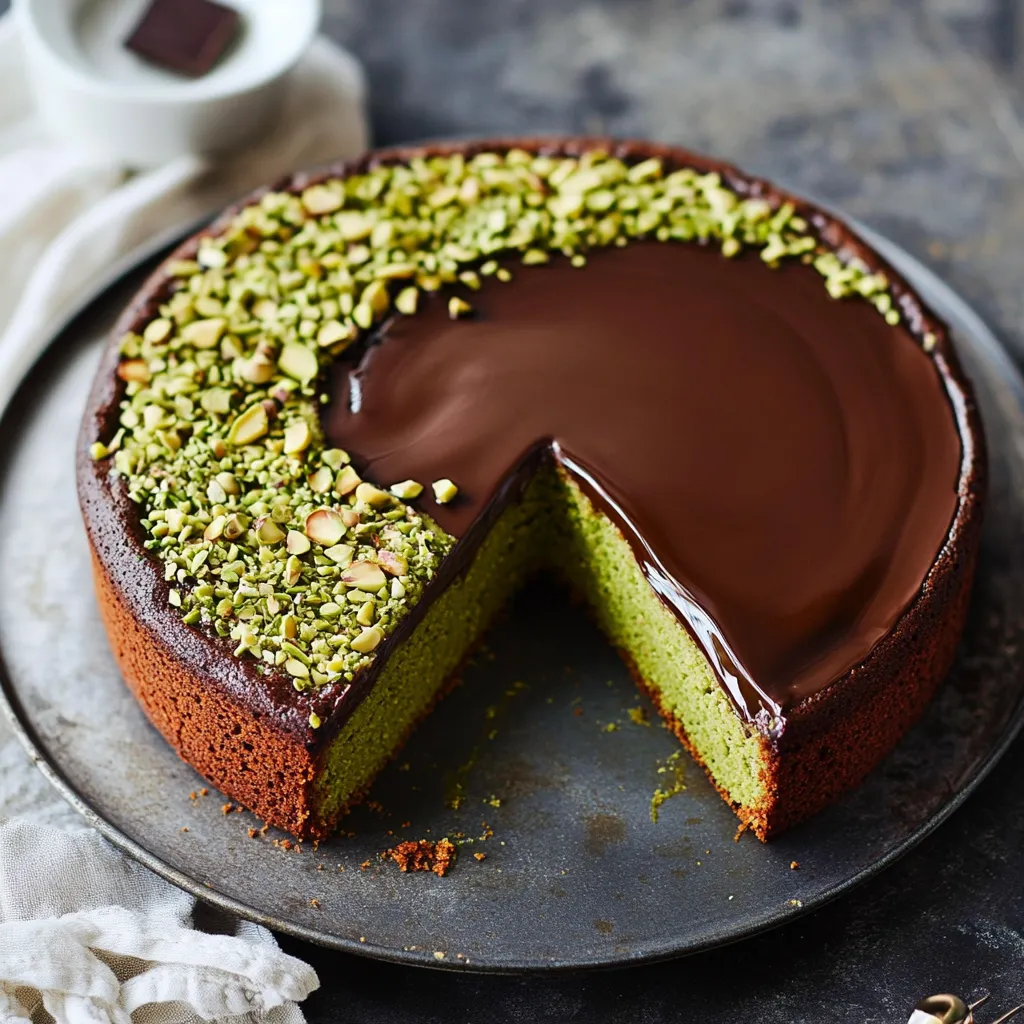
This knockout gluten-free treat packs amazing pistachio flavor and a gorgeous green hue without any artificial colors. Finished with smooth chocolate ganache and bordered with pistachio slivers, it's a fancy dessert that's actually pretty easy to put together. I stumbled upon this method while hunting for a birthday treat for a friend, and just one taste had me hooked completely.
When I made this for a dinner party last month, my super fussy brother-in-law asked for the recipe before he'd even finished eating. Everyone fell for the wonderful texture and authentic pistachio taste.
Key Components and Smart Choices
- Pistachio Flour: Darker green nuts make a greener cake; grinding your own raw pistachios gives the best color
- Almond Flour: Makes the pistachio flavor pop even more
- Eggs at Room Temp: They must be truly warm for the right lift
- Butter (Half-Melted): That in-between state - neither solid nor liquid - creates the ideal consistency
- Orange Zest: Really lifts the pistachio flavor
Step-by-Step Baking Guide
- Get Your Pan Ready: Grease a 9-inch cake pan (one with a removable bottom works best) and add parchment. The detachable bottom really helps get the cake out easily.
- Mix Dry Stuff: Sift your pistachio flour, almond flour, cornstarch, and salt together. This gets rid of lumps and helps your cake turn out smooth.
- Make Citrus Sugar: Mix orange zest into your sugar until it smells amazing. This releases the oils that make the pistachio taste even better.
- Beat Eggs Until Fluffy: Whip warm eggs with sugar for 7-10 minutes until they're super pale and thick. When you lift the beater, the mix should fall back in thick ribbons. This creates your cake structure.
- Get Butter Ready: Heat butter in short microwave bursts at half power until it's soft but not completely melted - think salad dressing texture. Mix in olive oil until combined.
- Blend Wet Ingredients: With mixer running slow, pour butter/oil mix into your eggs bit by bit. Go slowly to keep all that air you worked for. Add your pistachio extract.
- Add Flour Mixture: Fold in your sifted dry ingredients gently until just mixed. Don't overdo it or your cake will fall flat.
- Bake It Up: Pour into your pan and bake at 350°F for 40-45 minutes until a toothpick comes out clean. The top should feel set but still have a bit of give.
- Cool and Flatten: Let it cool completely in the pan. Run a knife around the edge to release it. If the top has puffed up, gently push down or trim it flat.
- Add Ganache Topping: Pour hot cream over chopped chocolate and stir until smooth. For neat edges, wrap the cake in an acetate strip before pouring ganache on top. Let it firm up before adding pistachio decoration.
 Pin it
I learned how crucial the butter consistency is when my first try ended up with tiny air holes throughout. Now I'm super careful about warming it just enough without totally melting it.
 Pin it
Understanding the Clever Chemistry
This cake gets its special texture from the mix of fluffy eggs, nut flours, and that particular butter state. The long egg-beating adds tons of air, building structure without needing baking powder or soda. At the same time, that semi-melted butter adds richness without making the batter heavy like fully melted butter would. This careful balance creates that amazing velvet-like texture that's nothing like regular cake - somewhere between dense pound cake and soft marzipan but much lighter and more elegant.
Switching It Up for Different Seasons
While it works all year long, this cake can be dressed up for holidays with different decorations. Around Christmas, try adding sugared cranberries around the edge for pretty red and green colors. For Valentine's Day, scatter some dried rose petals among the pistachios. And St. Patrick's Day? The cake's natural green inside is celebration enough! In summer months, I often serve it alongside fresh berries, which really complement the rich cake and ganache.
Prepping in Advance
One thing that makes this cake so great is how well it keeps. Unlike most cakes that get dry quickly, all the fat from nuts and butter keeps this one moist for several days. I've made it three days ahead of dinner parties, keeping it in the fridge with the acetate strip still around it. The flavor actually gets better over time, which makes it perfect for preparing ahead. Just don't forget to let it warm up before serving for the best texture.
Last-Minute Advice
- No acetate? A clear plastic sheet from a craft store can work too
- Pop the cake in the freezer for 20 minutes before cutting for cleaner slices
- Add a touch of gold luster dust on special occasions for extra fanciness
- The cake freezes great for up to a month - wrap single pieces for quick treats
- Try it with a small scoop of vanilla gelato for a wonderful temperature and flavor mix
 Pin it
Wrapping Up
This has become my go-to fancy dessert, the one people talk about long after they've left. The bold color, special texture, and perfect flavor combo make something truly amazing from pretty basic ingredients. It shows that sometimes the most impressive desserts aren't the hardest ones - just the ones made with a bit more care.
Frequently Asked Questions
- → Are the nut flours swappable?
- Sure, mix pistachio and almond to total 300g.
- → Why do the eggs need warming?
- Helps the ingredients mix up smooth.
- → How do I store this?
- Pop it in the fridge for up to 5 days, but bring to room temp before serving.
- → Is acetate required?
- Nope, though it makes the ganache look tidier.
- → Can it be made early?
- Yep, it holds up great refrigerated for days.