
 Pin it
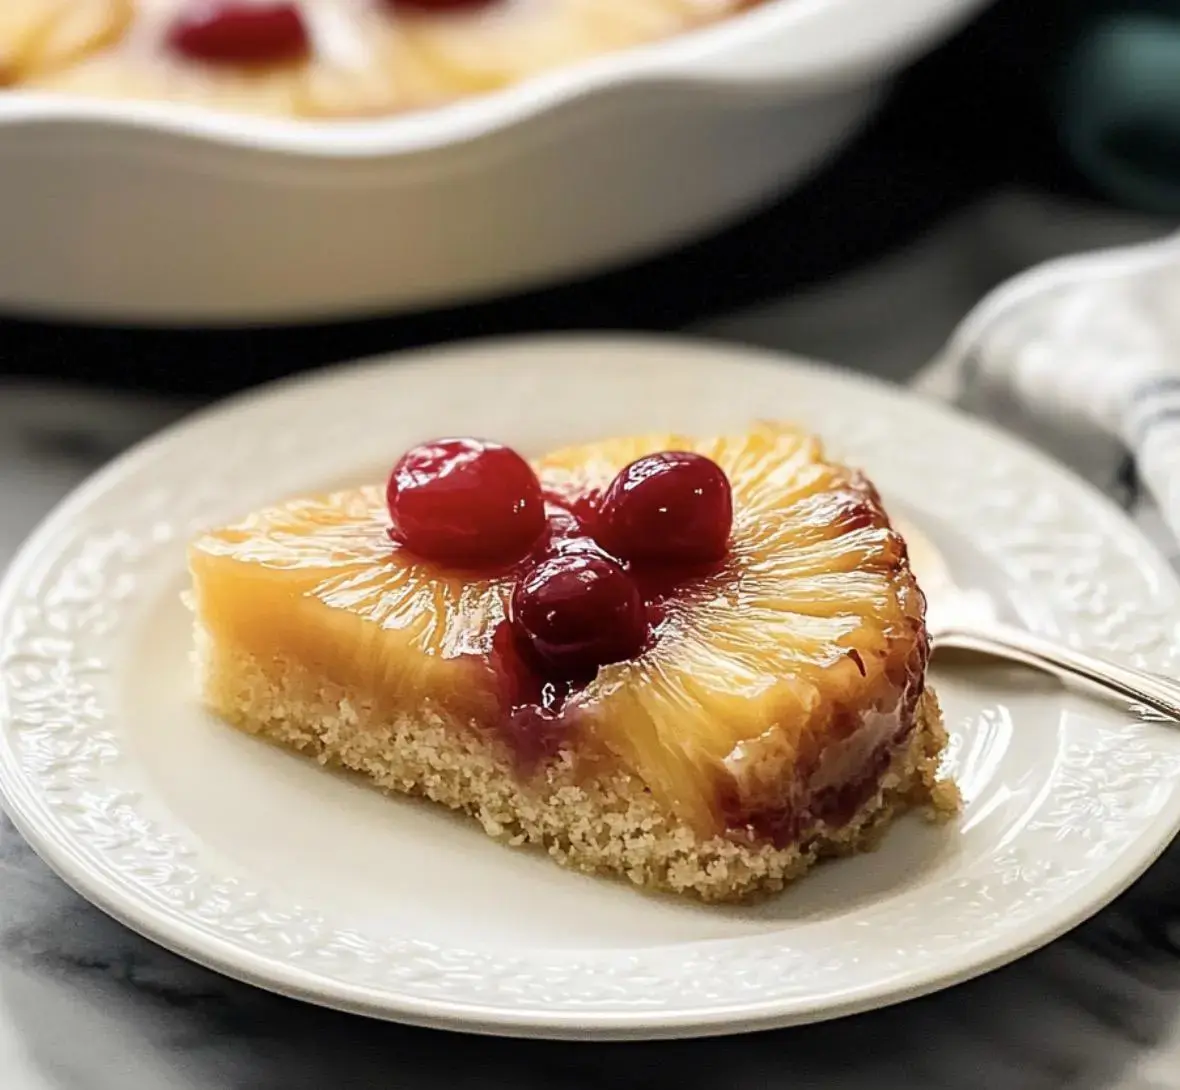
Craving that old-fashioned fruit-topped delight? Every bite of this dessert brings back childhood memories. You'll get a tender, butter-rich base topped with sweet, golden pineapple rings and bright cherries. It works great made from scratch or with a boxed mix for a quicker fix - either way you'll end up with an amazing treat everyone will love.
What Makes This Cake Special
We've tweaked this classic to make it even tastier. Our version uses specific flour types and whipped egg whites for extra softness, while the fruit on top creates its own delicious glaze as it bakes. Forget those novelty drinks that try to mimic the flavor - nothing beats the real thing! This sweet treat hits the spot when you want something truly satisfying.
Key Components
- Butter (melted): Forms the sweet base
- Sugar (brown): Turns into gooey caramel
- Rings of pineapple: The star of the show
- Maraschino cherries: Bright pops of color
- Specialized flour: Gives a delicate crumb
- Powder for rising: Lifts the batter
- Leavening soda: Adds fluffiness
- Pinch of salt: Cuts the sweetness
- Room-temp butter: For the batter
- Granulated sugar: Sweetens perfectly
- Whites from eggs: Creates lightness
- Tangy cream: Adds moisture
- Extract of vanilla: Enhances flavor
- Juice from fruit: Boosts taste
- Dairy liquid: Softens texture
 Pin it
Detailed Instructions
- Mix Your Base:
- Grab a large bowl and combine your flour, sugar, salt and yeast. Chop your cold butter into tiny bits and work them in using your fingertips until everything looks crumbly. Don't rush - this mixture forms the foundation of your amazing layers.
- Work The Dough:
- Add your cold milk and stir until it all comes together. Dump it onto your counter and work it for about 10 minutes till it feels smooth. You want it silky to touch but not sticky. A tiny sprinkle of flour helps if it's sticking to your hands.
- Initial Shaping:
- Press your dough into a rough rectangle shape. Nothing fancy needed yet. Wrap it tight in plastic and flatten it a bit. This helps later when we start the folding process.
- Chill Time:
- Stick it in the fridge for at least 2 hours. This waiting period can't be skipped - it lets the butter harden up and gives the flour time to absorb moisture. Leaving it overnight works great too.
- Prepare Butter Block:
- During the wait, take cold butter and pound it between sheets of wax paper into a 5x8 inch rectangle. Keep the edges straight and even - this creates those beautiful flaky layers. Pop it back in the fridge if it starts getting soft.
- Begin Folding:
- Roll your chilled dough out to twice the size of your butter block. Put the cold butter in the center and fold the dough over it like you're sealing an envelope. Pinch all edges closed to trap the butter inside.
- Build The Layers:
- Roll this package into a long rectangle, trying to maintain straight sides. Fold it in thirds like a business letter. Wrap it up and chill for 30 minutes. You'll repeat this process three more times.
- Overnight Rest:
- After your final fold, wrap the dough well and let it sleep in the fridge all night. This long rest makes the dough easier to handle and improves the flavor too.
- Cut And Shape:
- The next day, roll your dough about 1/4 inch thick. Cut into triangles for traditional shapes, or squares if you're making filled ones. Make your cuts clean and precise.
- Proof Them:
- Put your shaped pieces on baking sheets and let them sit at room temp until they're puffy - about 2 hours. They should look light and airy, and slightly wobble when you move the pan.
- Get Ready To Bake:
- Heat your oven to 400°F. Mix an egg with a splash of milk and carefully brush this all over your pastries, including the sides. This gives them that gorgeous golden finish.
- Bake Until Golden:
- Put them in the oven for 20-25 minutes until they're deeply browned. They should smell amazing and look richly colored. Let them cool a bit before biting in - the centers are super hot!
Ingredient Breakdown
The stuff you put in your cake really matters. Using the right flour (or a good boxed mix for a shortcut version) gives you that melt-in-your-mouth softness. The whipped egg whites and tangy cream work together too. All these things team up to make a cake that's both light and sturdy enough to support all that juicy fruit on top.
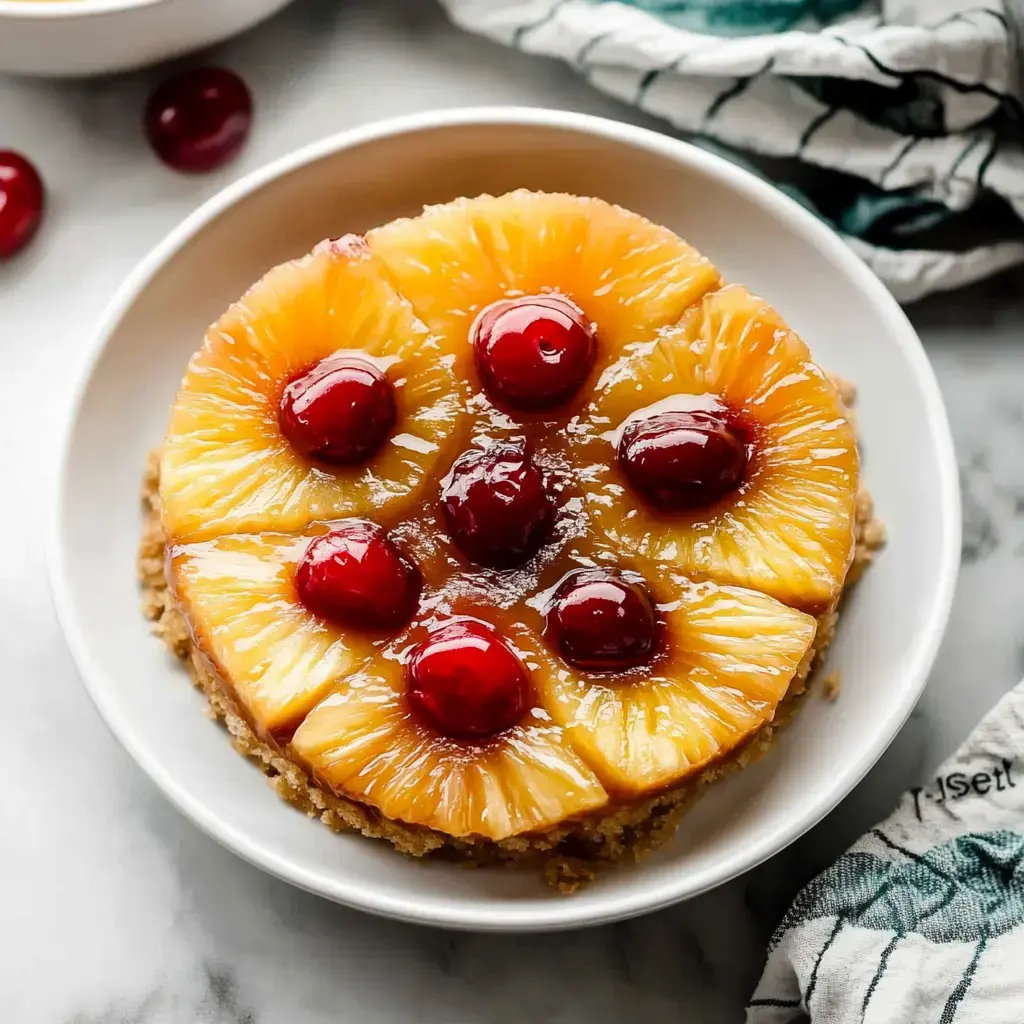
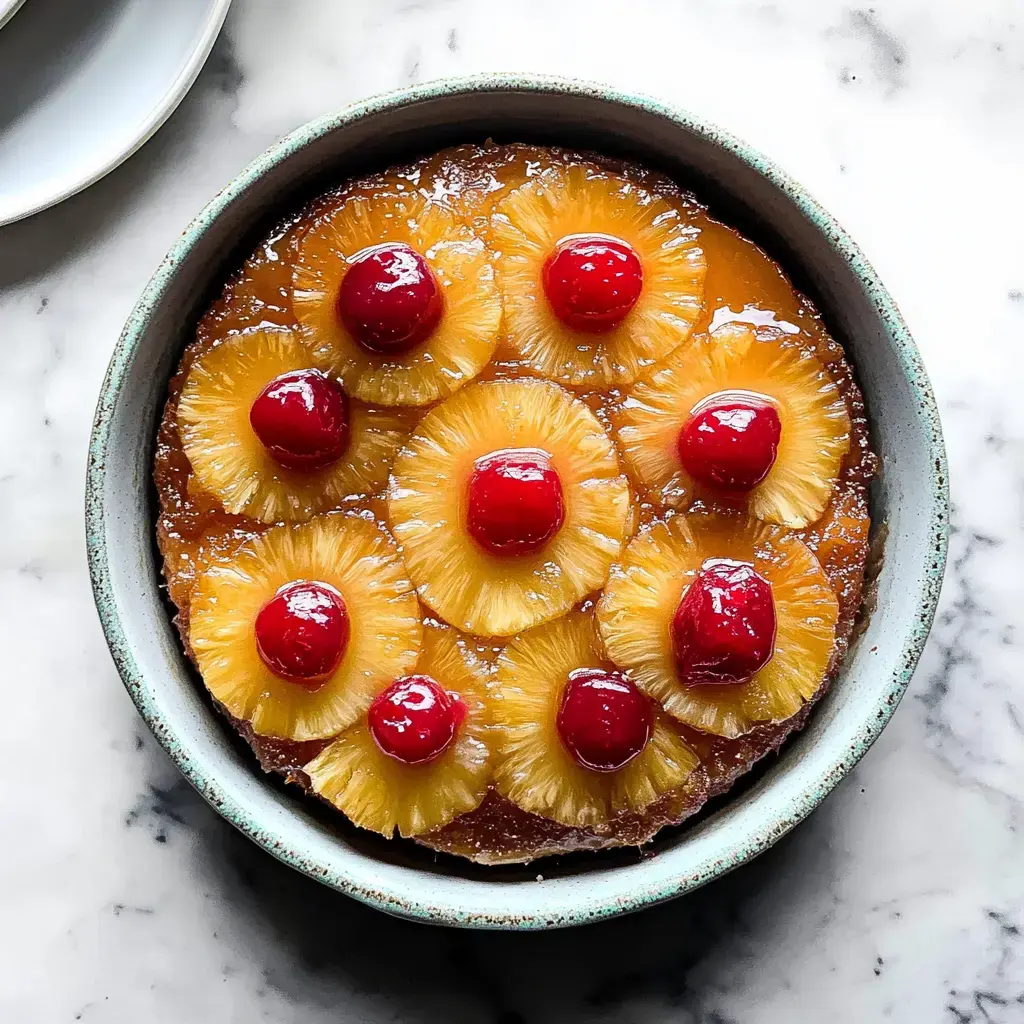
Fruit Layer Tricks
The fruit layer is what makes this dessert stand out. Blot your pineapple rings so they're not too wet, then arrange them with bright cherries over a mixture of butter and brown sugar. This creates that iconic look everyone recognizes. The magic happens during baking when everything turns into a sticky-sweet glaze, no matter if you're making it from scratch or using a mix.
Baking Know-How
This cake needs a bit more time in the oven than regular ones because of all that fruit on top. Don't forget to put something underneath to catch any drips, and give it time to cool before you flip it over. Follow these pointers and your cake will turn out picture-perfect every time you make it.
How It Feels and Tastes
This isn't your typical light and fluffy cake. It's got a bit more weight to it because of the fruit topping, but that's what makes it so good. When you take a bite, you get soft cake underneath and that amazing fruit layer on top that's coated in its own sweet, caramel-like sauce.
 Pin it
Ways To Enjoy
This sweet treat fits any occasion. The fruit makes it naturally pretty without needing any fancy decorating. You can eat it still warm or after it's cooled down - both are delicious. Try adding a dollop of whipped cream or a scoop of vanilla ice cream on the side to make it even more special. It'll be the hit of any gathering!
Frequently Asked Questions
- → Can canned fruit work?
Yep, it’s great. Just dry the slices well. Keep some juice if you want. Fresh ones work too, just slice them up nicely.
- → Why won’t the sugar brown?
Spread out the butter evenly. Cover it completely with sugar. Let it melt slowly. Keep an eye on the heat. Don’t go stirring it!
- → What if I don’t have sour cream?
Use Greek yogurt or plain yogurt. Buttermilk also does the job. It needs that tanginess to keep the cake soft.
- → How should I store leftovers?
Seal it tight in a container. Keep it in the fridge. Try to eat it within three days for freshness. Let it come to room temp before serving.
- → Do I need to cover it with foil?
Helps to keep the top from over-browning. Don’t wrap it tightly though. Tent it lightly and check under. You might need to remove it partway through cooking.
- → What if it’s browning too much?
Loosely tent the top. Lower the oven heat a bit. Place the pan lower in the oven. Peek earlier than planned, and check the edges.
- → Can I travel with it?
Transport it flat in a tall box. Bring a serving plate and flip it once you’re at the destination. Be careful of bumps!
- → What if I need it made fast?
Grab a store-bought cake mix for the base. Prepare the fruit ahead of time. Just flip and bake—it’ll still look great in a single pan.
- → How do I make a bigger batch?
Doubling up works fine. Use a larger pan and maybe bake it a bit longer. Make sure the center’s cooked and leave enough room in the oven.
- → How do I add more flavor?
Toss in some spices like cinnamon or nutmeg. Try adding a splash of rum, extra vanilla, or even chopped nuts. Just don’t mask the fruit too much.
- → What if the cake won’t flip out?
Let it cool for a few extra minutes. Run a knife gently around the edges. Flip it quickly while it’s still warm, using a solid plate and both hands.
- → What if the fruit stuck to the pan?
Peel it gently from the pan and press it back onto the top of the cake. It’ll still look fine. Next time, use a little more butter.
Conclusion
Fan of this? Give fruity tartlets a go or make a chilled creamy fruit dessert. Both showcase great fruit toppings.