
 Pin it
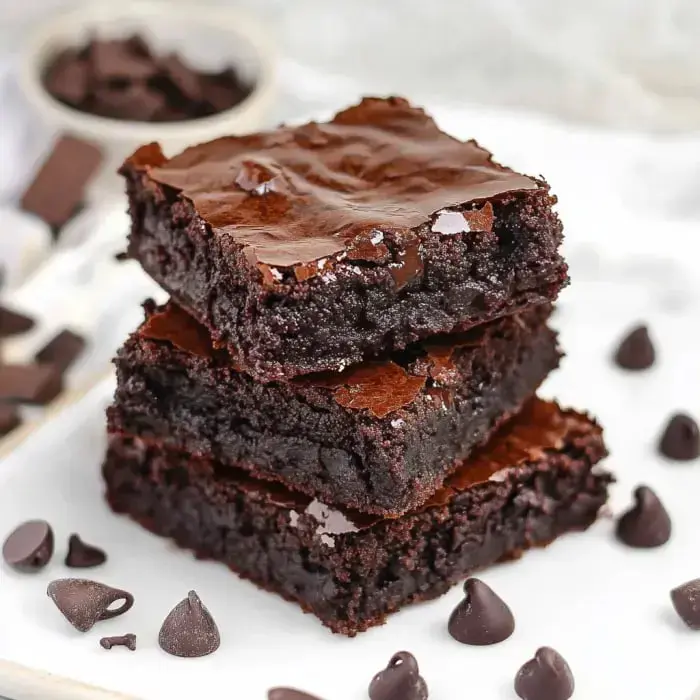
Craving a mind-blowing brownie that'll knock your socks off? You're about to hit the jackpot! These extra-fudgy squares come with that iconic crackly top and rich chocolate intensity that'll make your taste buds dance. Skip those store mixes - once you try these homemade goodies, there's absolutely no going back.
What Makes These Brownies Special
This no-fuss brownie will sweep any chocolate fan off their feet. Imagine biting into something with deep, intense cocoa flavor that just melts away in your mouth. The steps are simple enough for anyone to follow, but the results will have everyone thinking you've been baking all your life.
Ingredients List
- Butter: 1 cup unsalted, because we're doing this from scratch!
- Cocoa Powder: 3/4 cup unsweetened - quality matters here
- Sugar: 2 cups granulated - don't try to cut corners
- Eggs: 4 large, cold from the refrigerator
- Vanilla: 2 teaspoons pure extract
- Flour: 1 cup all-purpose, correctly measured
- Salt: 1/2 teaspoon, enhances the chocolate flavor
- Mix-ins: 1 cup of your personal favorites - chocolate chips, walnuts, whatever floats your boat
Baking Instructions
- Prep Work
- Heat your oven to 325°F and put parchment in an 8-inch pan with extra hanging over the sides so you can easily lift everything out when done.
- Mix Base
- Slowly melt the butter in a saucepan on low. While still warm, add cocoa and sugar, stirring until it looks like wet, shiny dark sand.
- Temperature Check
- Let everything sit for about 5 minutes to cool down a bit. You don't want the eggs to start cooking when they hit the hot mixture!
- Add Eggs
- Mix in each egg separately, stirring hard each time. This hard stirring is crucial for getting that gorgeous shiny crust.
- Complete Mixture
- Gently stir in flour and salt just until they vanish from sight. Now's when you'd add those chocolate chips or nuts if you want them.
- Into The Oven
- Pour everything into your pan and bake around 30 minutes. You want firm edges but a slightly soft center for that ultra-fudgy texture.
- Cooling Period
- Let them cool all the way down. It's tough to wait, but cutting them too soon means messy, gooey slices instead of perfect squares.
The Magic Behind The Fudginess
The real star of the show? It's how the cocoa powder and melted butter work together. This combo creates something truly incredible - deep chocolate flavor with that melt-in-your-mouth texture that'll have your friends asking what your secret is.
Pick Your Cocoa Type
Want a game-changing tip? The cocoa powder you grab makes a huge difference. Dutch-processed gives a mellow, almost cookie-like taste, while natural cocoa creates something closer to intense dark chocolate. Both turn out amazing - just depends what your mouth prefers.
Getting That Perfect Bite
Knowing exactly when they're done is everything for fudgy brownies. Don't wait for a clean toothpick - you actually want some sticky crumbs on it. If it comes out totally clean, they've gone too far. And remember, they'll firm up more as they cool down.
 Pin it
Customize Your Creation
Don't be afraid to make these your own. Throw in some crushed walnuts for extra crunch, add swirls of caramel, or dump in a handful of white chocolate chunks. The basic mixture works great as your starting point - just don't go overboard with add-ins or you'll mess up the consistency.
Storage Tips
Your brownies will taste amazing for quite a while if you store them properly. Pop them in a sealed container at room temperature and they'll stay perfect for 5 days. For longer storage, wrap them up tight and freeze them. You can thaw them whenever chocolate cravings strike and they'll taste just as good!
Frequently Asked Questions
- → What if I don’t have the right pan?
The size of your pan changes how they turn out. Larger pans make them thinner. Just keep an eye on them and maybe check early to avoid overbaking.
- → Can I make these gluten-free?
Use a gluten-free flour mix that’s intended for baking. Check the package to be sure. They’ll still be fudgy, though you might need to tweak the liquids. Watch your timing too!
- → How can I store them?
Seal them in an airtight container. They’re fine on the counter for about three days or in the fridge for up to two weeks. Just make sure they’re covered well (if you’ve got any left that is!).
- → Can I add other stuff?
Chopped nuts are always great! Diced bits of dried fruit work too. Even swirls of nut butter can be fun. Just don’t overdo it and stir gently to keep the fudgy texture.
- → How’ll I know they’re baked right?
The edges should pull away a little from the pan while the middle is irresistibly soft. Use a toothpick to check; it should come out clean but not perfectly dry. Trust your eyes for the final look!
- → What if they ended up too dry?
Next time, bake them for a bit less time. Keep a close watch on how soft the middle looks. A slight jiggle is much better than overcooked!
- → How should I pack them for travel?
Let them cool completely, then slice them neatly into squares. Arrange them flat in a box that has sturdy sides to avoid smushing. It’s worth the extra care.
- → Can I make them faster?
Sure! Stick to one pan to speed up cleanup. Have everything measured and ready to go, but don’t rush the baking! Cooling time’s just as important for a great texture.
- → What about making more of them?
Doubling’s easy! Just grab a bigger pan and keep an eye on your bake time—it’ll likely need a little longer. Don’t overcrowd if you’re using multiple racks in the oven though.
- → How can I make them even richer?
Try a high-quality cocoa powder. A splash more vanilla and using darker sugar are game-changers. You could even mix in a hint of espresso—just enough to bring out the chocolate flavor.
- → Why isn’t my top cracking nicely?
Be sure to dissolve the sugar really well. Whisk the eggs a bit longer too. Baking at the right temperature is key, and follow the steps carefully without substitutions.
- → What if the middle is too undercooked?
Stick them back in for a few more minutes, and consider lowering the temperature a little. A skewer will help test when it’s just right. Cooling always firms them up a bit more, so don’t panic!
Conclusion
Craving more? Try whipping up molten lava cakes next or bake some chunky chocolate chip cookies. Both are surefire winners for your sweet tooth.