
 Pin it
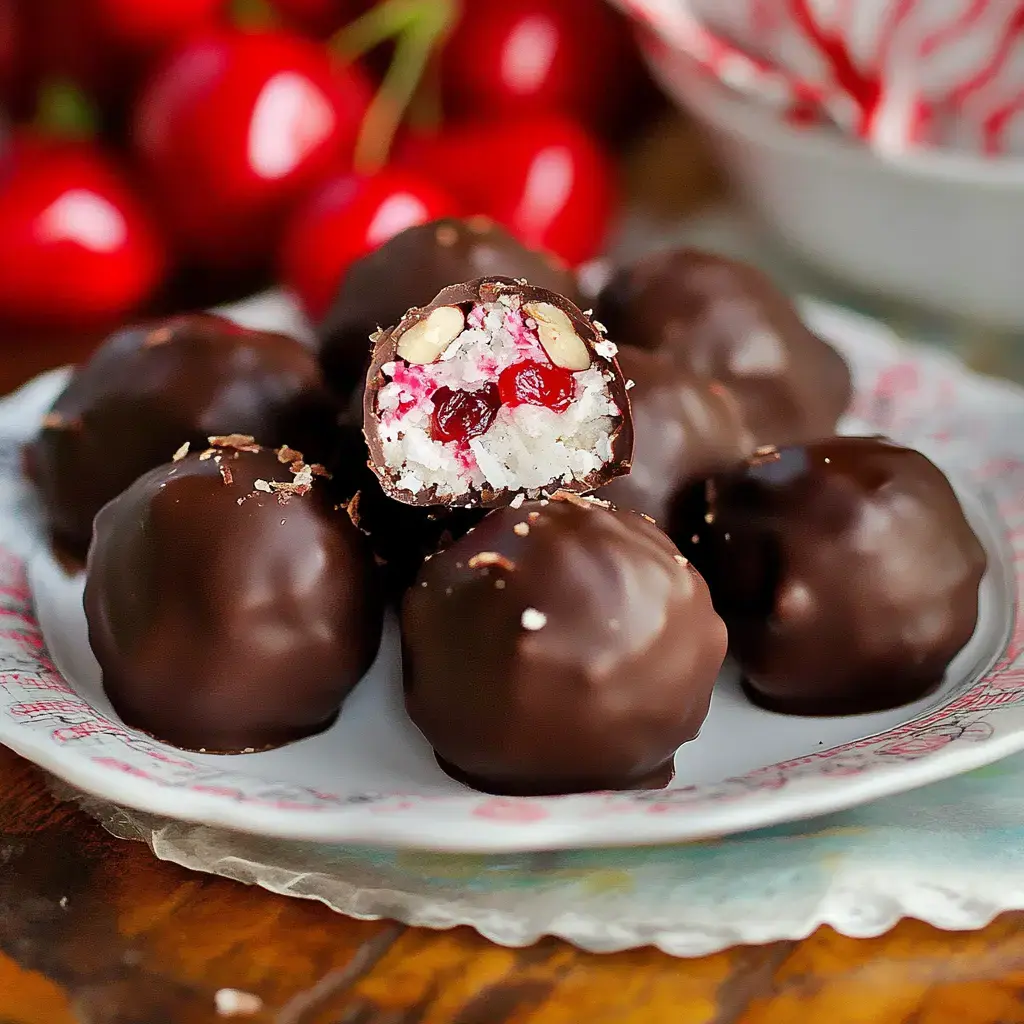
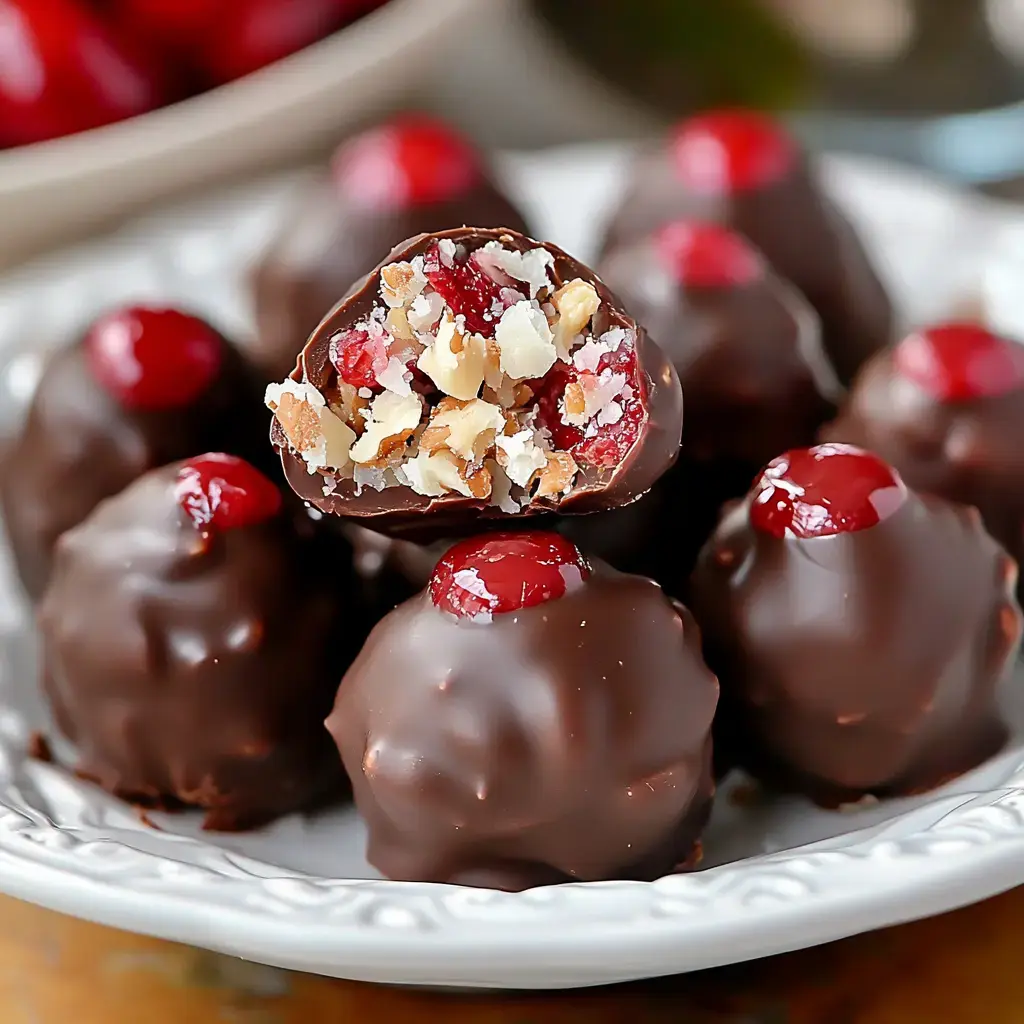
This Martha Washington Candy tradition comes from my grandma, and whipping up these treats signals the start of our holiday festivities! They're packed with coconut, pecans, and those vivid maraschino cherries, all hugged by chocolate. It's like a fancy chocolate-cherry combo meets creamy coconut goodness - you won't be able to stop at one!
What Makes These Treats Extra Special
I really dig how uncomplicated these candies are - no fancy gadgets needed! Just combine, cool, shape, and coat. They're perfect little gifts when boxed up, and they're always the first to vanish from our holiday get-togethers.
Grab These Ingredients
- Butter: Melt it beforehand for easier mixing.
- Powdered Sugar: Measure it loosely for best results.
- Good Vanilla: Splurge on pure extract - you'll taste the difference.
- Coconut: Look for sweetened flakes in the baking section.
- Condensed Milk: This gives everything that luscious texture.
- Cherries: Get maraschinos and make sure to chop and blot them thoroughly.
- Pecans: A quick toast brings out amazing flavor if you've got time.
- Chocolate: Ghirardelli melting wafers are my go-to choice.
Creating Your Sweet Treats
- First Steps
- Use your largest mixing bowl and toss in all ingredients except chocolate. Mix thoroughly - I get my hands dirty just like Grandma always did. The mixture should be sticky!
- Cooling Period
- Stick your bowl in the fridge for about two hours. Cold mixture is way easier to handle, trust me on this.
- Shape Time
- Form the mixture into bite-sized balls and arrange them on a parchment-lined baking sheet, then back to the fridge for 20 minutes.
- Chocolate Dipping
- Take your time melting the chocolate - patience pays off! Dip each ball using a fork, let excess drip off, then place on fresh parchment. Sometimes I add a sprinkle of coconut on top before they harden.
- Finishing Touch
- Allow them to rest until the chocolate completely firms up. They'll have that gorgeous glossy finish!
Tricks I've Learned
After countless batches over the years, here's what works best: Blot those cherries until they're completely dry or your filling will get too runny. Keep everything chilled as you work. Don't skimp on chocolate quality - it really shows in the final taste. And if you can find them, candy dipping tools make the coating process so much smoother!
 Pin it
Storage Secrets
These goodies stay fresh for around two weeks when stored in an airtight container - assuming they don't vanish before then! Store them in the refrigerator if your house is warm. Want to plan ahead? Form your balls, freeze them on a tray, then transfer to a freezer bag. They'll stay good frozen for months - just thaw in the fridge before the chocolate coating step.
Wonderful For Gifting
Each Christmas I box these up with pretty ribbons for homemade presents! My neighbors start asking about them by Thanksgiving. They're always a hit on holiday dessert tables too. Just don't forget to hide a few for yourself - they tend to disappear fast!
Try These Variations
I sometimes swap in walnuts when I'm out of pecans. My sister adds a tiny hint of almond extract for a flavor twist. When I'm feeling fancy, I'll add some white chocolate drizzle on top. They're pretty adaptable, so don't be afraid to experiment!
Family Memories
Making these candies always takes me back to cooking alongside my grandma. These days my kids join in, rolling the balls and adding toppings. It's become much more than just a sweet treat - it's our family tradition. Try them yourself, and maybe they'll become part of your holiday story too!
Frequently Asked Questions
- → Why should the filling be chilled before adding chocolate?
It helps keep the chocolate from melting and makes dipping much easier, avoiding any mess.
- → Are these candies freezer-friendly?
Definitely! You can store them in the freezer inside an airtight box for up to three months without any problem.
- → Why dry off the cherries first?
If there’s too much juice left on the cherries, the filling will turn soggy and the chocolate might not stick well.
- → Any tricks for dipping these without a mess?
Dipping tools come in handy! Remember to let extra chocolate drip off so you don’t get thick puddles underneath the candies.
- → How long can they stay fresh?
Keep them in an air-sealed container at room temperature, and they’ll be good for up to two weeks.