 Pin it
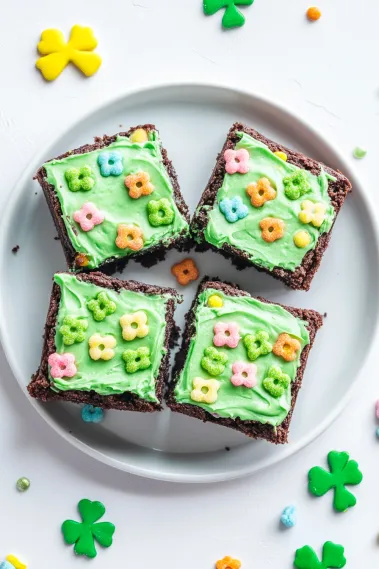
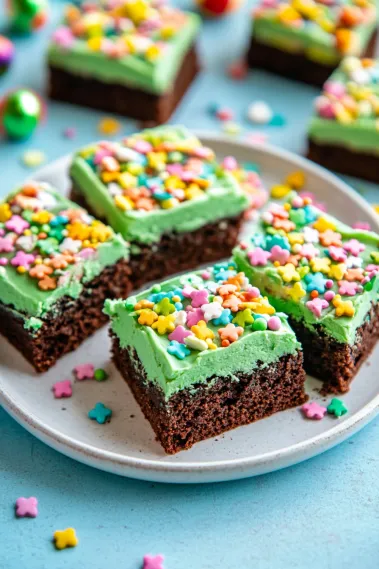
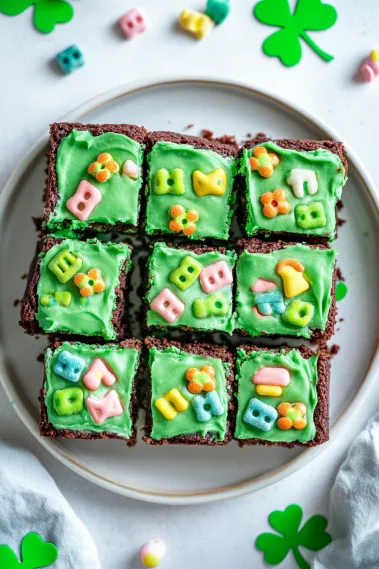
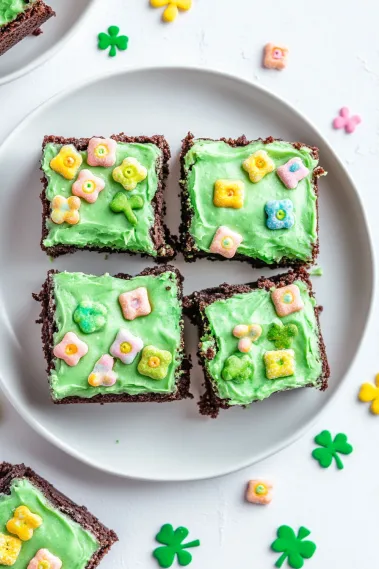
Turn regular boxed brownies into a fun St. Patrick's Day sweet with these Lucky Charms Marshmallow Brownies. Chewy, dense chocolate brownies filled with soft marshmallow fluff make an awesome base for the fluffy green marshmallow topping. The best part is the sprinkling of bright Lucky Charms marshmallows and sparkly edible gold bits that add playfulness to each bite. These yummy treats blend childhood cereal memories with classic chocolate brownies for a dessert everyone will go crazy for. They're great for St. Patrick's celebrations or whenever you want some rainbow magic on your plate.
I came up with this idea while hunting for a fun St. Patrick's Day treat that kids and grown-ups would both like. By mixing the fun of Lucky Charms bits with rich brownies and soft frosting, you get something that looks amazing and tastes even better. The way the fudgy brownies, smooth frosting, and little crunchy cereal pieces come together makes something way tastier than you'd expect from such simple stuff.
Key Ingredients and Smart Picks
- Brownie Mix: Go for a fancy fudge brownie mix to get the deepest chocolate flavor. Better brands usually make thicker, gooier brownies.
- Marshmallow Fluff: This goes inside and on top of the brownies. Try to get actual Marshmallow Fluff or Marshmallow Creme brands for the best results.
- Lucky Charms Marshmallows: You can sort them out from the cereal box or buy just the marshmallows online if you want to save time.
- Edible Gold Flakes: These add a fancy touch that really fits the St. Patrick's theme. You'll find them in cake supply shops or online.
Your choice of brownie mix really changes how good these turn out. When I switched from a cheap mix to a premium fudgy one, I couldn't believe the difference - the brownies were way thicker and gooier, which worked so much better with the light, airy frosting.
Step-by-Step Cooking Guide
- Step 1: Get Your Brownie Base Ready
- Heat your oven to 350°F and put parchment paper in a 9-inch square pan, letting some hang over the sides so you can lift the brownies out later. Spray the paper with cooking spray so nothing sticks. Mix up the brownie mix like the box says, but don't overmix or they'll get tough. Pour the mix into your pan and smooth it out flat.
- Step 2: Add Marshmallow Swirls
- Drop about 1/3 cup of marshmallow fluff in spoonfuls across your brownie batter. Take a knife or spatula and make a few swirls through the mixture. Don't mix too much - you want to see those little pockets of marshmallow in the finished brownies. These little spots will give you sweet surprises when you bite in.
- Step 3: Bake Them Right
- Cook the brownies for the time on the package, usually around 25-30 minutes. Check if they're done by sticking a toothpick in the middle - it should come out with a few crumbs but not wet batter. Let them cool completely on a rack. For extra gooey brownies, stick them in the fridge for 1-2 hours before adding the frosting. The cold brownies are also easier to cut neatly.
- Step 4: Make The Green Frosting
- In a big bowl, beat 1 cup (2 sticks) of room-temperature salted butter for about 2 minutes until it's light and fluffy. Mix in 1½ cups of marshmallow fluff until well combined. Slowly add 2 cups of powdered sugar, one cup at a time, starting on low speed so it doesn't fly everywhere. Add 1 teaspoon of vanilla extract and a bit of green food coloring until you like the shade. If the frosting's too thick, add 1-2 tablespoons of heavy cream until it's easy to spread.
- Step 5: Top And Finish
- Spread your green frosting evenly over the cold brownies. While it's still soft, scatter Lucky Charms marshmallows on top, pressing them down gently so they stick. Sprinkle some edible gold flakes for extra magic. For neat slices, put the decorated brownies in the fridge for about 15 minutes, then cut with a sharp knife dipped in hot water and wiped between cuts. Keep in a sealed container at room temperature for up to 3 days.
 Pin it
The first time I tried making these, I learned something about swirling technique. I mixed the marshmallow fluff in too much, and it pretty much vanished during baking. Now I just do a few gentle swirls, which makes beautiful pockets of gooey marshmallow all through the finished brownies.
Serving Ideas
You can serve these brownies in lots of different ways. For a St. Patrick's Day party, put them on a nice plate with some gold chocolate coins scattered around for extra festiveness. If you're taking them to a school event or bake sale, wrap each brownie in clear plastic with green ribbons. They also look great on a dessert table next to other green treats like mint cookies or lime cupcakes.
 Pin it
Fun Twists To Try
After making these brownies many times, I've tried several different versions to keep things interesting. For summer, try adding crushed graham crackers between the brownie and frosting to make them taste like s'mores. In winter, swap out Lucky Charms for crushed candy canes and make the frosting red or white. You can also play with different flavors in the frosting - a bit of mint or almond extract completely changes the taste while keeping the same festive look.
Keeping And Planning Ahead
These brownies work great for planning ahead. You can bake the unfrosted brownies up to three days early and keep them wrapped at room temperature, or freeze them for up to a month. You can make the frosting a day ahead and keep it covered in the fridge - just let it warm up and mix it again briefly before spreading. Once they're all put together, the brownies stay good at room temperature in a sealed container for up to three days, though the marshmallow bits might get a little soft over time. For longer storage, keep them in the fridge for up to a week, but bring to room temperature before eating for the best texture and flavor.
 Pin it
These Lucky Charms Marshmallow Brownies show how basic ingredients can turn into something special with a little creativity. By jazzing up boxed brownie mix with fun extras, you get a treat that's super tasty and captures the playful feel of St. Patrick's Day. The combo of fudgy chocolate base, fluffy marshmallow topping, and colorful cereal bits creates a treat with different textures that brings out everyone's inner kid while still being good enough for grown-up taste buds.
Frequently Asked Questions
- → Can I skip the box mix and make them from scratch?
- Of course! Just use your homemade brownie recipe for a 9-inch pan. The key is still swirling the marshmallow fluff in before baking. Once they cool, finish with the frosting and marshmallows as usual.
- → How do I separate the marshmallows from Lucky Charms?
- The easiest way is to pour some cereal into a bowl and pick out the marshmallows by hand. If you're short on time, you can buy just the marshmallows online too. For some fun, let kids sort them out while snacking on the cereal parts!
- → Can I prepare these ahead of time?
- Yep! Bake the brownies 1-2 days ahead and store them in an airtight container. If your kitchen's warm, popping them in the fridge helps the frosting stay firm. Let them sit out before serving so they taste their best.
- → Where can I buy edible gold flakes?
- Check out craft stores with baking sections, specialty baking shops, or online retailers. If you can't find gold flakes, gold sprinkles or colored sugar work just as well, or stick to the marshmallows for a festive look.
- → Can I go with a different frosting color?
- Absolutely! Green works for St. Patrick's Day, but try red for Valentine’s, orange for Halloween, or mix colors for birthdays. Divide the frosting and try multi-colored swirls for extra flair!
- → How do I keep leftover brownies fresh?
- Keep them in an airtight box at room temperature for up to three days. If you want them to last longer, refrigerate for up to a week. For saving them longer, freeze the unfrosted brownies and add frosting after thawing.
