
 Pin it
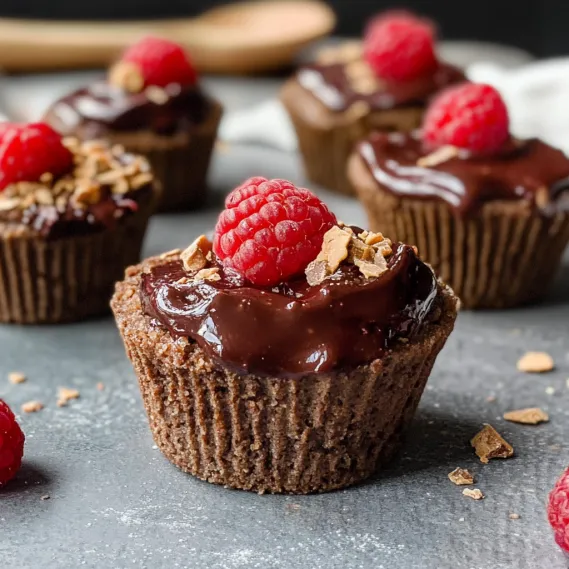
This dreamy, indulgent no-bake chocolate mousse in a nutty cup topped with fresh raspberry goodness has turned into my go-to treat for fancy get-togethers. The mix of smooth chocolate filling tucked inside a crunchy nut-based cup and crowned with bright raspberry sauce makes an unforgettable sweet that always wows everyone at the table.
I whipped up these mousse cups for the first time at my friend's engagement celebration when she asked for something "worth saying yes to." They were such a smash hit that folks started calling them "Marry Me Mousse Cups" – a nickname that's stuck around and now perfectly matches their special-occasion vibe.
What You'll Need
- Almond flour: Gives a nutty foundation that works amazingly with the chocolate while keeping things gluten-free
- Medjool dates: Add natural sweetness and stick the crust together without using white sugar
- Flax meal: Packs in healthy fats and makes the base just right – not too hard, not too soft
- Coconut cream: Creates that velvety, rich feel we want in a proper mousse without using dairy
- Frozen raspberries: Make life easier and give reliable flavor for that gorgeous red topping
- Chia seeds: Thicken the raspberry layer naturally while adding extra nutrition
- Cocoa powder: Brings deep chocolate taste to both the base and mousse parts
Steps For Amazing Marry Me No Bake Raspberry Chocolate Mousse Cups
- Mix up the chocolate base:
- Throw all your base stuff into a food processor and pulse till everything starts coming together. Keep going until you've got a sticky mix that stays together when you squeeze it. This usually takes about 2-3 minutes of processing, and you'll need to scrape down the sides now and then.
- Shape your cups:
- Put parchment paper cups in a muffin tin. Split the chocolate mixture evenly between cups. Push it down firmly and carefully work it up the sides to make a well in the middle. Dip the back of a spoon in cold water to help shape the cups without sticking. Stick them in the freezer for 15 minutes to get firm.
- Whip up the chocolate filling:
- Put coconut cream, cocoa powder, and pitted dates in your blender. Mix until completely smooth with no date bits showing, about 2-3 minutes. You want it thick but still pourable. Make sure to use both the solid and liquid parts if your coconut cream has separated.
- Fill your chocolate shells:
- Take the cups out of the freezer. Carefully spoon or pipe the mousse into each cup, filling them almost to the top. Smooth out the surface with the back of a spoon. Pop them back in the freezer for 2 hours to set completely.
- Cook up the raspberry sauce:
- Mix frozen raspberries, water, chia seeds, and cinnamon in a pot. Bring to a gentle simmer on medium heat, stirring every so often. Let it cook for 8-10 minutes, slightly mashing the berries with a wooden spoon. Take it off the heat while it's still a bit runny since it'll thicken more as it cools.
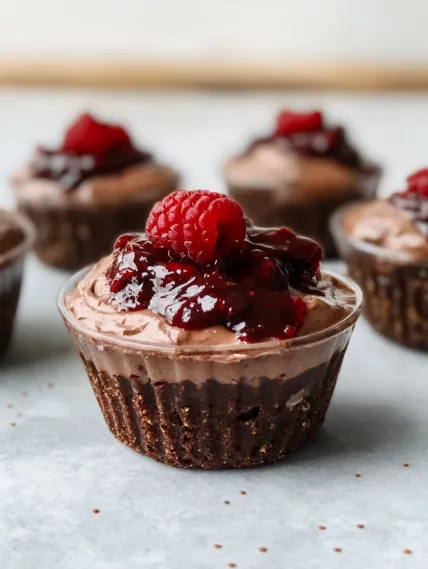
- Put it all together:
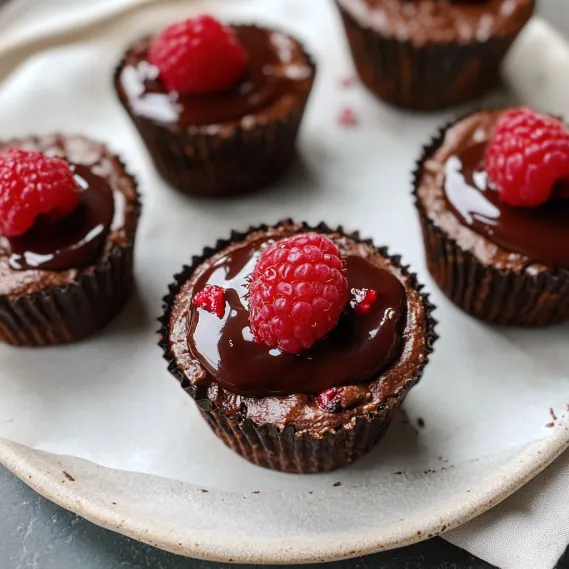
- After the raspberry mix has cooled down, spoon about 2 tablespoons onto each cold mousse cup. For extra fanciness, drizzle some melted chocolate on top if you want. Put them back in the fridge for 15-20 minutes before serving.
 Pin it
What really makes these mousse cups stand out is the Edward & Sons heavy coconut cream. After trying loads of different brands, I found this one has just the right fat content to make a silky mousse that holds its shape perfectly. My hubby always sneaks an extra cup when I make these for parties, saying they're just too tasty to share with others.
Prep In Advance
These mousse cups actually taste better when they sit a while. The flavors mix and mingle nicely after a day in the fridge. To get ahead, make the cups all the way through the raspberry topping, cover them loosely with plastic wrap, and keep in the fridge for up to 3 days. Add any fancy chocolate drizzle right before you serve them so they look their best.
Fun Twists
The basic version gives you lots of room to play around. Try swapping raspberries for strawberries, blackberries, or a mix of different berries. For something extra rich, add a layer of nut butter between the base and the mousse. During Christmas time, I sometimes put a bit of peppermint extract in the mousse and sprinkle crushed candy canes on top for a festive look.
How To Serve
For the best taste, take the mousse cups out of the fridge about 15 minutes before you plan to eat them. This lets the flavors wake up a bit at a slightly warmer temp. They go great with a small glass of dessert wine or a nice espresso to balance the sweetness. For fancy occasions, put each cup on a small plate with a dusting of cocoa powder and some fresh berries and mint leaves around it.
 Pin it
Switch It Up
If someone can't have almonds, you can use sunflower seed flour instead of almond flour and sunflower seed butter instead of almond butter. Oat flour works too, though it makes things a bit heavier. For folks avoiding coconut, blended silken tofu with melted chocolate can make a similar smooth texture, but it'll taste a bit different. When you can't find fresh dates, just soak dried ones in warm water for 15 minutes and they'll work fine in this recipe.
Frequently Asked Questions
- → Can I use something other than almond flour?
Sure, feel free to swap it for other nut-based flours or even mix oat flour with a bit of coconut for an interesting twist.
- → How much time is needed to chill the mousse cups?
You’ll need about two hours in the freezer for the base and mousse layers to firm up before finishing with the jam topper.
- → Will fresh raspberries work for the jam?
Of course! Fresh berries are fine, though you might need to tweak the cooking time to get the same texture.
- → Any alternatives for coconut cream?
Yes! Cashew cream or a thick almond-based option can step in to keep it dairy-free and still silky smooth.
- → What's the best way to store these?
Keep them in an airtight box in the freezer for up to a week. Let them sit out for a few minutes before digging in.