
 Pin it
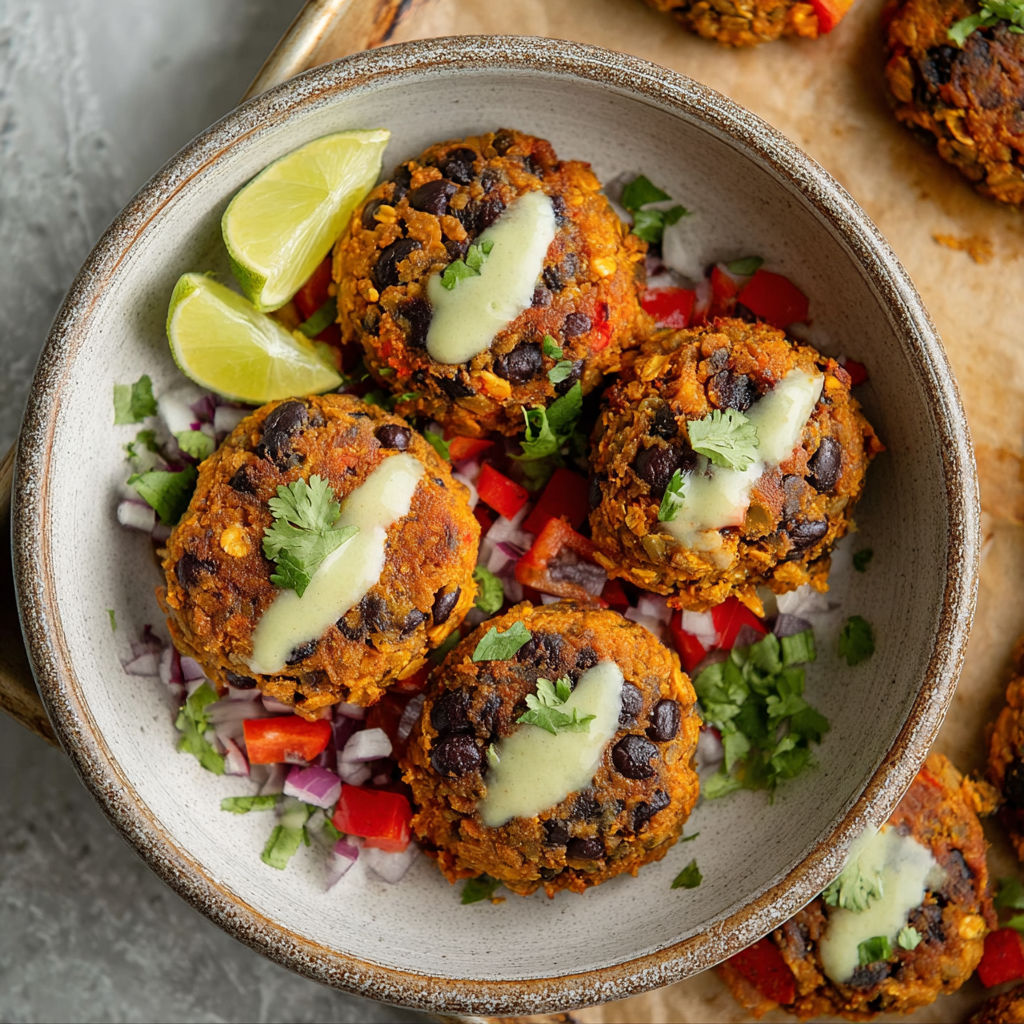
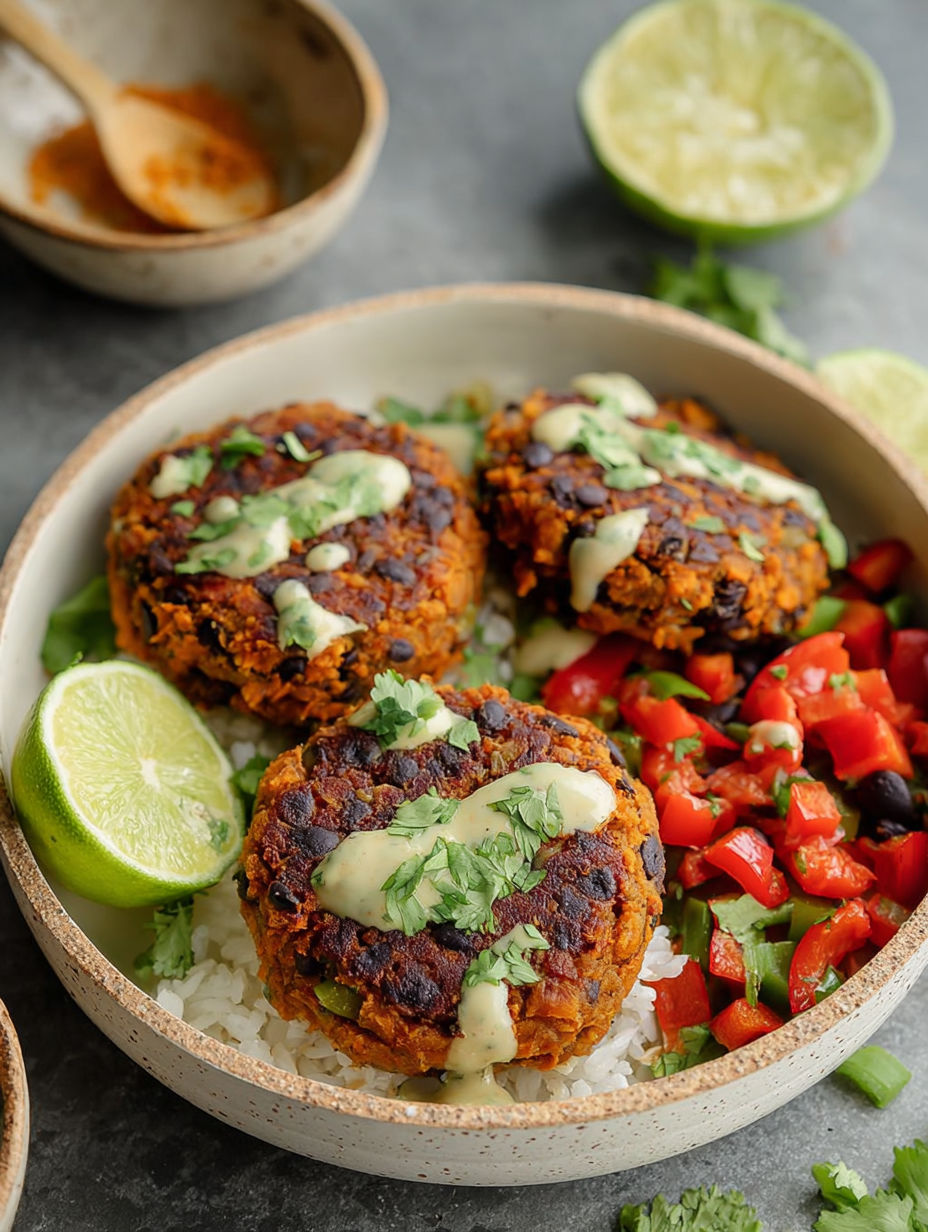
These zesty lime-soaked sweet potato black bean cakes turn basic pantry staples into an amazing flavor explosion that'll fill you up and make you smile. The oven-baked sweet potatoes bring natural sweetness while the tangy lime coating adds that perfect brightness that makes these cakes truly stand out from the crowd.
I came up with this dish when I needed something my veggie-loving daughter and meat-crazy partner would both eat. The first time these cakes hit the table, everyone went quiet then suddenly started asking for more.
- Black beans give you that filling protein boost and firm up nicely when baked
- Sweet potatoes work as a natural binder plus add sweetness and lots of good stuff
- Rolled oats help everything stick together without needing eggs or breadcrumbs
- Yellow onion and red bell pepper bring moisture and amazing smell
- Garlic gives that must-have savory punch that works so well with beans
- Smoked paprika adds that cooked-over-fire taste without the grill
- Ground coriander and cumin bring warm earthiness that makes beans taste better
- Fennel seeds throw in a surprise licorice hint that plays off the sweetness
- Vegan bouillon cranks up the savory richness for a satisfying bite
- Tamari adds that salty depth that pulls all flavors into harmony
- Lime juice cuts through with that bright tang that makes these cakes pop
- Agave syrup softens the lime's edge with just enough sweetness
Crafting Sensational Lime Soaked Sweet Potato Black Bean Cakes
- Prepare the beans
- Drain and wash your black beans well then spread them out on a baking sheet lined with parchment. This baking step can't be skipped because it dries out the beans so your cakes won't turn mushy. You'll know they're ready when they feel a bit dried out to touch.
- Roast the vegetables
- Put sweet potato chunks on one half of another baking sheet and the chopped onion, bell pepper, and garlic on the other side. Add a little oil and sprinkle with salt. Cooking them apart lets each get that amazing brown caramelization that makes them taste so good. Poke the sweet potatoes with a fork to check - they should be soft but not falling apart.
- Combine and process
- Let everything cool down a bit then dump it in your food processor with the oats and spices. Don't blend continuously - just pulse it. You want everything to mix but still keep some chunks. Stop and scrape the sides now and then. The mix should be sticky enough to form cakes but still have some texture to it.
- Form and bake
- Use a measuring cup to scoop out the mix so all your cakes cook the same. Push down firmly when shaping them so they don't fall apart. A quick spray of oil helps them get crispy outside. This first bake sets them up before you add the lime coating.
- Apply the lime coating
- Mix up the lime sauce ingredients until they're well combined. Use a brush to paint both sides of the cakes generously. This step gets that bright lime flavor all over the outside and makes them look shiny too. The second trip to the oven with the coating creates an awesome caramelized crust.
- Rest before serving
- Don't rush to eat them right away - let the cakes sit for at least 10 minutes after baking. They get much firmer during this time which makes them easier to pick up and gives them a better texture. Brush on a bit more lime coating just before serving for an extra fresh kick.
Fennel seeds are what makes these cakes special. Nobody can ever guess what that mystery flavor is, but everyone comments on how good it tastes. My daughter once told me she'd choose these as her "stranded on an island food" and could happily eat them forever.
Prep Ahead Ideas and Keeping Fresh
These cakes work great for meal planning and actually taste even better the next day. Put cooled cakes in a sealed container with parchment paper between them so they don't stick together. They'll stay good in the fridge for about 4 days. To freeze them, lay them out on a baking sheet until they're solid, then move them to a freezer bag. When you want them, heat frozen cakes in a 350°F oven for around 15 minutes until they're hot all the way through.
 Pin it
Tasty Pairing Ideas
These flexible cakes work in so many ways. Try them sandwich-style on toasted buns topped with avocado slices, fresh arugula, and extra lime sauce. For something lighter, crumble them over a bowl of mixed greens with little tomatoes and a simple dressing. They're also great next to some roasted veggies and quinoa for a complete dinner. My family loves them wrapped in warm corn tortillas with shredded cabbage and a spoonful of cashew cream on taco nights.
Swap-Out Options
No sweet potatoes around? Try butternut squash instead - it's just as sweet and works the same way. If you're out of black beans, grab some pintos though they'll change the flavor a bit. Don't have oats or can't eat them? Quinoa flakes work perfectly too. Not into agave? Just use maple syrup or honey in the lime sauce. Don't like fennel seeds? Just leave them out or use a smaller amount of ground fennel if you want a milder version.
 Pin it
Frequently Asked Questions
- → Why roast beans and veggies before making patties?
Roasting takes out extra moisture that could make the patties fall apart. It also deepens the flavors, giving the patties a caramelized, nutty taste you’ll love.
- → Do I need a food processor for this?
Nope! You can swap in quick oats for rolled oats and mash everything by hand with a potato masher. If you’ve got an immersion blender, that works too for blending it all up.
- → What sauces go best with these patties?
A few ideas: mix vegan mayo, ketchup, garlic, and lime for a quick sauce. Cilantro lime dressing or a jalapeño lime crema also pair perfectly with the lime glaze.
- → How can I speed up prep time?
Simplify by using pre-cut or frozen veggies. A food chopper can slice your prep time too. While the patties bake, whip up the lime glaze or dipping sauces to save time.
- → Why let the patties cool before eating?
They need 5-10 minutes to set after baking. This cooling time firms them up so they don’t crumble when eaten, locking in that perfect texture.
- → Can you freeze these patties?
Absolutely! Cool them completely after baking, then place them in a container with parchment between layers. Freeze up to 3 months. Bake them straight from frozen at 375°F for 15-20 minutes when ready to eat.