Lava Brownies

Featured in Indulgent Dessert Recipes to Satisfy Any Sweet Tooth.

These luscious brownies hide a frozen ganache core that melts into a flowy chocolate center during baking for a delightful lava effect.

A man wearing a white shirt and suspenders holding a piece of paper.
Updated on Tue, 18 Mar 2025 20:53:16 GMT
A delightful molten chocolate lava brownie plated with fresh raspberries and a sprinkle of sugar. Pin it
A delightful molten chocolate lava brownie plated with fresh raspberries and a sprinkle of sugar. | chefmelt.com

Dreamy Homemade Molten Brownies

After many chocolate cravings, I've nailed down these brownies with gooey centers. They've got a chewy exterior that hides warm melted chocolate waiting to flow out when broken open. I turn to this treat whenever I want to wow guests or need a serious chocolate fix myself. Once you bite into one, standard brownies just won't cut it anymore.

What Makes These Treats Irresistible

You'll fall head over heels for these decadent chocolate squares:

  • Deep chocolate taste that's super doable in your kitchen
  • A wonderful contrast between crisp edges and flowing middles
  • Sophisticated enough for special occasions yet straightforward for everyday
  • Can be prepared beforehand for stress-free serving

Simple Components For Molten Brownies

  • Semi-Sweet Chocolate: Quality baking bars work wonderfully, though chips can do the job too.
  • Unsweetened Chocolate: Gives your treats that intense chocolate punch.
  • Butter: Nothing fancy needed - standard sticks work great here.
  • Eggs: Let them sit out a bit before using for best outcome.
  • Sugar: Just the right amount for balanced sweetness.
  • Flour: You'll need only a small amount for the perfect texture.

No-Fuss Preparation Method

Create Your Flowing Center
Blend melted chocolate, butter and sugar together then stick the mixture in the freezer until solid.
Mix Up Your Outer Layer
Get your chocolates and butter melted, then stir in sugar and eggs. Add flour with minimal mixing - the batter comes together fast.
Put It All Together
Pour batter into your muffin cups halfway, add your frozen chocolate chunks, then top with remaining batter.
Into The Oven
Bake at 350°F until you see set edges while maintaining that runny middle.
Ready To Enjoy
Allow them to cool slightly before serving alongside ice cream or fresh fruit.

Tricks For Guaranteed Results

  • Center Preparation: The freezing step isn't optional - it's crucial for that flowing middle.
  • Flour Measurement: Use a flat edge for perfectly measured flour every time.
  • Careful Watching: They can go from perfect to overdone in minutes.
  • Baking Container: Larger muffin tins give these treats a restaurant-quality look.
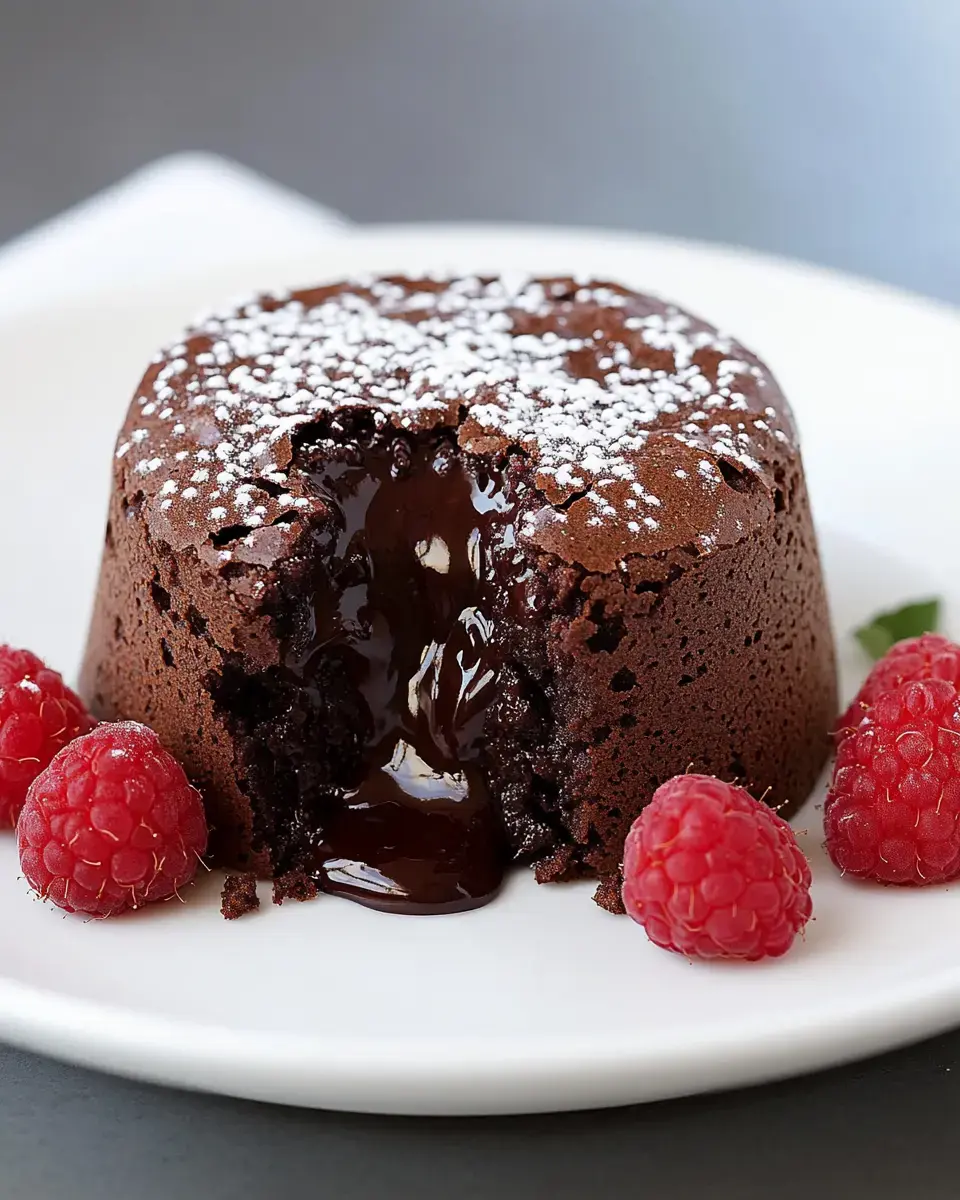
A molten chocolate dessert oozing from the center is served on a plate with fresh raspberries. Pin it
A molten chocolate dessert oozing from the center is served on a plate with fresh raspberries. | chefmelt.com

Make-Ahead And Keeping Fresh

You can mix everything up a day before and store the batter in your fridge under wrap. They taste best fresh from the oven, but will stay good for a couple days. Just heat them quickly in the microwave to bring back that melty middle.

Chocolate Heaven In Every Bite

The magic happens when you combine that chewy brownie shell with the flowing chocolate inside. They look fancy on a plate but don't need pro skills to make. Add some ice cream or berries on the side, and you've got a knockout dessert that'll make everyone think you spent hours in the kitchen.

Frequently Asked Questions

→ What’s the purpose of freezing the chocolate center?

Chilling the center ensures it doesn’t melt too early, so the gooey lava effect emerges as it bakes.

→ Can I prepare them in advance?

You bet! You can store the uncooked brownies in the fridge for up to a day before baking them fresh.

→ Why would I use a jumbo muffin pan?

It’s ideal for portioning, giving you the perfect brownie-to-lava ratio in each piece.

→ Can leftover brownies be warmed up later?

Absolutely! Pop them in the microwave for a quick reheat, though they’re best straight from the oven.

→ Why is cooling important before taking them out of the pan?

Letting them cool for a bit helps solidify the brownie structure while keeping the center beautifully gooey.

Lava Brownies

Gooey chocolate brownies with a surprise molten chocolate filling, made for creating the ultimate homemade dessert experience.

Prep Time
20 Minutes
Cook Time
25 Minutes
Total Time
45 Minutes

Category: Dessert Recipes

Difficulty: Difficult

Cuisine: American

Yield: 6 Servings (6)

Dietary: Vegetarian

Ingredients

01 1/3 cup of thick whipping cream.
02 1 stick (1/2 cup) of unsalted butter.
03 A cup of semisweet chocolate pellets.
04 1.5 sticks of unsalted butter.
05 4 ounces of dark baking chocolate.
06 1 and 1/2 cups of white sugar.
07 An egg yolk plus 3 whole eggs.
08 1 teaspoon of pure vanilla flavoring.
09 3/4 cup of regular all-purpose flour.
10 A quarter teaspoon of fine sea salt.
11 Some fresh raspberries to garnish.

Instructions

Step 01

On a low flame, stir together the chocolate chips, heavy cream, and butter in a small pan until everything melts and blends smoothly.

Step 02

Pour the melted mix into a bowl and let it settle for exactly 15 minutes before covering it up.

Step 03

Chill the chocolate mixture in the freezer for about an hour, letting it thicken to a fudge-like texture.

Step 04

Split the mixture into six same-sized pieces, roll into balls, and put them back in the freezer.

Step 05

Set your oven to 175°C (350°F) and grease a jumbo muffin tin with care to avoid sticking.

Step 06

In a microwave-safe bowl, melt the butter, additional chocolate chips, and dark baking chocolate—heat in 30-second bursts, stirring in between, until smooth.

Step 07

Using a hand mixer, whisk the sugar and eggs for exactly three minutes until the mix thickens and becomes pale.

Step 08

Pour vanilla extract into the egg mix, followed by your melted chocolate. Stir until evenly combined.

Step 09

Carefully fold in the salt and flour into the chocolate batter. Don’t overmix—just until it all comes together.

Step 10

Scoop the batter evenly into all six sections of the muffin tin.

Step 11

Push one frozen chocolate ball into the center of each batter portion.

Step 12

Make sure each chocolate ball is completely hidden under the brownie batter.

Step 13

Pop the tray into the oven and bake for about 25 minutes, or until the edges set but the centers still look gooey.

Step 14

Let the baked cakes cool for a short 3-5 minutes before carefully removing them from the tin.

Step 15

Serve the treats with fresh raspberries while the center is still warm and flowing.

Notes

  1. Fancy like a restaurant dessert.
  2. You can prepare parts ahead of time!
  3. Perfect for celebrating special events.
  4. Tastes best eaten fresh and warm.

Tools You'll Need

  • Large muffin tin (6 cups).
  • A hand mixer to whisk eggs and sugar.
  • A saucepan for melting the chocolate mixture.
  • A bowl safe for use in a microwave.

Allergy Information

Please check ingredients for potential allergens and consult a health professional if in doubt.
  • Milk products (cream, butter).
  • Eggs are included.
  • Contains wheat from the flour.

Nutrition Facts (Per Serving)

It is important to consider this information as approximate and not to use it as definitive health advice.
  • Calories: 580
  • Total Fat: 38 g
  • Total Carbohydrate: 65 g
  • Protein: 8 g