
 Pin it
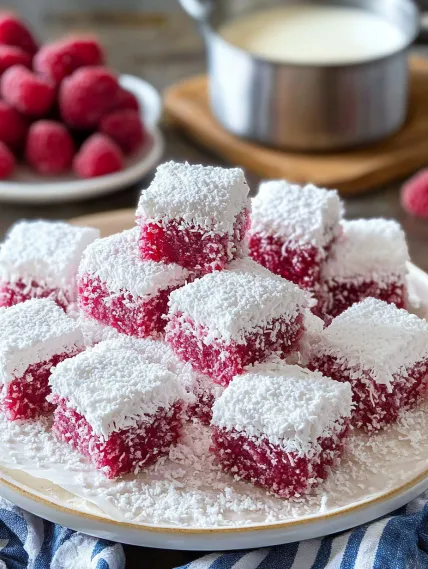
Pink Coconut Squares feature a fun spin on a beloved Australian sweet treat. Fluffy, light cubes of warm milk cake get dunked in a tangy raspberry coating and rolled in fine coconut flakes. This mix creates just the right balance of soft cake, fruity tang, and tropical crunch. These eye-catching rosy bites will wow everyone at your next tea party or celebration.
I whipped these pink coconut squares up for a backyard bash last year and couldn't believe how many folks who said they'd "just grab one" kept sneaking back for more. The light berry taste makes them seem less filling than chocolate ones, which guests used as the perfect excuse for "another tiny piece."
Key Components and Buying Advice
- Eggs: Use ones straight from your counter, not the fridge, so they whip up bigger and make your cake super fluffy.
- Cake Flour: Its lower protein makes cakes softer. Don't have any? Mix all-purpose flour with cornstarch—take out 2 tablespoons flour, add in 2 tablespoons cornstarch.
- Raspberries: When they're in season, grab fresh ones for best flavor, but frozen ones work great too and often cost less.
- Desiccated Coconut: The fine stuff sticks better than big shreds. You can find it at fancy food shops or online markets.
- Gelatin: Pick the plain kind for the right glaze texture. The powder type works better than sheets for this recipe.
I've learned that your berries can make or break these squares. When raspberries are at their peak locally, nothing beats them for flavor. But during winter months, good quality frozen berries actually taste better than the fresh ones that traveled across the world to reach your store.
Step-by-Step Baking Guide
- Step 1: Mix Up Your Sponge Base
- Set your oven to 350°F and put parchment in an 8-inch square tin. Heat ½ cup milk with 3 tablespoons butter in a small pot. In another bowl, mix 1½ cups cake flour, 1½ teaspoons baking powder, and ¼ teaspoon salt. Whip 3 room-temp eggs until foamy, then slowly add 1 cup sugar while beating until it looks pale and thick.
- Step 2: Finish and Bake Your Cake
- Add 1 teaspoon vanilla to your egg mix, then carefully fold in your dry stuff in three batches, switching with the warm milk mix. Pour everything into your lined pan, smooth the top, and bake about 25-30 minutes until a toothpick comes out clean when poked in the middle.
- Step 3: Get Your Cake Ready for Coating
- Let the cake sit in its pan for 10 minutes, then move it to a rack to cool totally before trimming the edges and cutting into 16-18 equal cubes. You can peel off any dark crust if you want, then pop the squares on a tray and stick them in the freezer for 20 minutes so they're easier to handle.
- Step 4: Create Your Berry Coating
- Put 1 tablespoon plain gelatin in 3 tablespoons cold water and let it sit. Cook 2 cups raspberries with ¼ cup water until soft, then squish them and push through a strainer to get rid of seeds. Stir in 3 cups powdered sugar until smooth.
- Step 5: Coat Your Cake Squares
- Warm your raspberry mix gently, add the soaked gelatin, then cool until it thickens but still pours easily. Take one frozen cake cube at a time, dunk it fully in the pink mixture using a fork, let extra drip off, then roll in coconut to cover all sides before setting on a wire rack to firm up.
 Pin it
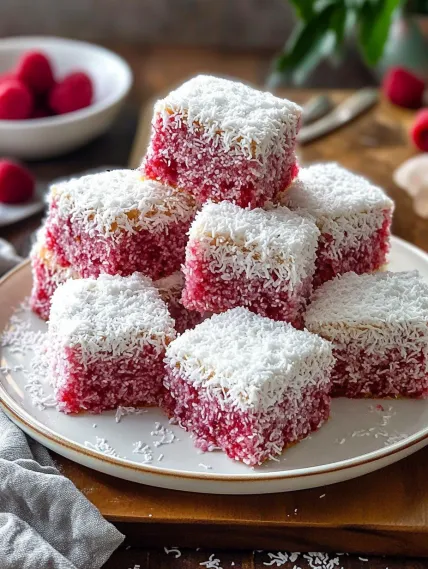
My first try at these pink squares taught me why freezing the cake bits matters so much. Without chilling them first, my soft cake just broke apart in the glaze. Now I always stick them in the freezer for at least 20 minutes, which gives me perfect squares with sharp edges and even coating.
The Magic Behind Fluffy Sponge
When you beat eggs and sugar for a long time, you trap tiny air bubbles that make your cake light and airy. The warm milk trick helps the sugar dissolve fully and keeps the eggs stable, creating a cake that's both soft and strong enough to hold up when dipped. This hot milk sponge works perfectly for these coated squares.
 Pin it
Prep Ahead and Keeping Fresh
These treats actually taste better the next day when flavors have mingled. You can bake the cake up to two days early and keep it wrapped at room temp. Finished squares stay good in a sealed container in your fridge for three days or in your freezer for up to three months.
Try These Tasty Twists
While raspberry makes stunning pink treats, you can swap in other fruits too. Try blackberries for deep purple squares, mangoes for bright yellow ones, or passionfruit for something exotic. Adding lemon zest to your cake batter brings a nice zingy contrast to any fruit coating you choose.
Classic Ways to Serve
In Australia, folks usually enjoy these squares with a cup of tea. For a fancier dessert, cut them in half and add whipped cream and fresh berries between the layers. They also taste great with coffee, making them perfect for afternoon get-togethers or a special breakfast treat.
Fixing Common Problems
If your cake sinks in the middle, you probably didn't beat the eggs and sugar long enough. When coconut won't stick right, warm your glaze slightly. For neater cutting, chill your cake in the fridge before slicing. If your coating seems too runny, just stir in more powdered sugar bit by bit.
 Pin it
Smart Baking Shortcuts
- Leave cake squares in the freezer overnight for super clean edges when dipping
- Pour some white icing over the raspberry coating before adding coconut for a cool marble look
- Hold squares with a fork and spoon when dipping to keep your hands clean and get even coverage
- Put parchment paper under your work area before you start dipping for way easier cleanup
- When your glaze gets too thin, just add more powdered sugar a spoonful at a time
Frequently Asked Questions
- → Can fresh raspberries replace frozen ones?
- Sure, fresh raspberries work just fine in equal amounts. They might make the glaze slightly brighter in flavor. Plus, if fresh raspberries are already sweet and ready, no need to thaw anything - toss them right into the recipe with the sugar for the same result.
- → Why put cake squares in the freezer?
- A quick chill—about 30 minutes in the freezer—helps firm up the cake, making it easier to dip into the glaze without falling apart. It also slows glaze absorption and sets the coating quickly for neat results.
- → Can I prepare them ahead of time?
- Absolutely! They taste even better after a day or two as the flavors settle. Keep them refrigerated in a sealed container for up to three days. Let them warm up to room temperature for about 30 minutes before enjoying. You can even freeze the unglazed sponge for up to a month if needed!
- → What if I can’t find desiccated coconut?
- Shredded coconut is a great substitute. Just give it a quick pulse in a blender if the pieces are too long, so they stick better to the glaze. Both sweetened and unsweetened versions work, though unsweetened keeps things balanced.
- → How do I avoid a dense sponge cake?
- Whip those eggs and sugar well—don't rush it! Beat them until they’re super pale and have tripled in volume. Other tips? Use room temp ingredients, avoid overmixing when adding the flour, and make sure not to peek (no opening the oven!) while baking. Lastly, ensure your baking powder is fresh!