
 Pin it
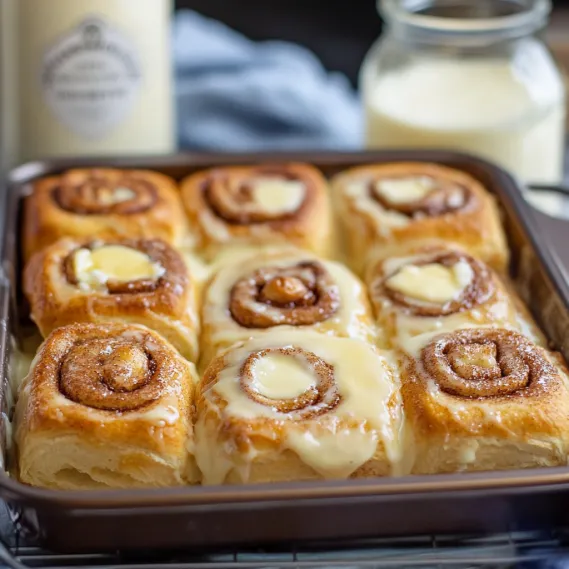
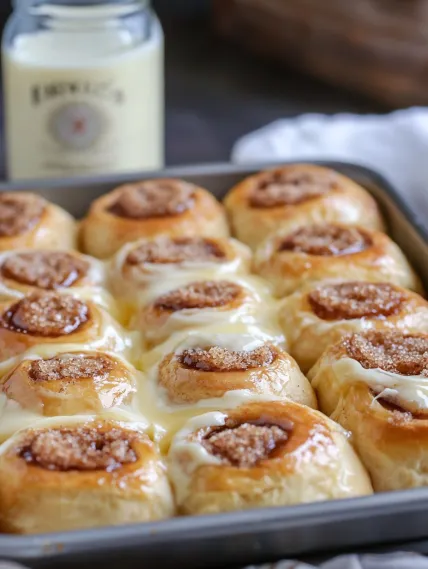
This indulgent cheesecake Danish turns regular King's Hawaiian rolls into a fancy morning treat that seems like it's from an upscale bakery. The combo of soft, sweet rolls and smooth cheesecake filling makes an addictive texture that'll have everyone going back for more.
When I first whipped these up for a family get-together, my nephew said they were "way better than anything from a bakery" and now he asks for them whenever he stops by. What began as a quick fix when I didn't prepare a proper sweet treat has turned into our go-to special breakfast.
Ingredients
- King's Hawaiian sweet rolls: The key foundation that gives just the right sweetness and soft texture
- Cream cheese: Go with full fat for the creamiest, richest results
- Butter: Pick unsalted to manage the taste better
- Brown sugar: The dark kind adds richer caramel notes
- Cinnamon: Grinding it fresh will boost the flavor
- Nutmeg: Grating it yourself makes a big difference
- Granulated sugar: Cuts through the cream cheese tang nicely
- Egg: Holds the cheesecake mixture together
Easy Preparation Steps
- Get your dish ready:
- Melt 1 tbsp butter and coat the bottom of a 9×13 baking dish. This adds flavor and stops sticking.
- Fix up the rolls:
- Set rolls on the melted butter and cut an X into each one about two-thirds of the way down without going through the bottom. This makes pockets for filling while keeping everything together.
- Mix up the butter combo:
- Stir together melted butter, brown sugar, nutmeg and cinnamon until well mixed. Pour it all over the rolls, letting it sink into cuts and around edges for max flavor.
- Whip up cream cheese mix:
- Beat softened cream cheese until totally smooth before adding sugar. Mix well then add beaten egg. You want it completely lump-free for the perfect filling.
- Stuff the rolls:
- A piping bag with big tip works best. Push tip into the X cuts and fill each roll with plenty of cream cheese mix. Take your time so filling goes inside rather than sitting on top.
- Cook them just right:
- Bake uncovered at 375°F for exactly 12 minutes for soft results. The filling should set but stay creamy, and rolls should keep their softness while getting slightly golden edges.
 Pin it
These take me back to the Danish pastries my grandma would make from scratch every Christmas morning. Her version took many hours of work, but these capture that same wonderful taste in way less time. The way the cream cheese filling slightly melts into the sweet dough creates that authentic Danish texture we all love.
Keeping Them Fresh
These yummy treats stay fresh when kept in a sealed container in the fridge for 3-4 days. When you want to enjoy leftovers, warm them in the microwave for about 15 seconds to bring back that just-baked softness. The cream cheese filling actually tastes even better after sitting in the fridge for a day, making them possibly tastier on day two.
 Pin it
Tasty Twist Ideas
The standard version makes a perfect classic Danish, but you can easily change up the filling for different flavors. Mix in a spoonful of jam to the cream cheese for fruity options like strawberry or blueberry. For a more dessert-like treat, add mini chocolate chips or drizzle melted chocolate on top after baking. During autumn, adding some pumpkin puree and pumpkin spice to the cream cheese makes a seasonal favorite that goes great with coffee.
What To Serve With Them
These cheesecake Danishes go great with fresh fruit for a well-rounded breakfast. For a special brunch, put them next to a savory egg dish for the perfect sweet-savory combo. Coffee is the traditional drink pairing, but they're also fantastic with hot tea or even a mimosa for celebrations. As dessert, try them warm with a small scoop of vanilla ice cream for an extra special treat.
Frequently Asked Questions
- → Can I get these ready in advance?
Absolutely! Prep the cream cheese filling and the buttery topping before, refrigerate them, and assemble the rolls just when you're ready to bake.
- → Can I swap out the type of rolls?
King's Hawaiian rolls are ideal for their sweetness, but feel free to try other soft rolls. Just know the taste might be a bit different.
- → What if I don’t own a piping bag?
No worries! A regular zip-top bag works great. Snip a corner off to pipe the filling, or use a spoon to scoop it into the rolls.
- → How should I save leftovers?
Pop them in a sealed container and keep them in the fridge for 3 to 4 days. Warm them up in the microwave or oven before eating.
- → Can I change up the filling flavors?
For sure! Add some zest, vanilla, or even fruity spreads into the mix for a unique twist that's all yours.