
 Pin it
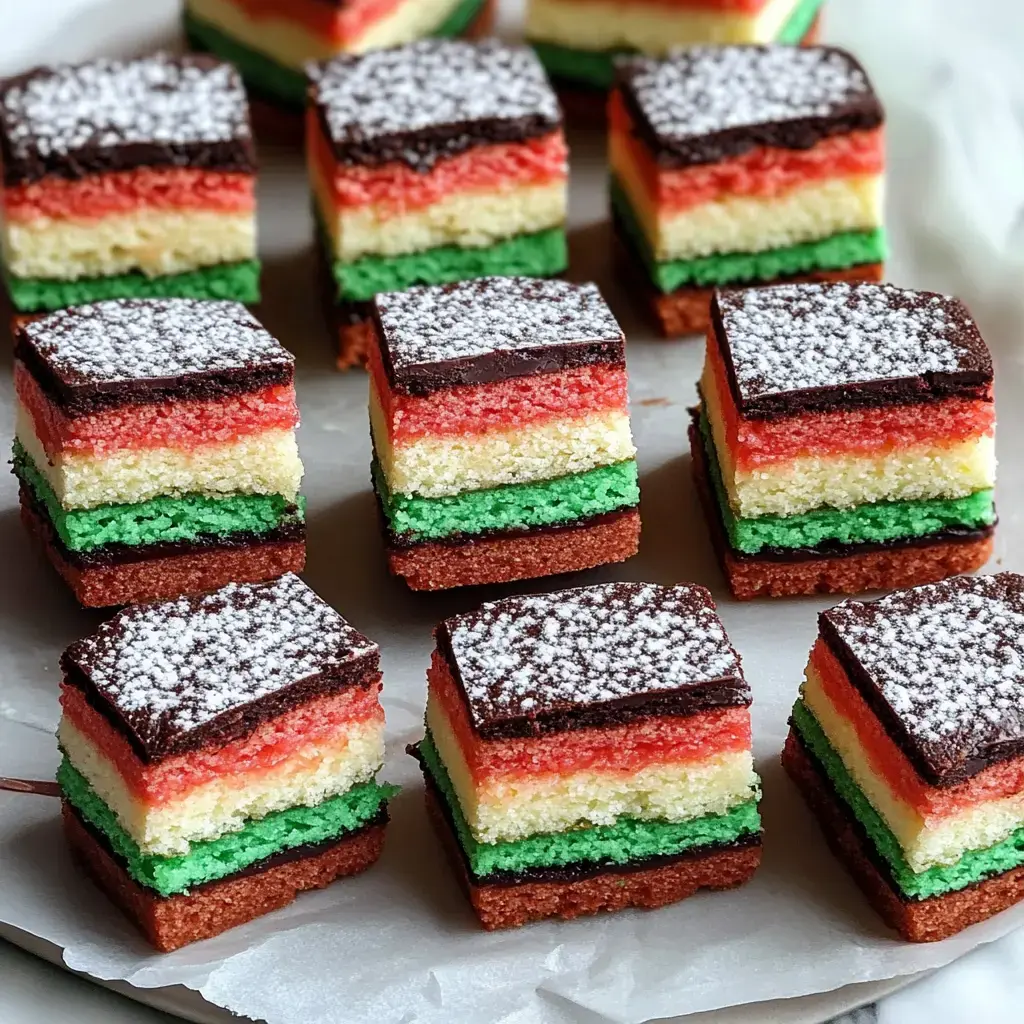
Colorful Almond Tricolor Squares
I'm excited to pass down my grandmother's beloved method for these multilayered almond treats. During December festivities, my home transforms into a production zone for these gorgeous stacked delights. They need some patience, but trust me—this straightforward approach creates the most delicious squares with wonderful almond taste, soft layers, and the perfect chocolate coating. After you try making these at home, you'll wonder why you ever bought them.
What Makes These Squares Special
These delightful homemade treats are wonderful because:
- They surpass anything you'll find at fancy neighborhood bakeries
- The simple stacking technique makes gorgeous holiday goodies
- You're free to switch up the fruit filling and chocolate coating
- The batch is generous enough for friends and family (if you don't finish them first)
Simple Components for Tricolor Squares
- Eggs: Split them with care, as the whites create our airy, delicate texture.
- Almond Paste: The foundation of the authentic flavor, absolutely essential.
- Granulated Sugar: Delivers the perfect soft bite we're looking for.
- Margarine or Butter: Both do the job wonderfully, so use your preference.
- All-Purpose Flour: Standard pantry flour works perfectly for these treats.
- Food Coloring: Grab the gel variety for vibrant, striking colors.
- Raspberry or Apricot Jam: Pick whichever you enjoy most, they're both fantastic.
- Bittersweet Chocolate: Quality matters here—better chocolate means tastier treats.
Straightforward Making Process
- Mixing Your Foundation
- First, whip those egg whites until they form gentle peaks like little mountains. In another bowl, beat the almond paste until it's completely smooth. Add your butter and mix until it looks like whipped cream. Put in egg yolks one by one, then a little almond extract for that amazing smell. Carefully fold in those fluffy egg whites—they'll make our layers super light.
- Adding the Vivid Colors
- Grab three separate bowls and split your mixture evenly—a kitchen scale works great here. Now for the fun part—mix red color into one bowl, green into another, and leave the last one white. Take your time stirring until each color looks bright and even. Carefully spread each colored batter into its own lined pan, making sure it's smooth all the way to the edges.
- Careful Oven Time
- Keep a close eye on these layers as they only need about 8-10 minutes. They're done when they bounce back slightly when touched. Don't let them turn golden—we want those bright colors to stay true. Let them cool completely on racks before moving forward.
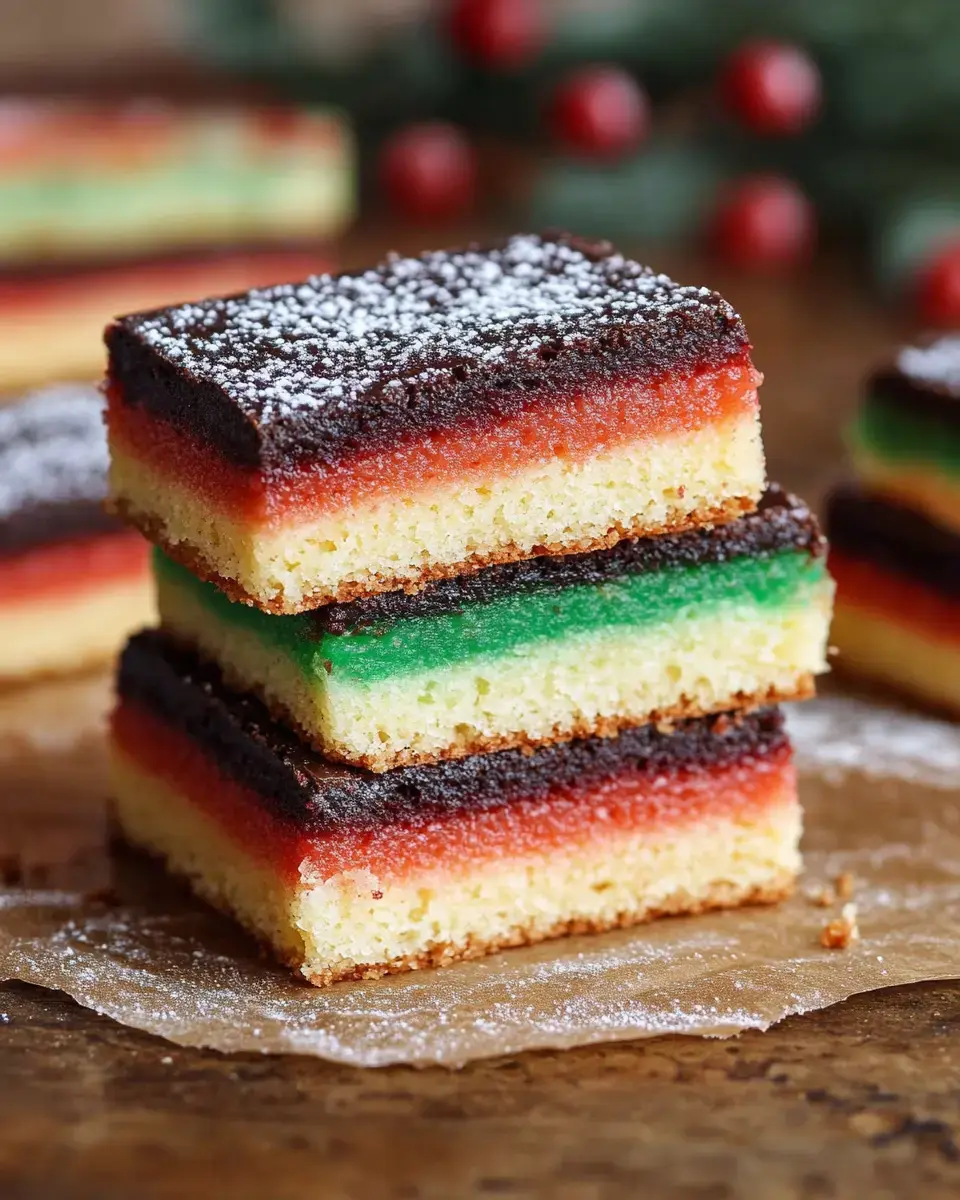
- Crafting the Stack
- Now we'll build our masterpiece. Start by putting down the green layer, spread jam across it. Next comes the white layer, more jam, then finally top with the red layer. Wrap everything tightly in plastic and here's the trick—put a heavy pan on top and leave it overnight. This presses everything together perfectly.
- Finishing with Chocolate
- Slowly melt your chocolate until it's silky smooth. Pour half on top and spread it all the way across, then chill until firm. Turn everything upside down and do the same on the other side. Once fully set, trim the edges (chef's snacks!), then cut into neat little rectangles.
- Last Details
- Wipe your knife between cuts for pretty edges. If you're feeling fancy, add a little extra melted chocolate drizzle or tiny shiny sprinkles. Let them warm up a bit before eating—they taste much better at room temperature.
Tricks for Guaranteed Results
- Almond Paste Check: Use only soft, fresh paste for easier mixing and better flavor.
- Equal Portions: Using a scale for dividing batter means perfectly matched layers.
- Take Your Time: The overnight pressing isn't optional—it's what bonds everything together.
- Neat Cutting: A bread knife wiped clean between slices gives you picture-perfect portions.
 Pin it
Keeping Them Fresh
Store your beautiful tricolor squares in the refrigerator in a sealed container, and they'll stay delicious for up to seven days. Want to plan ahead? Pop them in the freezer for up to three months—just move them to the fridge the night before you need them.
Impressive Yet Doable Treats
These gorgeous tricolor almond squares bring so much happiness when you make them and even more when you share them. They're ideal for holiday gatherings, birthday celebrations, or anytime you want to create something that looks professional. Once you get the hang of this method, you'll find yourself making them for every special occasion, just like I do.
Frequently Asked Questions
- → Why weigh the batter portions?
It helps to keep all layers evenly thick so your cookies look uniform and well-layered.
- → What’s the reason for underbaking these layers?
It keeps them nice and moist, so the final treat isn’t dry after assembly.
- → Why is chilling important before slicing?
It makes the edges cleaner and ensures the layers stay firmly together while cutting.
- → Can I freeze these cookies?
Absolutely. Store them in a completely sealed container in the freezer for up to three months.
- → Why warm the jam before spreading?
It softens the texture, making it easier to spread thinly and evenly between layers.