
 Pin it
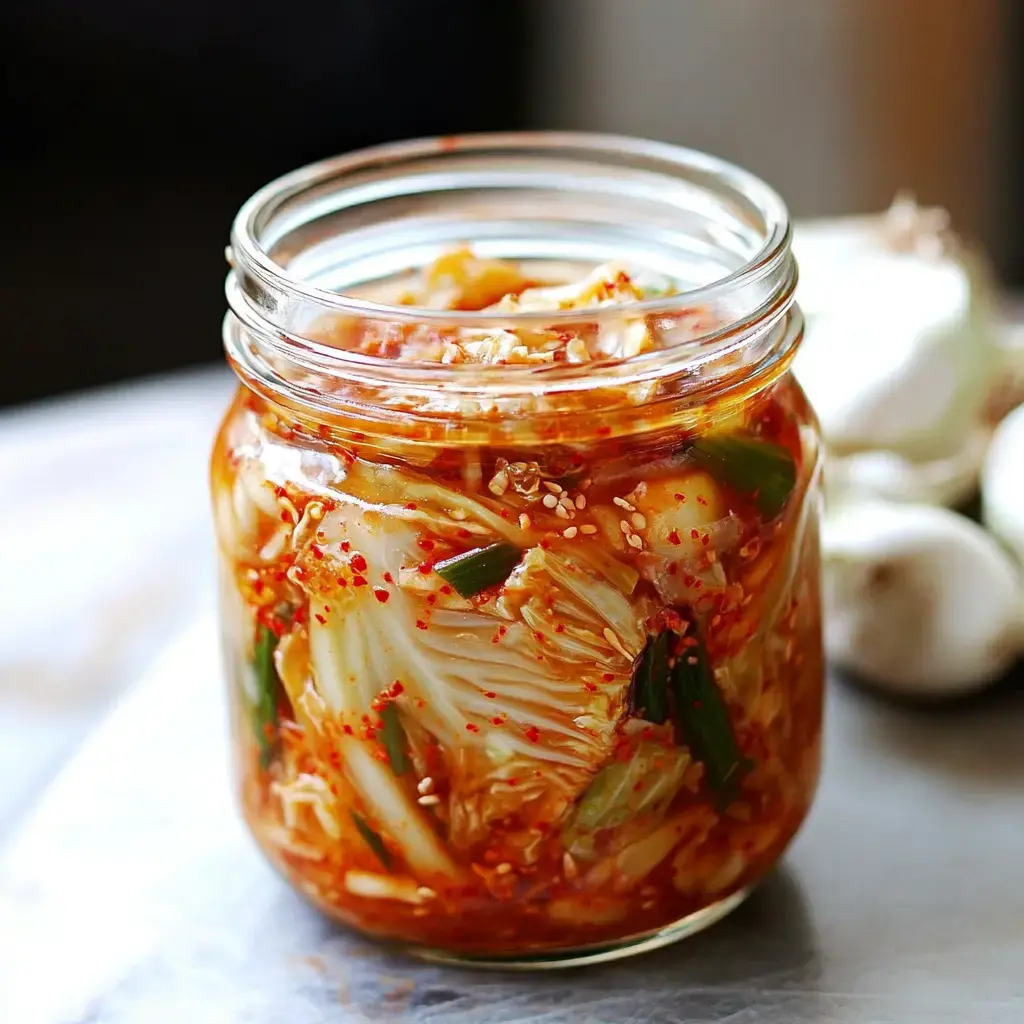
My next-door friend from Korea showed me this fantastic Cabbage Kimchi trick, and I've gone crazy for it! The mix of tangy, hot flavors makes everything better, from simple rice to barbecued meats. Don't worry about the fermenting part - it's actually super simple.
What Makes This So Good
I'm all about how you can tweak this kimchi to match your taste buds - go mild or knock-your-socks-off spicy. It's loaded with gut-friendly bacteria and gets tastier the longer it sits. I jumped into kimchi-making with this simple version (they call it mak kimchi) before trying fancier stuff.
Shopping List
- Napa Cabbage: Pick one that's firm and bright with zero dark spots.
- Quality Salt: Forget regular table salt - grab sea salt or kosher instead.
- Flavor Boosters: Tons of ginger and garlic - be generous!
- The Heat Source: Gochugaru (those Korean chili flakes) - you can always add extra later.
- Umami Kick: Some shrimp paste or fish sauce for that deep taste.
- Added Texture: Grab Korean radish if your store carries it.
- Green Onions: They bring brightness and pretty color.
Step By Step Guide
- Prep Your Greens
- Chop that cabbage into chunks you can eat easily, then work salt into it with your hands. Pour water over it and place something heavy on top - a dinner plate works great. Leave it sitting for about two hours until it gets soft.
- Wash It Off
- Run the cabbage through cold water three times to get the salt balance just right. Let it drip dry while you get everything else ready.
- Create Your Paste
- Combine your fish sauce with ginger and garlic. Now comes the exciting part - mixing in the gochugaru. Go easy at first if you're not sure about spiciness!
- Combine Everything
- Press the water out of your cabbage, then throw all ingredients together. Don't be shy - use your hands to mix it well (but wear gloves unless you want red fingers!).
- The Waiting Game
- Stuff everything into containers - press down firmly to remove air pockets. Keep some room at the top for bubbling. Let it hang out on your counter a couple days.
Insider Secrets
After making so many batches, here's what I've figured out: Always skip table salt - its iodine messes up the fermenting. Sample your chili flakes first - their heat levels can really vary. And make sure to push down your kimchi daily to keep everything under the liquid.
 Pin it
Storage Smarts
When your kimchi hits that perfect taste, stick it in the fridge. It'll actually improve for several months! I munch it straight from the jar, toss it in stir-fried rice, or stuff it in homemade dumplings. You gotta try kimchi grilled cheese sandwiches - my kids can't get enough!
Personal Touches
Don't have fish sauce? No sweat! Grab some kelp powder for a veggie-friendly option. Sometimes I throw in some carrot strips or sliced onions. Just follow the basic steps and play around with extras. Every family in Korea puts their own spin on kimchi, and now you can create your signature version!
Frequently Asked Questions
- → Why is non-iodized salt recommended?
Using iodized salt might mess with the fermentation process and cause strange colors. Go for sea salt or kosher salt instead.
- → How can I tell when my kimchi is done?
Check the taste every day as it ferments. It’s good to eat when it’s got a tangy, sour kick you enjoy, usually after 1-5 days.
- → Why keep cabbage weighed down?
Making sure the cabbage stays under the salty liquid helps spread the salt evenly and ensures proper fermentation.
- → Can I change the level of spiciness?
Absolutely! Add more or less of the gochugaru (Korean red chili flakes) depending on how spicy you want it, between 1 and 5 tablespoons.
- → How long can kimchi stay fresh?
As long as it’s kept cold in the fridge, your kimchi will continue to ferment slowly and stay good for months. The flavors will get bolder over time.