
 Pin it
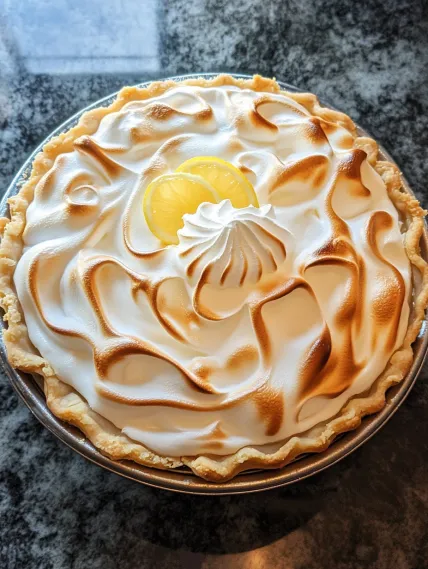
Every bite of this tangy lemon meringue pie delivers an amazing mix of tastes and feels. The thin, butter-rich base holds up a sunny, zesty lemon layer that's the perfect mix of sweet and sour. On top sits a fluffy cloud of golden meringue, giving you wonderful contrasts in each mouthful. While this eye-catching treat might look tricky to make, following a few key steps will help you bake something truly special for any celebration.
I tried this pie again and again for several weeks, baking more than twelve versions until everything clicked. After making my friends and family try countless slices (they didn't mind!), everyone agreed - this version nails the flavor balance and fixes all those annoying problems that usually ruin lemon meringue pies. When my grandma tasted it and said "this is better than my own recipe," I knew I'd cracked the code.
Key Ingredients and Smart Shopping Guide
- Lemons: Only use fresh ones. You'll need both juice and skin, so pick bright, strong-smelling lemons with thinner peels for more juice.
- Egg Yolks: They make your filling rich and thick. The yellower they are, the prettier your filling will look.
- Egg Whites: Your meringue base must be totally yolk-free or it won't whip up right.
- Cornstarch: This makes your filling firm enough to cut cleanly without being too stiff. Don't swap it for anything else.
- Cream of Tartar: This helper stops your meringue from collapsing and leaking, keeping it tall and pretty.
Your lemons can really change how this pie turns out. I've noticed that Meyer lemons work amazingly well in winter and early spring, giving an incredible smell to your filling. But regular lemons work great all year long. Whatever you do, don't use the bottled stuff – squeezing fresh lemons is totally worth the extra work.
Step-by-Step Baking Method
- Step 1: Get Your Crust Ready
- Bake your pie crust at 375°F for about 15-20 minutes with weights in it, then another 5-7 minutes without them. It should look light golden but not too brown. This half-baking trick keeps your crust from getting soggy when filled, but lets it finish cooking perfectly with everything else.
- Step 2: Cook Up Your Lemon Filling
- Mix 1½ cups water, 1½ cups sugar, ⅓ cup cornstarch, and ¼ teaspoon salt in a pot. Boil it over medium heat, stirring all the time until it thickens. Take it off the heat. In another bowl, beat 5 egg yolks, then slowly mix in 1 cup of your hot mixture to warm them up safely. Pour this back into the pot and cook 2 more minutes. Turn off the heat and mix in 2 tablespoons butter, ½ cup fresh lemon juice, and 2 teaspoons lemon zest.
- Step 3: Whip Up Fluffy Meringue
- In a super clean, dry bowl, beat 5 room-warm egg whites with ½ teaspoon cream of tartar until soft peaks show up. Slowly add ½ cup sugar, 1 tablespoon at a time, beating until stiff, shiny peaks form. Don't stop too soon or your meringue will sag; don't go too long or it'll look grainy.
- Step 4: Put Everything Together
- Pour your hot lemon filling into the warm crust. Right away, spoon meringue onto the hot filling, starting at the edges and moving toward the middle. Make sure the meringue touches the crust all around to lock it in. Use your spoon back to make pretty swirls and peaks in the meringue.
- Step 5: Brown It Just Right
- Bake your finished pie at 350°F for 20-25 minutes, until the meringue turns golden with darker tips. Baking (not broiling) makes sure the meringue cooks all the way through, so it won't weep later. Let the pie cool on the counter for 2 hours, then put it in the fridge for at least 4 hours before cutting.
 Pin it
I found out how important it is to seal the meringue to the crust through mistakes. My first few tries left gaps between the filling and meringue, creating nasty water pockets that ruined everything. Now I always make sure to spread the meringue all the way to the edges, touching the crust to make that important seal.
Understanding Meringue Magic
Getting beautiful, stable meringue comes down to a few basic science facts. Egg whites contain mostly protein and water. When you beat them, these proteins unfold and stick together, making a web that traps air bubbles. Adding cream of tartar makes the mix a bit more acidic, which helps those proteins stay stable. Sugar doesn't just make things sweet - it strengthens the protein structure and keeps moisture inside. That's why you need to add sugar bit by bit after soft peaks form - too early and it blocks protein stretching; too late and it won't dissolve right. The first time I skipped the cream of tartar, my meringue leaked terribly. Just adding that one simple thing completely changed my results.
 Pin it
Fixing Runny Filling Forever
Finding just the right thickness for lemon filling took me many tries. Too much lemon juice makes filling that won't set properly; too little and you get bland taste. The amount of cornstarch matters just as much - too much makes it gummy, too little gives you soup. Through lots of testing, I learned that cooking the filling thoroughly both before and after adding egg yolks is key to activating the cornstarch so it thickens properly. Your filling should coat a spoon and leave a clear line when you run your finger through it. My neighbor always said she hated lemon meringue pie because of "that runny filling," but she fell in love immediately after trying this version.
Prep Ahead for Easy Entertaining
Though this pie tastes best within a day of baking, you can get parts ready ahead of time to make things easier. You can blind-bake the crust up to 3 days early and keep it at room temp if it's wrapped well. The lemon filling can be made up to 2 days ahead and kept in the fridge with plastic wrap touching its surface to stop a skin from forming. Just warm it gently before putting it in the crust. But always make your meringue fresh right before assembly. When I hosted Easter dinner last year, I made the crust and filling the day before, which let me focus on putting the pie together while my main dishes were cooking.
Fun Flavor Twists to Try
While the classic lemon meringue is perfect on its own, I've played with some seasonal changes that people really enjoy. In summer, adding a tablespoon of finely chopped basil to the filling brings a surprising herb note that works great with lemon. For fall gatherings, sometimes I add 1/4 teaspoon cinnamon to the meringue before beating, which adds warmth without drowning out the bright lemon flavor. During winter holidays, swapping one tablespoon of lemon juice for cranberry juice and adding 1/2 teaspoon orange zest makes a festive twist. My family still loves the original best, but these small changes help this classic dessert match the seasons.
 Pin it
This lemon meringue pie has become the treat everyone asks me to bring to parties. There's something special about how the buttery crust, bright filling, and fluffy top come together that makes people smile when they see it. While it takes a bit more care than other desserts, the results are totally worth the effort. Each part tastes great alone, but together they create something truly amazing.
Frequently Asked Questions
- → Why does my meringue leak or shrink?
- Your meringue might leak or shrink because of these: 1) You didn’t spread it while the lemon base was warm, which helps seal it; 2) It didn’t reach the crust’s edges; 3) The egg whites weren’t at room temperature; 4) The meringue got overbeaten; or 5) The humidity was too high. Stick to the steps for a perfect finish.
- → How can I stop the bottom crust from getting soggy?
- To keep your crust crisp, pre-bake it (blind bake). Lay parchment in the crust, fill with weights like dried beans, and bake at 375°F for 15 minutes. Remove weights and bake another 5–10 minutes until golden. This seals it from the wet filling.
- → Can lemon meringue pie be made in advance?
- It’s best enjoyed fresh the day it’s made. You can prepare parts ahead: the crust dough keeps 5 days in the fridge or 3 months frozen. You can also pre-bake it a day early. Once the pie is built, it needs 4 hours chilling before serving. Freezing isn’t ideal.
- → Why is my lemon layer runny?
- If it’s runny, it likely wasn’t cooked long enough. The filling should bubble and thicken noticeably. Measuring cornstarch accurately is crucial, too. Make sure to temper egg yolks by slowly whisking hot liquid into them, then cook it all further.
- → What are ‘stiff peaks’ for meringue?
- Stiff peaks mean the meringue holds its shape. Lift the mixer—you’ll see peaks standing tall without sagging. It should look shiny and smooth. Don’t beat too much, or it might weep during baking.
- → Can fresh lemon juice be skipped for bottled?
- Fresh juice is always better! Bottled juice can have preservatives that give it a less vibrant taste. With lemon being the star here, freshly squeezed juice and zest are essential for the best flavor.