
 Pin it
This cherry danish turns basic ingredients into an amazing bakery-style treat your friends and family won't believe you made at home. The crisp, layered puff pastry holds a smooth cheese mixture covered with juicy cherries, giving you the perfect mix of crunch, creaminess and fruity sweetness in every mouthful.
I first whipped up this cherry danish for a family get-together with my spouse's parents, and it's now become my go-to baked good. There's something magical about how the buttery, sweet smell fills my kitchen while it's baking – it always brings everyone running to the table, eager to dig in.
- Puff pastry sheet: Grab it from the freezer section for amazing results without making complicated dough yourself
- Cream cheese: Adds a lovely rich tang that works against the sweetness
- Sugar: Gives just enough sweetness without going overboard
- Egg yolk: Makes the filling richer and helps everything stick together
- Vanilla extract: Adds warm, cozy notes that work well with both cherries and pastry
- Lemon juice: Adds a fresh kick to the cream cheese and makes the fruit pop
- Salt: Tiny amount that makes all the difference in bringing out flavors
- Canned cherries: So handy and give reliable results no matter the season
- Egg yolk: For brushing the outside to get that beautiful golden color
- Powdered sugar and milk: Mix up for a simple sweet topping that hardens nicely
Tasty Step-by-Step Instructions
- Thaw the Pastry:
- Let your frozen puff pastry sit out for exactly 30 minutes until it's bendable but still cool. Keep it folded while it thaws so it doesn't split at the creases. Getting this timing right makes everything easier.
- Prepare the Filling:
- Mix the cream cheese and sugar together on low until it's totally smooth. Then add in the egg yolk, vanilla, lemon juice and salt, and keep mixing until everything's silky. You want it thick enough to spread but not runny.
- Roll the Pastry:
- Put your thawed pastry on a parchment-covered baking sheet and sprinkle some flour on top. Carefully roll it out to smooth the folds and make the rectangle a bit bigger. Try to keep the thickness even all over.
- Assemble the Danish:
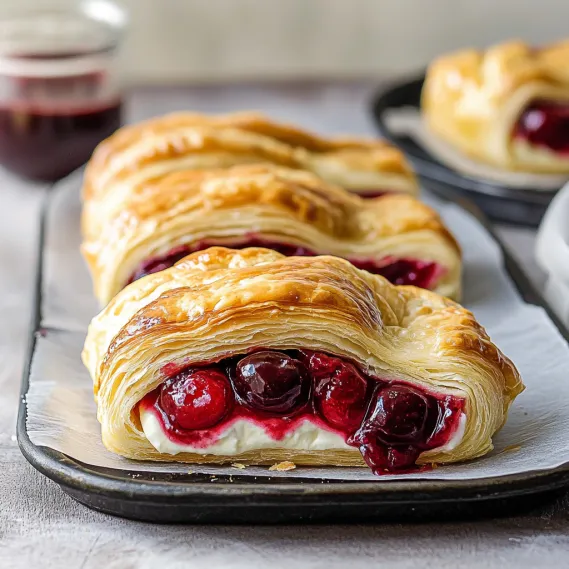
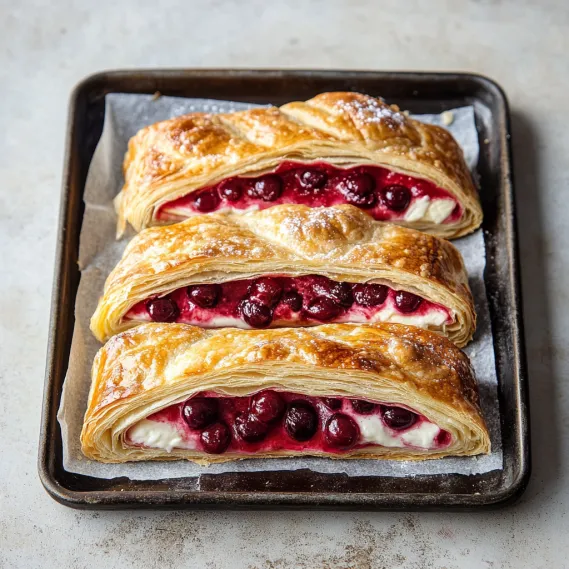
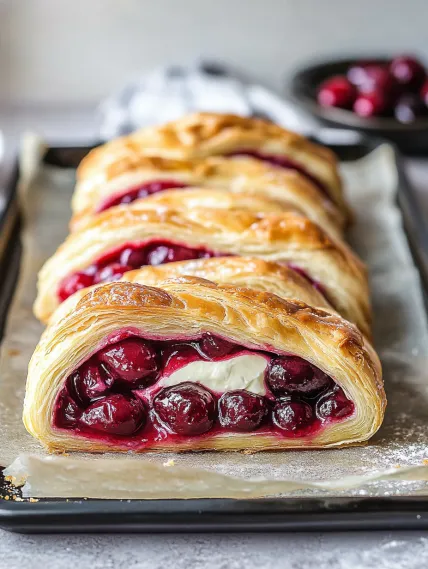
- Spread your cheese mix down the middle third, making a nice 3-inch wide strip about half an inch thick. Scatter your drained cherries evenly on top of the cheese layer, pushing them in slightly.
- Create the Braid:
- Take a pizza cutter or scissors and cut one-inch strips along both outer sides, stopping an inch from the filling. Fold the strips back and forth from each side to make a braid pattern with cherries peeking through. Tuck the ends under to look neat.
- Finish and Bake:
- Brush the whole thing with beaten egg yolk to get that nice golden color. Bake it at 400°F for 25 minutes until it's dark golden and puffed up with visible layers. Look for slightly caramelized edges to know it's done.
- Make the Glaze:
- Stir together powdered sugar and milk until completely smooth. If it's too thick or thin, add tiny bits of milk or sugar until it drips off a spoon easily but isn't too watery.
- Cool and Glaze:
- Let your danish cool completely on a rack before adding the glaze. Cooling it right helps the glaze stay on top instead of melting away.
 Pin it
The cherries really make this treat special to me. I came up with this mix when I was trying to copy a pastry I loved from a little European bakery near my college. The first time I made it for my grandma, she took a bite, closed her eyes and told me it reminded her exactly of the pastries from the bakery in her hometown.
Storage Tips
This danish keeps well at room temperature for a couple days if you put it in an airtight container. Just make sure it's totally cool before you store it, or you'll get moisture that makes the pastry soggy. If you need it to last longer, you can keep it in the fridge for up to five days, though it won't be quite as crisp. To perk it up, warm it in a 300°F oven for about 5 minutes before eating.
Seasonal Variations
Cherry filling is a classic, but this recipe works with pretty much any fruit you've got on hand. During summer, try fresh blueberries or peach slices lightly mixed with sugar. In fall, go for thinly sliced apples tossed with cinnamon. Winter's perfect for using preserved fruits like the cherries in our main recipe. Each version brings something new while keeping that yummy cream cheese base.
Serving Suggestions
This danish tastes best when it's slightly warm or at room temperature. To make it look extra fancy, sprinkle some powdered sugar on top right before serving or add a dollop of lightly sweetened whipped cream on the side. It goes perfectly with coffee for breakfast or brunch, but can also work as a dessert with a scoop of vanilla ice cream.
 Pin it
The History of Danish Pastry
What we call danish pastry actually started in Vienna, Austria, before Austrian bakers brought it to Denmark back in the 1850s. Danish bakers tweaked the recipe over time, creating their own version they called wienerbrød or Vienna bread. These pastries became popular worldwide when Danish immigrants took their recipes to America in the early 1900s. Our easier version using puff pastry keeps the spirit of these traditional treats while making them doable for home cooks.
Frequently Asked Questions
- → Can I switch the cherries for another fruit?
Totally! Try blueberries, apple slices, or even Nutella if you'd like to mix things up.
- → What's the trick to keep puff pastry from tearing?
Let it sit at room temp for about 30 minutes before unfolding. It'll soften and handle better.
- → Can I prep this dessert early?
Yes, make it a few hours ahead and keep it sealed or stored in a container to stay fresh.
- → Is there a substitute for cream cheese?
You can use mascarpone, ricotta, or even a vegan alternative to switch things up.
- → How do I make the glaze just right?
Stir powdered sugar with small splashes of milk until smooth. Add milk or sugar to get the texture you want.