
 Pin it
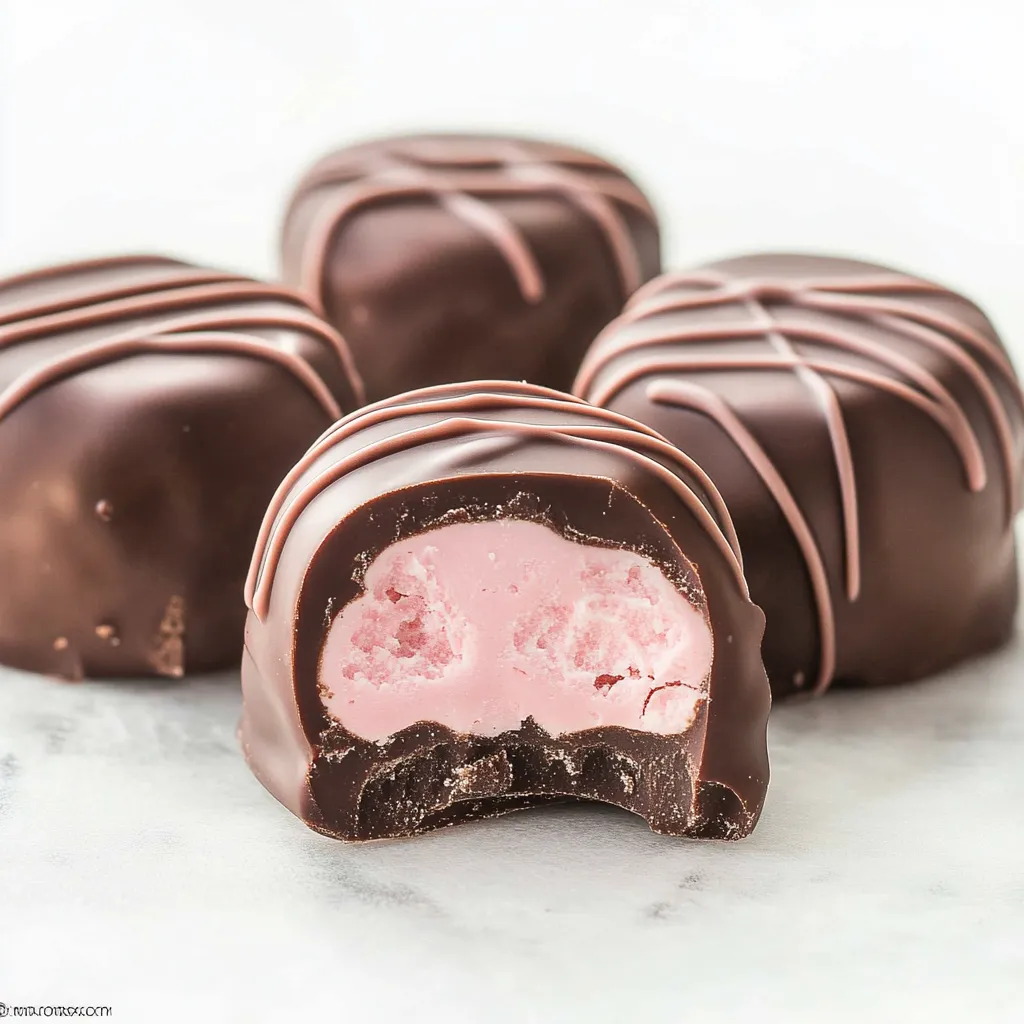
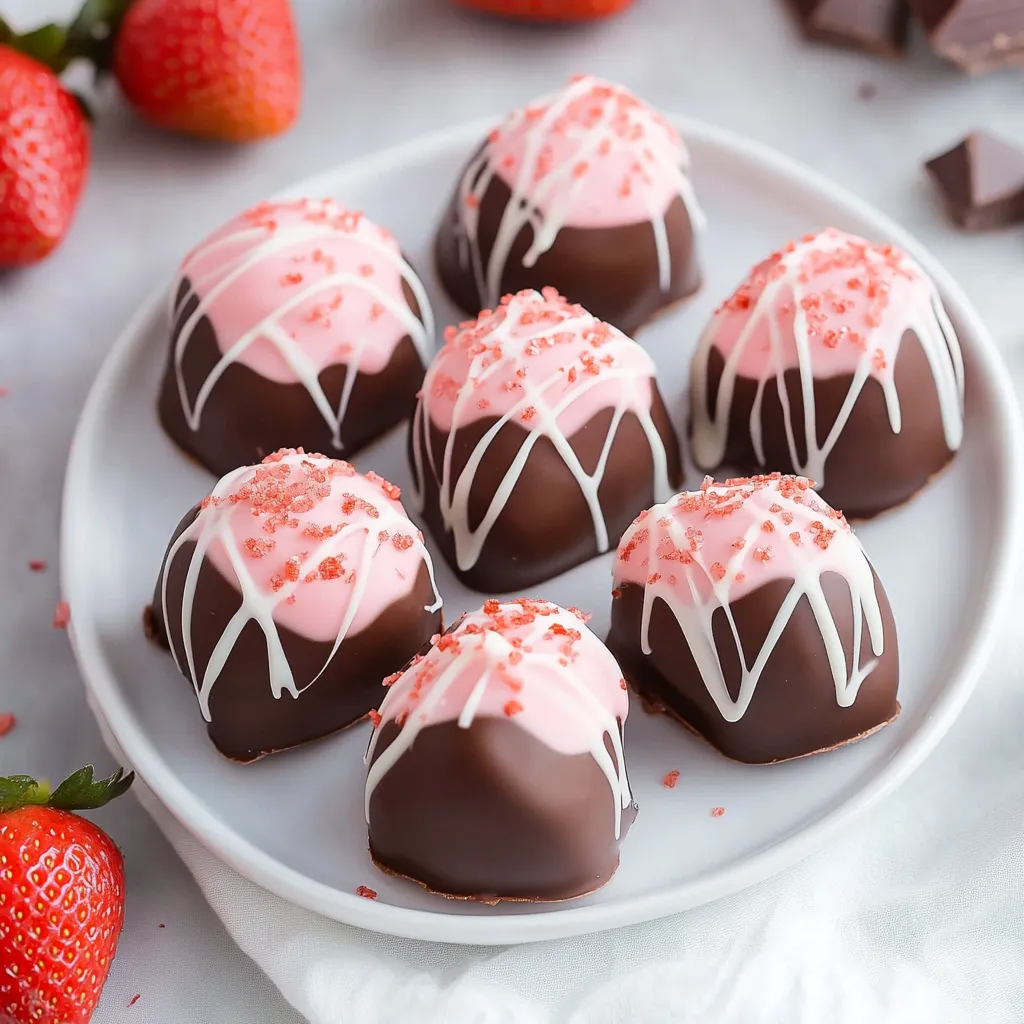
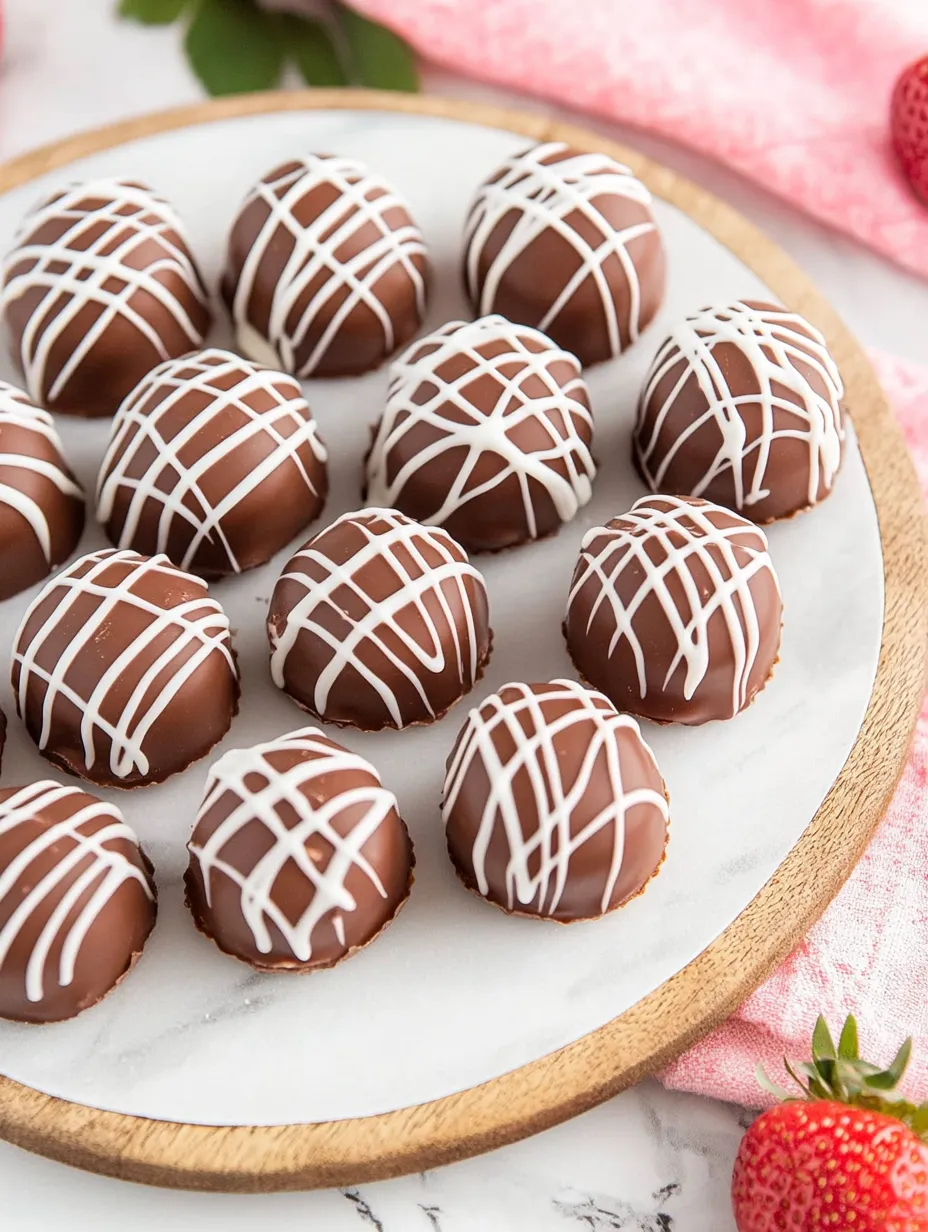
Turn basic ingredients into fancy, homemade chocolates that look like they came from an expensive shop. These strawberry cream-filled treats need just three things but give amazing results without much fuss. They're great for presenting to friends or enjoying during special moments.
After making chocolates for many years, I've found that getting the melting right and watching your temperatures is the key to success.
Key Components
- High-End Chocolate: Go for melting wafers when dipping
- Strawberry Frosting: 16 oz container, from the store or homemade works too
- White Chocolate: 12 oz for the inside mixture and garnishing
- Parchment Paper: To cover your trays
- Extra Toppings: Sprinkles or colored sugar if you want
Step-by-Step Guide
- 1. Making Your Filling:
- Put parchment in a 9x9 inch pan with 2 inches hanging over. Melt white chocolate using water bath method: get water barely bubbling, put chocolate in bowl above but not touching water. Keep stirring until it's all smooth. Mix into strawberry frosting until everything blends nicely. Spread it flat in your lined pan. Cool in fridge for 30 minutes until it's firm enough to cut.
- 2. Getting Chocolate Ready:
- Melt your dipping chocolate in a fresh water bath or zap it in the microwave for 30 seconds at a time, stirring between zaps. If you're using the microwave, go at half power. Your chocolate should look glossy and smooth, around 90°F.
- 3. Coating Your Treats:
- Cut your cold filling into little 1-inch blocks. Use a fork to dunk each block into your melted chocolate. Tap the fork gently on the bowl to let extra chocolate drip off. Place them on a sheet covered with parchment.
- 4. Making Them Pretty:
- While the chocolate's still wet, make patterns with your fork or drizzle different colored chocolate over top. Add sprinkles now if you want them. Let everything harden completely at room temp or pop in the fridge for 15 minutes.
- 5. Hardening and Keeping:
- Let your chocolates set completely before you touch them. Store them between sheets of parchment in a sealed container. They'll stay good on the counter for two weeks or in the fridge for a month.
 Pin it
Keeping Them Fresh
Keep your chocolates separated with parchment paper layers in a sealed container. They'll stay good on your counter for two weeks, or in the fridge for a month. If you do refrigerate them, let them warm up before eating so you get the best flavor and feel.
Tasty Companions
- Fresh picked strawberries
- A nice cup of coffee
- Bubbly for special times
- A mug of hot chocolate
- Your favorite tea
- Packed in pretty boxes for gifts
 Pin it
Taste Options
- Try raspberry frosting with dark chocolate
- Mix vanilla frosting with some mint flavor
- Pair orange frosting with dark chocolate
- Combine lemon frosting with white chocolate
- Use coffee frosting with milk chocolate
 Pin it
These DIY chocolates show you can make candy shop quality treats in your own kitchen with minimal ingredients and some careful work. Whether you're sharing them or keeping them all for yourself, they'll wow everyone with their fancy look and amazing taste.
Frequently Asked Questions
- → Can I try different frosting flavors?
- Absolutely! Play around with any canned frosting to mix up the flavors.
- → What’s the best way to store these?
- Keep them in an airtight container at room temperature for up to two weeks.
- → Would melting chocolate wafers work?
- Yep, they’re a great option and pretty easy to handle.
- → Why do I need to tap the fork when dipping?
- It’s to shake off extra chocolate and avoid messy puddles around the candies.
- → Is freezing these an option?
- Sure thing! Put them in a sealed container and freeze for up to three months.