
 Pin it
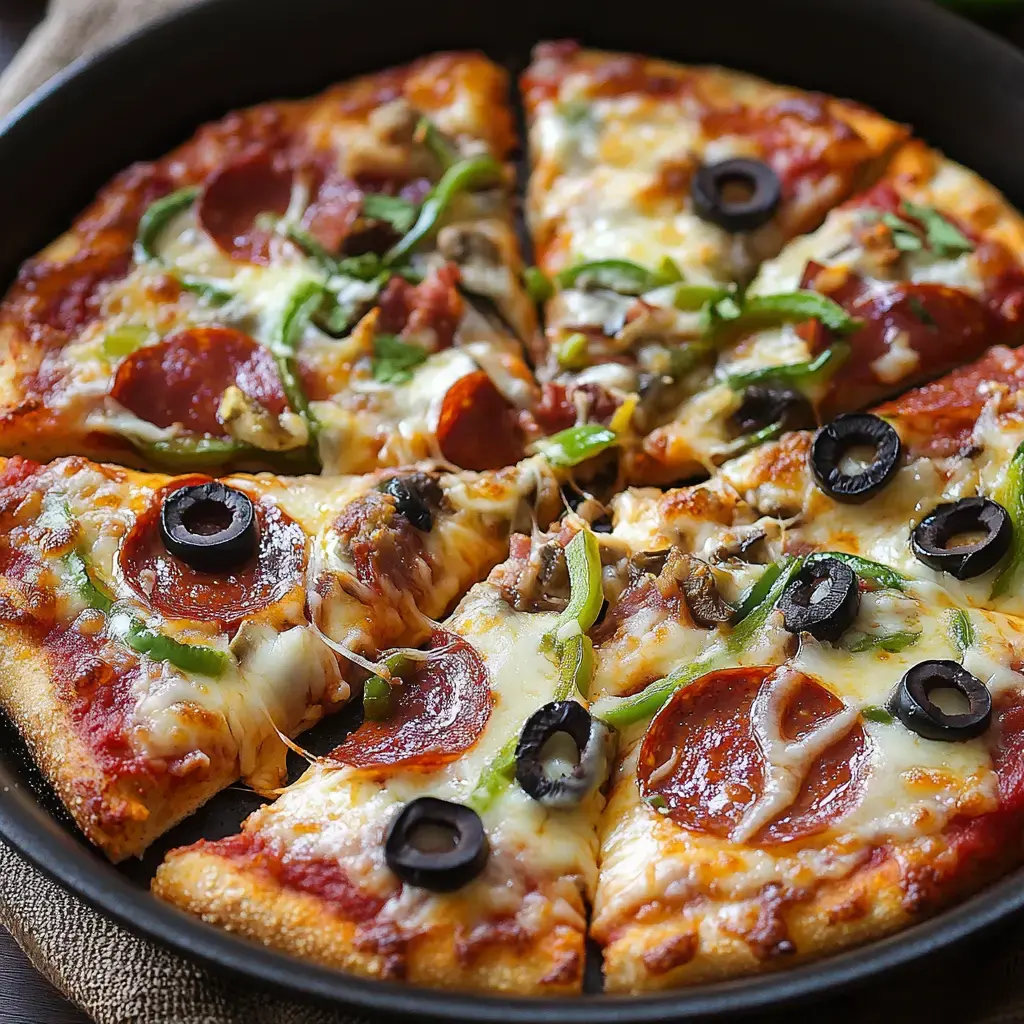
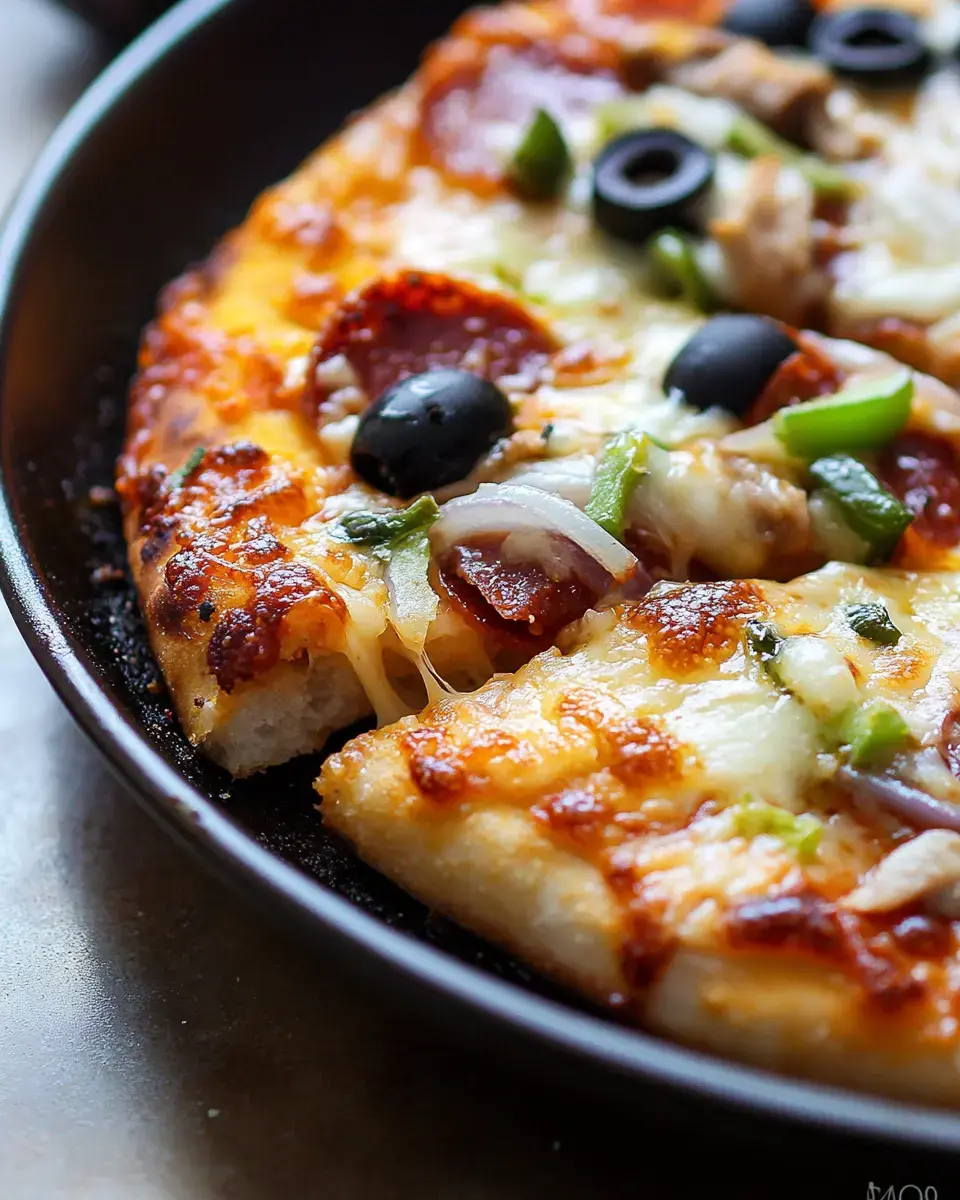
Quick No-Dough Cheese Base Pizza
I've got to tell you about my favorite low-carb pizza hack that I make whenever pizza cravings strike. Instead of traditional dough, this version uses cheese to form a crispy base that's totally guilt-free. I whip it up in my pan in minutes and add whatever toppings I'm in the mood for. Once you give this a try, you'll never look at pizza the same way again—it's that good!
What Makes This No-Fuss Option Special
- Works perfectly for keto and low-carb eating but doesn't feel like diet food
- Comes together in just a few minutes without any fussy dough steps
- Can be customized with whatever toppings you fancy
- Saves well and makes a fantastic grab-and-go meal option
Basic Components for Cheese Base Pizza
- Finely Grated Cheddar: Creates the crunchy foundation for our no-dough pizza.
- Custom Toppings: Stick with low-carb options or go with your personal favorites.
- Basic Flavor Boosters: A sprinkle of Italian herbs and garlic powder takes the taste to another level.
- Reliable Pan: Cast iron gives the best results but any non-stick option will work fine.
Simple Making Method
- Set Up Your Cheese Foundation
- Grab your favorite shredded cheese—I personally love combining mozzarella with cheddar for awesome flavor and meltability. Scatter it in an even thin layer across your hot pan. Keep an eye on it as the edges start bubbling and melting—that's when you know it's working its magic.
- Nail That Crunchy Base
- Watch your cheese closely as it transforms. You'll spot it bubbling up and turning a nice golden color underneath, which usually happens in about 3-4 minutes. Don't try to speed this up—getting that crunch factor depends on this step. When you see that gorgeous golden shade on the bottom, take the pan off the heat and let it cool slightly for a minute or two.
- Top It Your Way
- While the cheese is still warm but firm enough to hold toppings, start adding your favorites. Fresh basil, tomato slices, and a dash of Italian herbs work wonders. Spread everything out evenly across the surface. If you want more cheese on top, sprinkle it now. Don't go overboard though—too many toppings can make your crunchy base soggy.
- Quick Broil Finish
- Move your oven rack about 6 inches from the broiler element and turn it on high. Slide your pan under the heat and don't walk away—this happens fast! You're aiming for hot toppings and bubbly melted cheese on top, which takes roughly 2-3 minutes. Leave the oven door cracked and turn the pan if needed for even heating.
- Cool Down and Dig In
- After everything's perfectly melted and hot, pull your pan out and let it sit for about 5 minutes. This cooling period is super important—it helps the cheese structure firm up so you can cut nice clean slices. Use a pizza cutter or sharp knife to cut it into pieces, then enjoy while it's still warm and crispy.
Tricks for Great Results
- Stay Alert: Don't leave your pan unattended as cheese can burn in seconds.
- Use Quality Cookware: A solid, heavy pan makes a huge difference in how your pizza turns out.
- Switch It Up: Experiment with different topping combos to find what you love most.
 Pin it
Fun Twists and Leftover Ideas
- Go for BBQ chicken or spicy taco fixings for something unexpected
- Wrap leftover slices in parchment paper before refrigerating
- Pack it with colorful veggies for a nutritious spin
Your Go-To Carb-Free Pizza Alternative
This cheese-based pizza gives you that amazing pizza experience without the carbs weighing you down. The crunchy cheese foundation loaded with your favorite toppings makes for a super quick dinner option. Whether you eat it straight from the pan or save some for later, it's a tasty way to enjoy pizza that fits your lifestyle.
Frequently Asked Questions
- → Why let the cheese set before adding toppings?
This stops the toppings from sinking right into the melted base.
- → What cheese combo gives the best results?
A mix of melty mozzarella and cheddar creates a great flavor and texture.
- → Can I switch up the toppings?
Absolutely, you can pile on anything you like for flavor variety!
- → What’s the best way to keep leftovers fresh?
Store them in the fridge inside a ziplock bag with parchment paper separating the layers.
- → What’s the purpose of using a broiler?
It ensures the toppings are melted fast without overdoing the cheese crust.