 Pin it
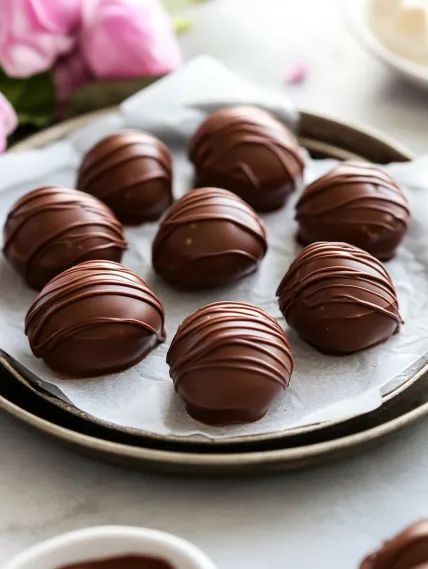
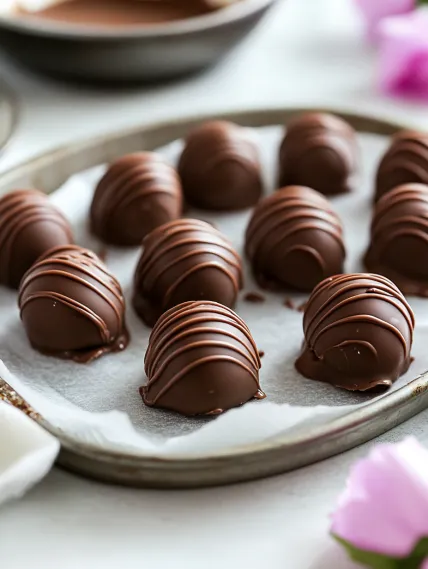
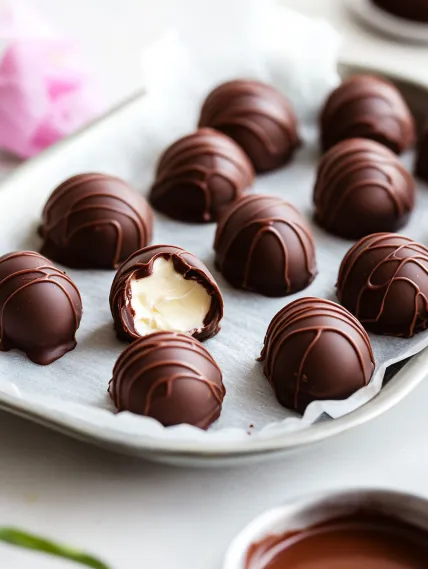
These DIY Easter egg buttercream treats turn basic ingredients into fancy, soft-centered candies that'll make you forget about store-bought versions. The velvety buttercream inside works perfectly with countless flavor options, all wrapped in good-quality chocolate for a truly satisfying bite. Their cute egg shape and adaptable flavors make them ideal for Easter baskets, thank-you gifts, or little indulgences to savor during springtime. They're incredibly rich, totally customizable, and way more impressive than anything you'll find at the grocery store.
I began crafting these buttercream eggs after getting curious about what was actually in those chocolate eggs at the grocery store. Through trying different buttercream textures and chocolate methods, this has turned into our family's must-do Easter activity. My kids can't wait for our yearly candy-making day, and they each pick their favorite flavor mix. Even my super-picky mother-in-law asked me how to make them after trying some at our Easter lunch.
Key Ingredients and Smart Selection Advice
- Butter: The key component for your filling. Grab unsalted butter that's been sitting out exactly 60 minutes for just the right softness.
- Confectioners' Sugar: Gives you that sweet, firm filling that won't lose its shape. Don't skip sifting it for the best texture.
- Heavy Cream: Brings that lovely richness to your filling. In a pinch, you can use half-and-half instead.
- Quality Chocolate: Go for proper baking bars, not chips. This choice will dramatically affect your coating's look, taste, and texture.
- Flavorings: Vanilla creates your foundation flavor, while other extracts let you get creative.
Your chocolate choice can really make or break these candies. I've had great results with Ghirardelli or Baker's bars. They cost a bit more than chips, but the better flavor and how smoothly they melt is totally worth spending those extra few dollars.
Step-by-Step Making Guide
- Step 1: Whip Up Your Buttercream Foundation
- Whip 1/2 cup room temp butter till it's fluffy, about 2 minutes. Slowly mix in 2 1/4 cups confectioners' sugar, switching between that and 2 tablespoons heavy cream. Keep beating until it's all smooth. Mix in 1 1/2 teaspoons vanilla extract and 1/2 teaspoon almond extract until everything's thick and well-combined.
- Step 2: Cool Down For Better Handling
- Wrap up your buttercream and stick it in the fridge for at least an hour. This crucial cooling time makes the buttercream firm enough to shape properly. Don't try to rush this part or you'll end up with a sticky mess.
- Step 3: Form Your Egg Shapes
- Use a tablespoon to scoop the cold buttercream (about 1 ounce per egg). Roll each scoop into a ball, then gently press it flat between your hands. Make one end a bit pointier to create that egg look. Put your shaped eggs on a parchment-lined tray and chill them again for at least an hour until they're firm.
- Step 4: Get Your Chocolate Ready
- Cut 16 ounces of baking chocolate into small, uniform pieces. Melt them carefully in your microwave using 20-second bursts, stirring well each time. When it's nearly all melted, add 1 teaspoon vegetable oil and stir until it's perfectly smooth. Let it sit for 3-5 minutes so it won't melt your buttercream eggs.
- Step 5: Coat With Care
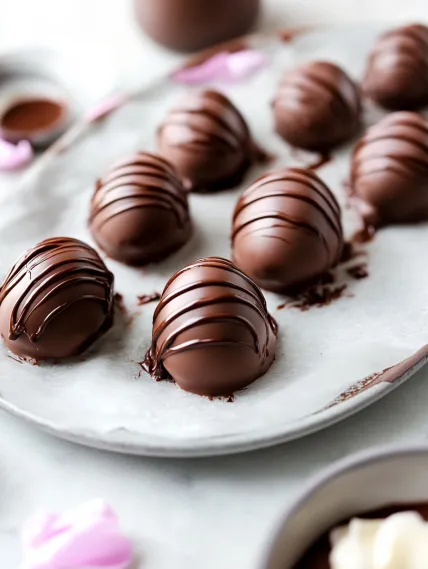
- Taking one cold egg at a time, dunk it completely in your melted chocolate using a fork. Gently tap the fork on the bowl's edge to let extra chocolate drip off. Use a toothpick to help slide the candy onto your parchment-lined tray. If you want, drizzle some leftover chocolate on top for decoration. Chill until the chocolate gets completely hard, about 30 minutes.
 Pin it
The first time I tried making these candies, I thought I could skip that second cooling step. Big mistake! The buttercream started melting as soon as it touched the warm chocolate! Now I know those thoroughly chilled eggs are absolutely necessary for getting that clean dip and pretty finish.
Tasty Flavor Options
What makes these buttercream eggs so awesome is how many ways you can make them. The vanilla-almond base tastes great by itself, but I love splitting the buttercream to create different flavors. For those who love coconut, swap out the almond extract for coconut extract and throw in 1/2 cup of finely cut shredded coconut for a taste of the tropics. Lemon buttercream eggs made by using lemon extract instead of almond are super refreshing and perfect for spring. My kids go crazy for the chocolate version, where I take out 2 tablespoons of sugar and add cocoa powder instead for a double-chocolate treat. If you want something more grown-up, adding 1 teaspoon of espresso powder makes coffee-flavored eggs that taste amazing with dark chocolate coating. Every Easter, we make a mix of flavors, which looks beautiful when arranged together and makes sure everyone finds something they love.
 Pin it
Tricks For Fancy-Looking Candies
After many years making these buttercream eggs, I've figured out how to make them look like they came from a fancy candy shop. The biggest trick is taking your time when dipping. After covering the egg in chocolate, I let the extra drip off for a good 5-10 seconds, lightly tapping the fork against the bowl. Then I use a toothpick to slide the egg onto the parchment, which stops chocolate from pooling around the bottom. For decorating, I put leftover melted chocolate in a small plastic bag, cut a tiny hole in one corner, and squeeze thin lines across the tops. Sometimes I'll use white chocolate for a nice contrast. For really special occasions, I've added gold edible powder or tiny sugar pearls to the wet chocolate, turning these simple candies into fancy treats that look like they cost a fortune.
How To Keep Them Fresh
Since these buttercream eggs have dairy in them, you need to store them right. They'll stay fresh in a sealed container in the fridge for up to 2 weeks, though at my house they're usually gone way before that! If you're making them ahead for Easter, they actually taste better after a day or two as the flavors blend together. When giving them as gifts, I let them sit at room temp for about 10-15 minutes before serving, which gets the buttercream to that perfect melt-in-your-mouth softness. I've also found these eggs can be frozen for up to 3 months - just let them thaw overnight in your fridge. This makes them great for planning ahead or saving some treats to enjoy long after Easter. My husband actually likes eating them straight from the freezer, saying they taste like little ice cream bites!
Creative Gift Packaging
These buttercream eggs become extra special gifts with the right packaging. For Easter baskets, I wrap each egg in bright foil candy wrappers from craft stores and tuck them into paper grass. For thank-you gifts, I line small bakery boxes with tissue paper and arrange different flavored eggs inside, adding a note that lists all the flavors. At our family Easter get-together, I create a pretty display by putting the eggs on a tiered plate with small signs showing which flavor is which. For kids' parties, I've even used white chocolate colored with oil-based candy colors to make pastel eggs that look amazing arranged in a circle around a chocolate bunny in the middle.
 Pin it
These Easter egg buttercream candies have become more than just sweets in our home - they're now a tradition that tells us spring has arrived. There's something really special about turning simple ingredients into such a treat, and seeing people's faces light up when they bite into these homemade candies makes all the work worthwhile. Whether you're making them as gifts, for parties, or just for your family, these little eggs bring pure joy in every bite.
Frequently Asked Questions
- → How long should they chill?
- Long enough to firm up for coating.
- → Can I swap flavors?
- Sure, ditch almond or add extra vanilla.
- → What chocolate works best?
- Use baking bars instead of chips.
- → Are they freezable?
- Absolutely, up to 3 months.
- → Good for parties?
- Perfect for little hands and big smiles!
