
 Pin it
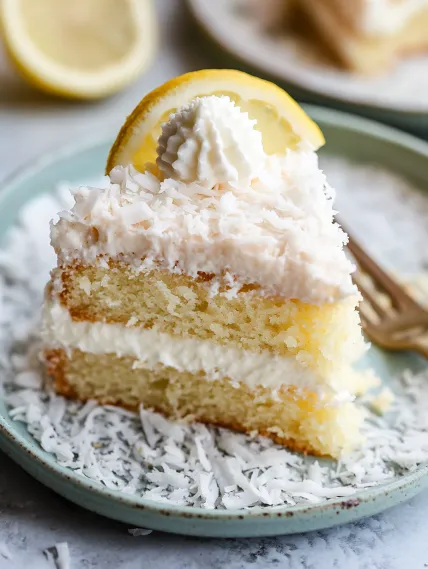
This three-tiered coconut cake gives you everything you'd want from a home-baked treat - incredibly juicy texture, feather-soft lightness, and deep coconut taste in every mouthful. The smooth coconut cream cheese frosting perfectly matches the gentle texture, making a dessert that's eye-catching and unforgettable. With coconut worked into all components - from the mix to the topping to the decoration - this stunning sweet will take you right to island bliss with each bite.
I worked for months tweaking this coconut cake, trying so many different versions to get just the right mix of flavor and feel. The first time I brought it to a family party, my coconut-crazy aunt said it beat the coconut cake she'd been buying from her top bakery for 15 years. That's when I realized I'd made something truly amazing that would become my go-to celebration dessert.
Key Components and Buying Advice
- Cake Flour: Its reduced protein makes a more gentle, soft texture. Don't swap in regular flour or you'll end up with a heavy cake.
- Egg Whites: They build framework without making the mix heavy, giving you that lovely light, puffy feel.
- Sour Cream: The hidden magic that keeps the cake super soft and stops it from drying out.
- Coconut Extract: Just a tiny bit adds strong flavor that boosts the natural coconut taste throughout.
- Canned Coconut Milk: This thick, creamy type (not the drinking kind) adds real coconut flavor and perfect moisture.
The type of coconut products you pick really changes this cake. I've learned that full-fat canned coconut milk (never the stuff in cartons) gives the deepest taste. For the flaked coconut, the sweetened kind not only tastes nicer but also adds extra moisture that's vital for the cake's amazing texture.
Step-by-Step Baking Guide
- Step 1: Set Up Your Baking Base
- Heat your oven to 350°F and get three 8-inch cake pans ready with butter and parchment circles. This careful setup makes sure your layers will come out cleanly without breaking. Mix 2½ cups cake flour, 2 teaspoons baking powder, ½ teaspoon baking soda, and 1 teaspoon salt in a bowl.
- Step 2: Mix The Best Batter
- Whip ¾ cup soft butter with 1⅔ cups sugar until pale and airy, around 2 minutes. Slowly add 5 room temp egg whites, then blend in ½ cup room temp sour cream and flavorings (2 teaspoons vanilla, 1 teaspoon coconut). Switch between adding dry mix and 1 cup canned coconut milk on low, then stir in 1 cup sweetened coconut flakes by hand.
- Step 3: Bake Carefully
- Share the batter equally among your ready pans - a kitchen scale helps make even layers. Bake for 21-24 minutes, just until a stick poked in the middle comes out clean. Don't cook too long or you'll lose the cake's special juiciness. Let cool in pans for an hour, then move to a rack to finish cooling.
- Step 4: Make Rich Frosting
- Beat 1 cup soft butter and 8 ounces soft cream cheese until smooth. Slowly mix in 5 cups powdered sugar, taking turns with 2 tablespoons coconut milk. Add ½ teaspoon each of vanilla and coconut flavorings plus a tiny bit of salt. Whip on high for 3 minutes until fluffy and silky.
- Step 5: Build And Finish
- Trim cake layers if needed for a flat cake. Put first layer on your plate and spread with 1½ cups frosting. Do the same with second layer and another 1½ cups frosting. Add top layer and cover the whole cake with leftover frosting. Press 2 cups sweetened coconut flakes onto the top and sides for a pretty snow-like look.
 Pin it
My first try with this cake taught me to be patient with cooling. I tried to frost the layers while they were still a bit warm, and the frosting started melting. Now I always make sure the cake layers are totally cool before putting them together, which keeps the frosting perfectly creamy and looking beautiful.
How The Perfect Cake Texture Happens
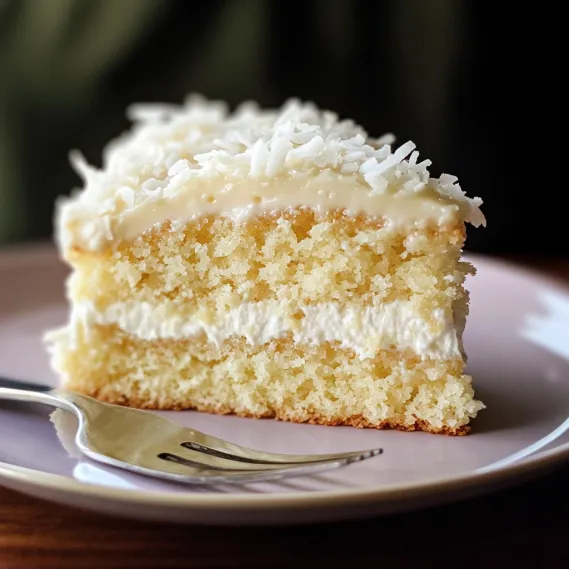
The amazing feel of this coconut cake isn't by chance - it comes from picking the right stuff and using good methods. Cake flour, with less protein, makes less gluten when mixed, creating that soft, gentle bite. Using just egg whites keeps things airy and light, while sour cream adds moisture without weighing everything down. I've found that mixing just until things come together stops overworking the gluten, which would make a tough cake. Using butter for taste and canned coconut milk for moisture creates the right balance that keeps this cake fresh for days. My family has seen that while many homemade cakes get dry fast, this one stays really moist even three days later - if it lasts that long!
 Pin it
Making Pretty Decorations
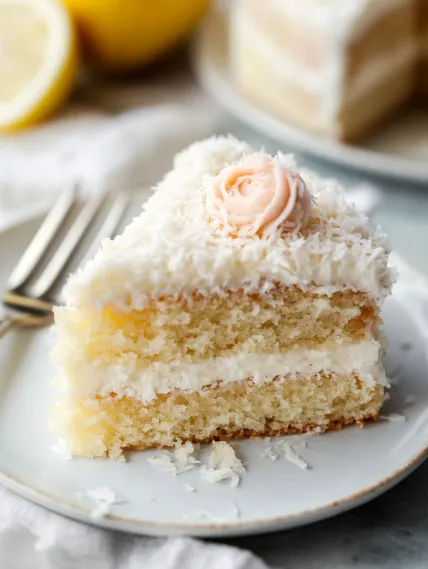
While this cake looks great with just coconut pressed into the frosting, I love adding special touches for big events. For my mom's birthday, I made simple buttercream flowers using plain buttercream (the cream cheese frosting is too soft for making designs). I used a Wilton 1M tip to make swirls around the top edge, then added some shiny sugar for a fancy look. For spring parties, I sometimes color a bit of coconut with food dye to make a "nest" on top, filled with tiny chocolate eggs. At Christmas, I add sugar-coated cranberries and rosemary twigs for a festive look. These little extras turn an already beautiful cake into an amazing centerpiece for your most special days.
Getting Layer Cakes Right
Making a pretty layer cake doesn't need to be scary. I've found that taking time to get ready makes all the difference. After cake layers are fully cool, I wrap them up and put them in the fridge for about an hour. The cold layers are way easier to work with and don't crumble as much. I always use a turning cake stand, which lets me spin the cake as I frost for smooth, even coverage. Another game-changer is putting on a thin first layer of frosting, then chilling for 20 minutes before adding the final coat. This locks in crumbs and makes a smooth base. Finally, for perfectly even layers, I use a bread knife to cut the tops flat before stacking. These simple tricks turn a good cake into something that looks professionally made.
Planning Ahead And Keeping Fresh
This coconut cake works great for busy hosts because you can make it well before your event. The cake layers can be baked up to two days early, wrapped tight in plastic, and kept at room temp. The frosting can be made a day ahead and put in the fridge - just let it warm up and beat it for a minute to make it fluffy again before using. The finished cake stays great in the fridge for up to 5 days, though I suggest letting it sit out for about 30 minutes before serving for the best taste and feel. If you're planning way ahead, the plain cake layers can be frozen for up to 3 months - just thaw in the fridge overnight before putting together and frosting.
 Pin it
This coconut cake has become my most asked-for dessert for birthdays, anniversaries, and special events. There's something magical about the mix of the soft, tasty cake with the creamy frosting and the texture of the coconut that makes people smile with the first bite. Though it might seem like a lot of work, each step helps create a truly amazing cake that will become your signature dessert too.
Frequently Asked Questions
- → Is cake flour best?
- Yes, it makes the texture perfect.
- → Why only egg whites?
- They make the cake airy and light.
- → How long to cool?
- Leave in pans for 1 hour, then fully cool.
- → Can I freeze it?
- Totally fine for 2-3 months.
- → Is it party-worthy?
- This tropical treat will steal the show!