
 Pin it
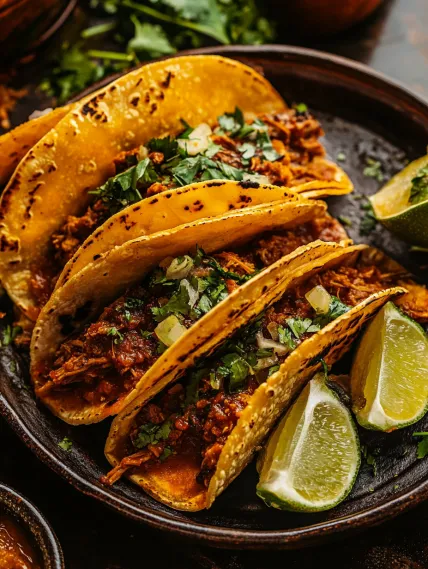
These knockout Birria Tacos pack a taste punch with juicy, slow-cooked beef, deep adobo sauce, and gooey Oaxaca cheese, all crisped up in corn tortillas. The mix of rich meat, spicy dipping broth, and that can't-resist crunchy outside makes a taco experience you'll dream about – trust me, it's totally worth the prep time.
The first time I made these for friends, they crowded my kitchen and watched me put them together, grabbing them right off the pan. That moment when you dip these babies in the rich broth takes them from good to absolutely mind-blowing.
Key Ingredients and Smart Shopping Advice
- Dried Chiles - Look for guajillo and ancho at Latin grocery stores or online shops for that real-deal flavor
- Chuck Roast - Gets super tender during slow-cooking; grab one with nice fat running through it
- Oaxaca Cheese - Melts like a dream; can swap for mozzarella in a pinch
- Corn Tortillas - The traditional pick that gets perfectly crispy; go for fresh ones if possible
- Herbs and Spices - Cinnamon, cumin, oregano, and bay leaves team up for that signature birria taste
The real trick happens when you dunk those tortillas in the rich, red broth before they hit the hot pan, giving them that famous orange color while soaking up tons of flavor.
Step-By-Step Cooking Guide
- Step 1: Get Your Chiles Ready
- Cut off stems and dump out seeds from your guajillo and ancho chiles. Toss them in a dry pan for about 30 seconds each side until they smell amazing. This wakes up all their hidden flavors.
- Step 2: Whip Up Your Sauce
- Drop those toasted chiles in hot water for 15-20 minutes till they're soft. Throw them in a blender with chipotle, onion, garlic, tomatoes, and spices until smooth. This sauce is where all the magic starts.
- Step 3: Brown Your Beef
- Sprinkle salt and pepper on beef chunks, then brown them in a hot Dutch oven till they're golden all over. Don't skip this – it locks in all the good stuff and builds flavor.
- Step 4: Low and Slow Cooking
- Pour your chile sauce over the browned meat, add beef stock and water, then let it hang out in a 350°F oven for about 2½ hours. You'll know it's done when you can pull it apart with a fork.
- Step 5: Get Your Dipping Broth Ready
- Strain the cooking liquid for a smooth dipping broth. Save some to keep your meat nice and juicy.
- Step 6: Pull Apart Your Meat
- Grab two forks and shred that tender beef. Mix in enough cooking liquid to keep everything moist and tasty.
- Step 7: Build and Dip
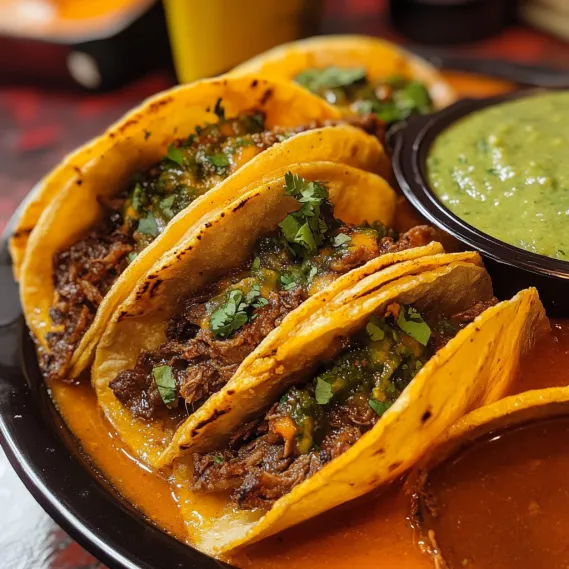
- Warm up corn tortillas so they don't crack. Fill one side with shredded meat and cheese, fold over, then quickly dip both sides in the broth. This step gives you that signature color and flavor punch.
- Step 8: Crisp Them Up
- Cook your dipped tacos in a hot pan until they're crispy outside and the cheese is all melty inside, about 2-3 minutes per side. You want that nice crunch when you bite in.
- Step 9: Serve Right Away
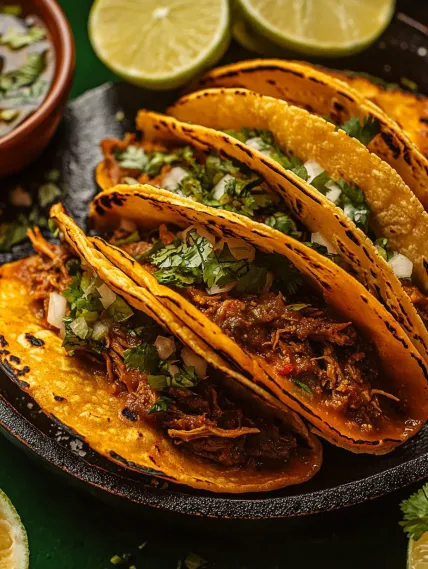
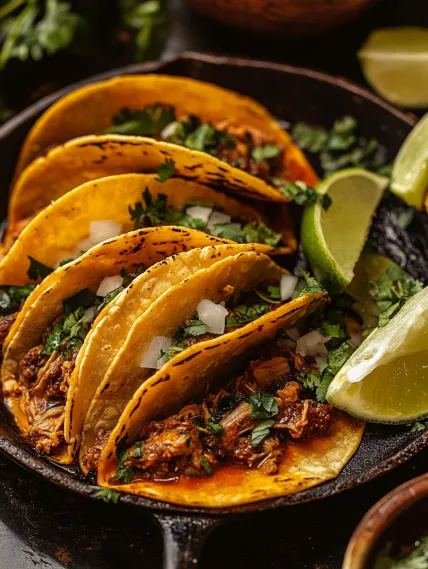
- Put tacos on a plate with small bowls of broth for dipping. Top with fresh cilantro and diced white onion for extra flavor and a pop of color.
- Step 10: Save Leftovers Right
- Got extras? Keep the rice and beef mix in separate containers in the fridge for up to 3 days. This keeps the rice from getting soggy.
 Pin it
I found out the hard way about dipping tacos after my first try left me with soggy, falling-apart tortillas. Now I always do quick dips and put them straight in a hot pan for that perfect crunch.
Adjusting the Heat Level
The kick in these tacos mainly comes from dried chiles and chipotles. For a kid-friendly version that won't set mouths on fire, I cut back to just two guajillo peppers, focusing on their taste rather than heat. For spice lovers in my house, I'll toss in some red pepper flakes or add hot sauce on the side. Setting up a DIY taco bar lets everyone customize their heat level and toppings just how they like.
 Pin it
Party Prep Plan
Birria tacos are my go-to for easy hosting. I cook the beef up to three days ahead – it actually tastes even better after sitting overnight. When guests arrive, I just heat up the meat and broth, then set up a taco station. People love watching the dipping and crisping process – it's like dinner and a show all at once. Plus, my whole house smells amazing, and I get to hang out instead of hiding in the kitchen.
Year-Round Variations
I love tweaking this dish as the seasons change. In spring, I'll toss in baby carrots and fresh peas. Summer calls for garden zucchini and tiny tomatoes added at the very end. Fall is perfect for chunks of butternut squash cooked till soft. Winter versions get hearty with parsnips and root veggies. The base recipe stays the same, but changing up the veggies keeps it fresh so we never get tired of it, even though it shows up on our table all the time.
Pro Kitchen Tricks
- After cooking the beef, pour in a splash of red wine to scrape up all the tasty bits from the pot
- Try adding a tiny bit of nutmeg to really bring out the mushroom flavor
- Cook your rice in butter for a couple minutes before adding water for extra nuttiness
- A dash of Worcestershire sauce gives the beef mixture amazing depth
- In a rush? Use already-cooked rice and cut back on the liquid
I've tweaked these tips over many batches, especially after discovering that adding finely chopped celery to the filling creates that authentic buffalo wing feeling – reminds me of my favorite appetizer but in a healthier package.
These Birria Tacos have become my favorite way to wow people without spending forever in the kitchen. There's something really satisfying about turning basic ingredients into something that tastes like it took all day. The mix of savory, spicy goodness with melty cheese and fluffy rice just works for pretty much everyone at my table.
 Pin it
Last-Minute Advice
- Can't do dairy? Try coconut cream and dairy-free cream cheese instead
- Turn leftover filling into a creamy soup by blending some of it
- Throw in a handful of baby spinach right at the end for extra nutrients
- A little smoked paprika on top adds great color and a hint of smokiness
- Freeze single portions for quick grab-and-go meals later
These Birria Tacos show that you don't need fancy techniques for amazing family food. With some simple steps and good ingredients, you can make tacos at home that beat restaurant versions – fresher, less greasy, and exactly how you like them. Just a bit of patience turns basic stuff into a meal that'll have everyone asking for your secret recipe.
Frequently Asked Questions
- → Can I use a slow cooker instead of the oven?
- Definitely! Just brown the meat, make the sauce, then cook everything in a slow cooker on low for 6-8 hours until it's super tender and easy to shred.
- → What's a good replacement for Oaxaca cheese?
- No Oaxaca cheese? Use mozzarella or Monterey Jack—they melt nicely and have a mild taste that works perfectly.
- → How spicy are these tacos?
- They're moderately spicy thanks to the chiles and chipotles. For less heat, reduce chipotles or remove seeds from the dried chiles.
- → Can I freeze the beef and consomé?
- Of course! They freeze great for up to 3 months. Just thaw in the fridge overnight and reheat before taco assembly.
- → What are good sides for birria tacos?
- Top picks include chopped onions, fresh cilantro, limes, and radishes. You can also serve them with Mexican rice, refried beans, or coleslaw.