
 Pin it
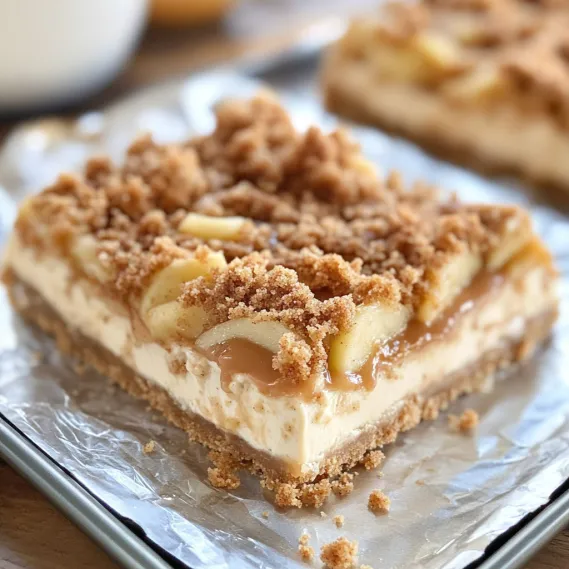
Butter meets cheesecake meets cinnamon apples meets crumbly topping—that's what makes these Caramel Apple Cheesecake Bars so amazing. Each mouthful gives you different textures working together, from the crisp base to the smooth middle to the fruit and that irresistible topping. Everything gets tied together with that sweet caramel drizzle on top. While everyone goes crazy for pumpkin when fall hits, these bars show that apples can steal the show too. All those cozy autumn flavors come through in every single bite, making this the perfect fall treat.
I still remember when I first brought these to my book group. Everyone went completely quiet and just reached for seconds. My neighbor who always passes on sweet stuff actually asked me for the recipe before leaving. What makes everyone go wild for these bars is how each part stands out while working together with everything else. The textures and flavors match up so well that you can't help going back for another piece.
Must-Have Ingredients and Smart Picks
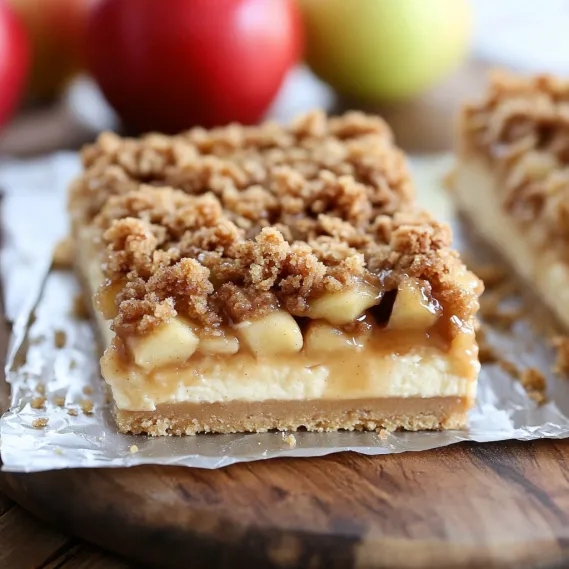
- Apples: Go for crisp, slightly tart ones like Honeycrisp, Pink Lady, or Granny Smith that won't turn mushy. That little bit of tang really works magic against the sweet caramel.
- Cream Cheese: Make sure it's full-fat and sitting out until soft. Cold cream cheese will leave bumpy bits no matter how long you mix it.
- Butter: Don't even think about using margarine or substitutes in the base or topping. Real butter brings flavor you just can't get any other way.
- Caramel Sauce: Making your own is awesome, but a good store-bought one works great when you're rushed. Look for ones with actual butter and cream on the ingredients list for the best flavor.
I've learned that what you put in really changes what you get out with these bars. One time I splurged on apples straight from a local farm and fancy butter with extra fat. Those bars turned out so incredibly good that everyone kept asking what my secret was.
 Pin it
Step-by-Step Baking Guide
- Step 1: Make Your Shortbread Foundation
- Mix soft butter and sugar until it's fluffy and pale, then fold in flour and salt just until it comes together. It'll look a bit crumbly but should stick when you squeeze it. Press this mix firmly into your pan, making sure it's even all over. Bake until you see the edges just starting to turn golden, about 15 minutes. This pre-bake makes sure your base can hold everything that goes on top.
- Step 2: Whip Up the Smooth Cheesecake Middle
- While your base bakes, beat the softened cream cheese with sugar until it's completely smooth. Add eggs one by one, mixing well after each. Stir in vanilla, but don't overmix once the eggs are in. Pour this creamy mixture over your warm crust, making sure it reaches all the corners. The warmth from the crust helps the cheesecake spread out evenly.
- Step 3: Get Your Apples Ready
- Peel and slice your apples thinly, then toss them with sugar, cinnamon, and a tiny bit of nutmeg. How thick you cut them matters a lot - too thick and they stay crunchy, too thin and they disappear. Aim for about 1/8-inch slices for just the right bite. Spread these spiced apple slices all over the cheesecake layer, letting them overlap a little so every bite has some apple.
- Step 4: Create the Crumbly Topping
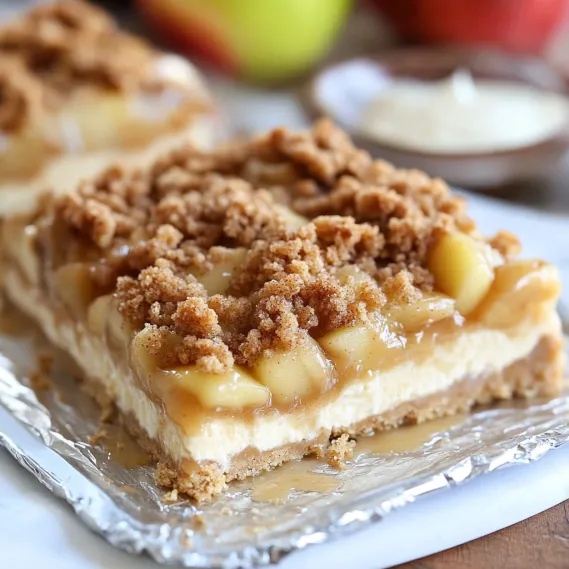
- Mix flour, brown sugar, oats, cinnamon and cold butter cubes until you get coarse crumbs with some bigger butter bits. Work fast with your fingers to keep those butter pieces intact - they make the topping extra good. Sprinkle this mix all over the apples so everything's covered. This topping adds great crunch and soaks up some juice from the apples as they bake.
- Step 5: Bake and Finish
- Bake until the topping turns golden and the middle is mostly set but still wiggles slightly in the center. Let it cool completely at room temperature before putting it in the fridge for at least 2 hours, but overnight is even better. This waiting time lets all the flavors mix together and helps the cheesecake set up properly. Just before you serve it, warm up your caramel sauce a little and drizzle it all over the cut bars, letting it run down the sides for that wow factor.
 Pin it
I learned my lesson the first time I made these when I got impatient and tried to cut them too soon. I ended up with a tasty but messy dessert. Now I always make them a day ahead, giving them plenty of time to chill properly. That overnight rest also lets the apple flavor spread throughout the bars, making them taste even better.
Creative Serving Ideas
You can dress these bars up or down depending on the occasion. For fancy dinner parties, put single bars on pretty plates with a small scoop of vanilla ice cream and an extra drizzle of warm caramel. For casual get-togethers, arrange them on a wooden board with some cinnamon sticks and fresh apple slices for a rustic look. They work just as well packed in lunch boxes or set out at bake sales - that's what makes them so great for any occasion.
Different Season Twists
While apples shine in this recipe, you can switch things up based on what's in season. During summer, I've swapped in fresh peaches and added a hint of nutmeg to the topping with amazing results. In winter, try adding a spoonful of bourbon to your caramel sauce for a grown-up twist that goes perfectly with after-dinner coffee. The basic setup - shortbread, cheesecake, fruit, crumble - works with pretty much any fruit that's looking good at the market.
Prep Ahead and Storage Tricks
These bars actually get better after sitting in the fridge, making them perfect for planning ahead. You can make them up to three days before you need them and keep them cold, though I'd wait to add the caramel until right before serving so they look their best. They freeze really well too, for up to a month - just thaw them overnight in the fridge before serving. If you're freezing them, cut them into squares first and put parchment paper between layers so they don't stick together.
 Pin it
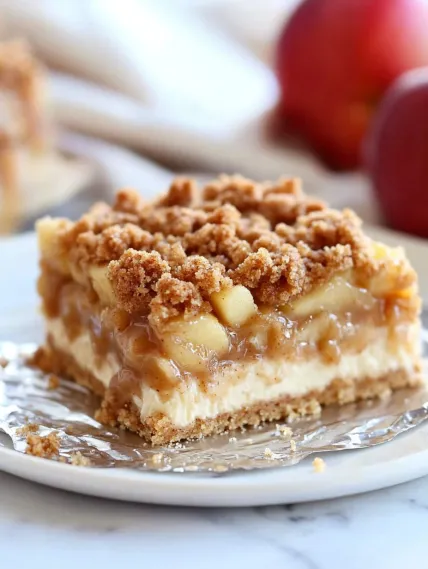
This recipe started as my brother's favorite and has turned into one of my go-to desserts. There's something so satisfying about bringing together all these different elements that work so well together. The combo of crisp shortbread, smooth cheesecake, tender apples, crunchy topping, and silky caramel gives you so many flavors and textures in one bite. They might take a few extra steps and dirty some dishes, but these caramel apple cheesecake bars are worth the effort. They capture all the best fall flavors in a handheld treat that'll disappear fast.
Frequently Asked Questions
- → Can I make these bars early?
- Absolutely! These bars actually taste better the next day. You can prep them up to 2 days ahead and stash them in the fridge with a cover. The caramel can be made up to a week before and kept in a separate container. Before serving, let the bars come to room temperature for about 20 minutes and warm the caramel slightly.
- → Do these bars freeze well?
- Yep, freezing works great! Slice them up, layer them with parchment in a sealed container, and freeze for 3 months. Defrost them overnight in the fridge. For best texture, leave out the caramel before freezing and add it fresh after thawing.
- → Which apples work best for this?
- Granny Smith is the go-to since their tartness pairs perfectly with the sweet toppings, and they hold their shape while baking. If they're not available, try Pink Lady, Honeycrisp, or Braeburn. Avoid softer apples like Golden Delicious since they could get mushy.
- → Can I use ready-made caramel?
- Sure, a good store-bought thick caramel works fine. Steer clear of runny caramel syrups for the best texture. Warm it a little before drizzling so it's easier to spread evenly.
- → Why did my topping melt instead of staying crunchy?
- Soft or melted butter can cause this. Make sure the butter is cool and firm when mixing. It also helps to chill the topping for 15 minutes before adding it. Keep an eye on your oven temp since too much heat can make the butter dissolve too quickly.
- → What's the right size for dicing apples?
- Go for small chunks, around a quarter-inch each. Pieces that are too big might not cook all the way, while tiny bits could vanish into the topping. A medium dice is your best bet for making sure you get apple texture in every bite.