Show your love with rich, homemade Valentine's truffles! Crafted from real chocolate and cream for a melt-in-your-mouth delight, they're simple to make yet so impressive. A hint of butter adds smoothness, and vanilla makes the flavor stand out. Top them with cocoa, sprinkles, or pink drizzles for a romantic touch. Chill, roll, and you're done! They're great as a gift or for a romantic dinner—and you can prep them in advance too. Each piece is pure chocolate bliss that'll make anyone feel special.
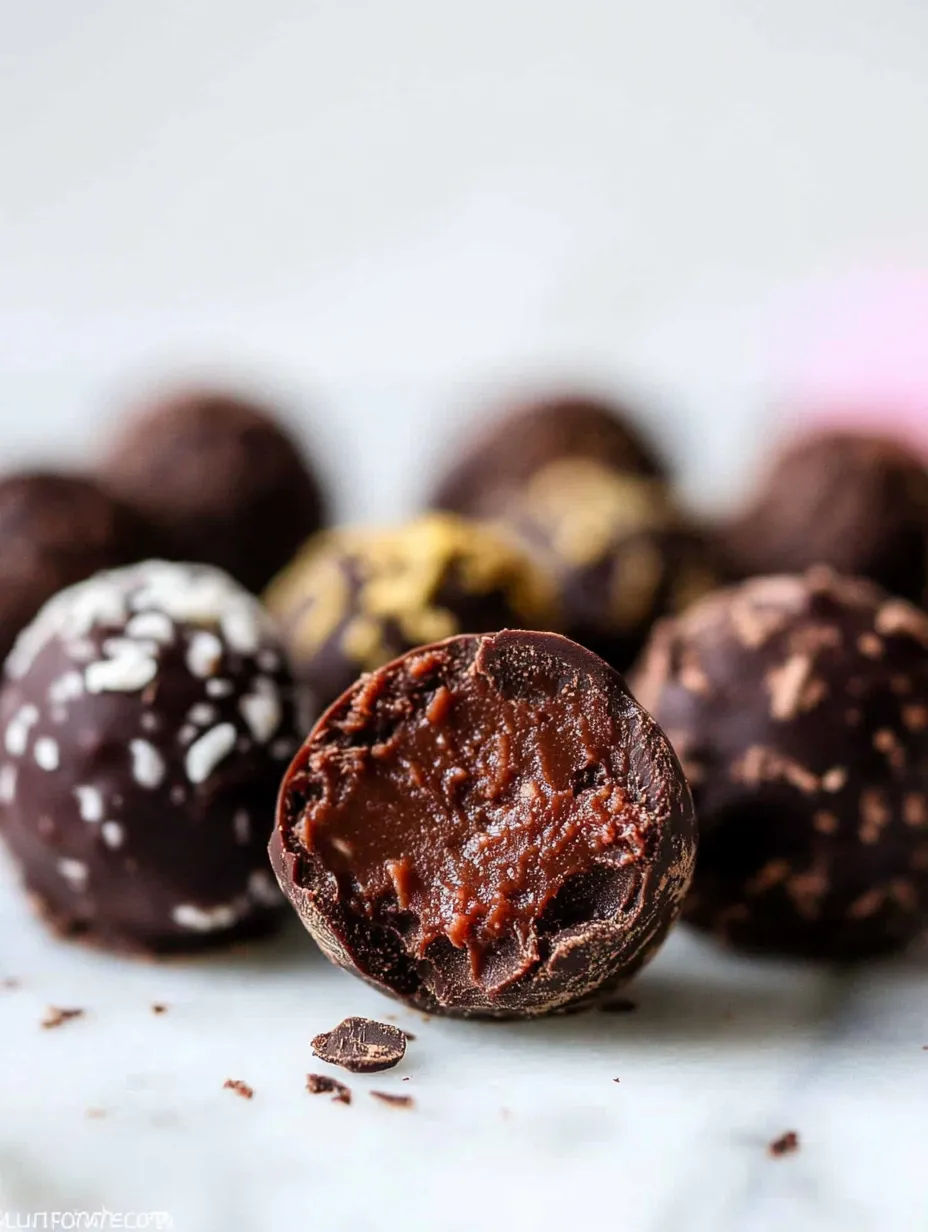
When you sink your teeth into a homemade chocolate truffle, everything seems to pause. That gorgeous outer layer breaks to show a crazy smooth, velvety inside - it's basically chocolate magic in tiny form. In my own kitchen, I've turned these truffles from a basic chocolate-cream mix into a fancy treat that's as good as anything you'd pay big bucks for. What makes them so special? Top-quality chocolate and a bit of butter that gives them this amazing smoothness you just can't resist.
I gave these truffles to my best friends last Valentine's Day. Seeing their amazement when they found out I'd made these myself, not bought them from some fancy shop, made all that careful chocolate work totally worth it. What's my trick? Taking it slow with every step and grabbing the best stuff your money can buy.
Key Components and Shopping Advice
Chocolate: Grab top-shelf chocolate bars - something like Lindt or Ghirardelli with 60-70% cacao works great. Since chocolate is what these truffles are all about, don't cheap out here
Heavy Cream: Pick only heavy cream or heavy whipping cream that's at least 36% fat. You need all that richness to get the ganache just right
Butter: Get unsalted butter and let it warm up first. Even this tiny amount makes your truffles way smoother
Vanilla Extract: Use real vanilla extract for better flavor depth. Don't go for the fake stuff - you'll taste the difference in such a simple treat
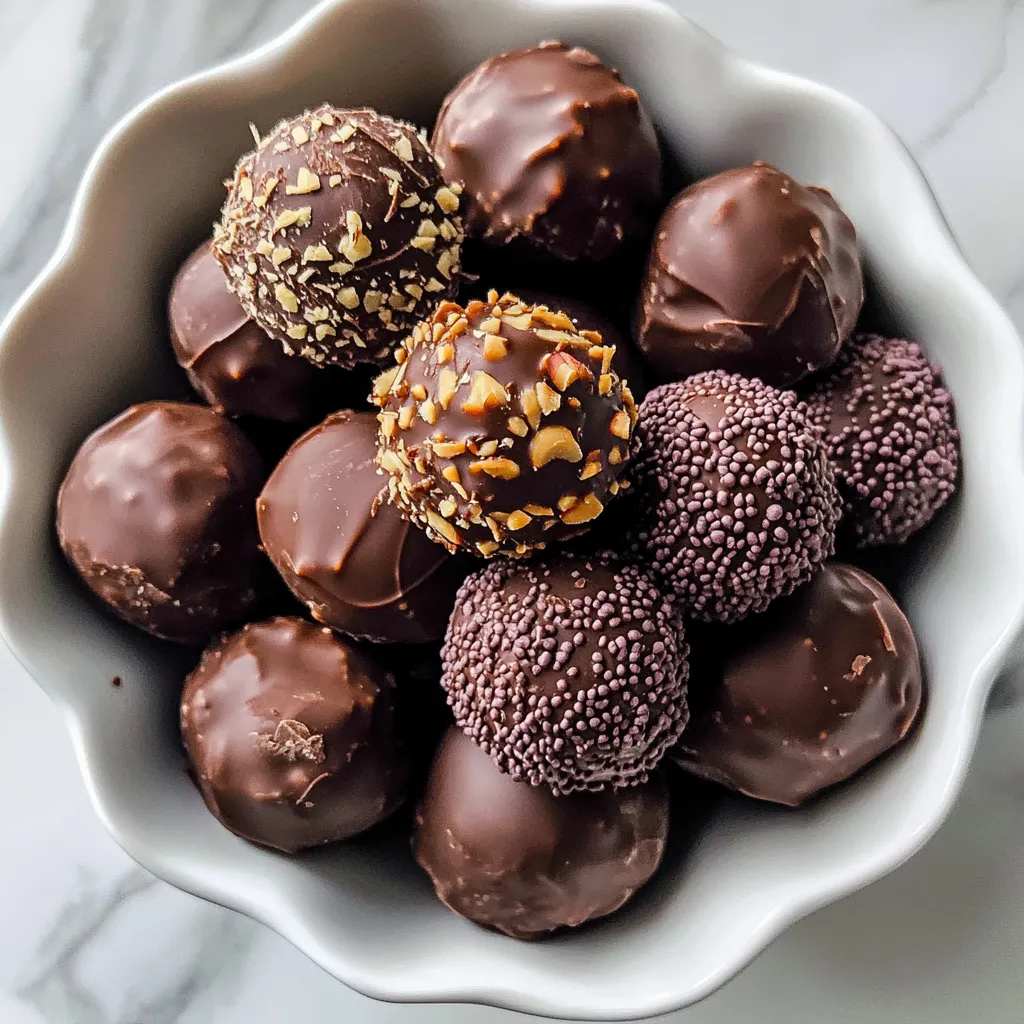
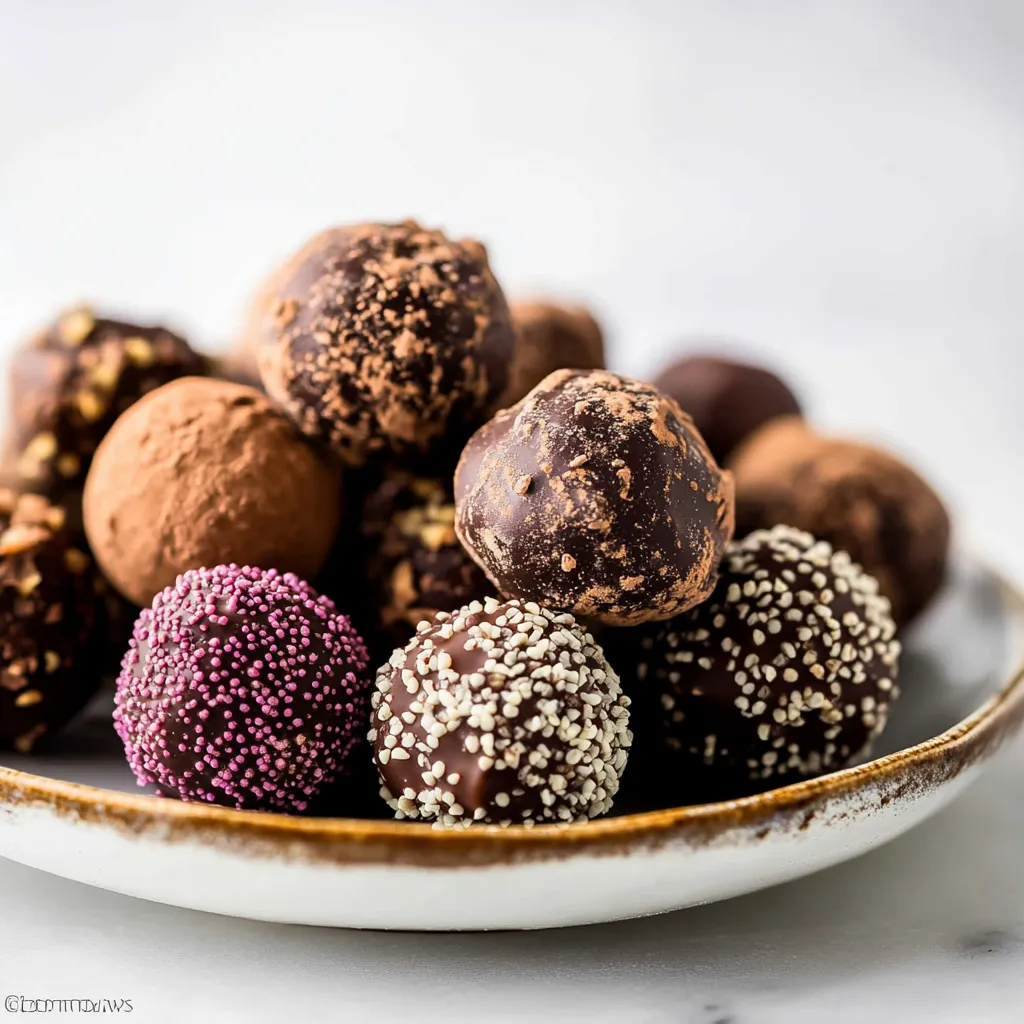
Extra Coatings: Have cocoa powder, smashed nuts, or fun sprinkles handy for finishing touches. Each one brings its own cool texture
I've been making these truffles for years now, and I've figured out that taking your time and watching the temperature are what make them turn out great. Every ingredient does something important to create that magic moment when the truffle melts as soon as it hits your tongue.
Step-by-Step Guide
1. Getting Everything Ready
Start your truffle adventure with everything set up. Chop your chocolate into tiny, same-sized bits - picture small rocks, not big chunks. This helps it melt evenly for a smooth ganache. Put your heat-safe bowl, cream, softened butter, and tools where you can grab them easily. Trust me, being organized now stops any panic when you pour hot cream over chocolate.
2. Warming Up the Cream
Put your heavy cream in a clean little pot. Heat it on medium-low, looking for those key signs - tiny bubbles at the edges, steam coming up, and slight movement on top. Don't let it boil; we just want it hot enough to melt chocolate but not so hot it burns. This usually takes 3-4 minutes, but go by what you see, not the clock.
3. Making the Ganache
This is where the real magic starts. Slowly pour your hot cream over the chopped chocolate, making sure all pieces get covered. Add your room-temp butter now - it'll melt with the chocolate. Now comes the waiting part - don't touch anything for 5 whole minutes. The heat gently melts everything while the butter adds that incredible smoothness. Don't rush by stirring too early.
4. Mixing It Just Right
Begin stirring from the middle with a rubber spatula, moving outward in tiny, steady circles. Watch how it changes from separate stuff into a shiny, unified ganache. When it looks like liquid silk with no streaks, add your vanilla. One last gentle stir mixes it in perfectly. If you see any chocolate bits that didn't melt, put the bowl over some warm (not hot) water for half a minute.
5. The Important Cooling Time
Cover your ganache with plastic wrap, pushing it right onto the surface - this stops that annoying skin from forming. Pop it in the fridge for 1-2 hours, until it's firm enough to scoop but still workable. I usually check mine after an hour - you want it to keep a fingerprint when poked but not be super hard.
6. Scooping It Out
Put parchment paper on a baking sheet. Use a small cookie scoop or spoon to make 1-inch portions of the cold ganache. Don't worry about making perfect balls yet - just focus on getting them all about the same size. If stuff starts sticking, stick it back in the fridge for 15 minutes. I've learned cold ganache is way easier to handle.
7. Shaping the Balls
Now for the hands-on fun part. Working quickly, roll each portion between your palms into smooth balls. Here's a pro tip I picked up at a chocolate workshop: keep your hands cold by running them under cool water and drying them between every few truffles. This stops the chocolate from melting as you work.
8. Adding the Final Touches
Set up your coating stations before you start rolling - whether it's cocoa powder, crushed nuts, or melted chocolate. Roll each truffle in whatever coating you want right after shaping it. For cocoa-covered truffles, use a fork to gently toss them in the powder - this covers them more evenly than just rolling.
I started making truffles in my grandma's kitchen, where she taught me that taking your time leads to perfect results. Every batch I've made has helped me get better, showing me how tiny changes can make a big difference in how they turn out.
Coating Know-How
After making tons of batches, I've learned different coatings need different methods. Always sift cocoa powder so it doesn't clump up. For chocolate coating, let it cool a bit before dipping to make a thicker shell. Nuts should be crushed super fine so they'll stick properly.
Pin itHomemade Chocolate Truffles Recipe | chefmelt.com
Keeping Them Fresh
These truffles actually taste better after sitting in the fridge for a day. The ganache sets perfectly, and all the flavors mix together beautifully. They'll stay good for up to three weeks if you keep them in a sealed container.
Changing Flavors With the Seasons
What's so cool about this basic truffle recipe is how you can switch it up all year round. In winter, I like to put peppermint or a splash of spiced rum in the cream before heating it. Spring calls for lighter stuff - maybe some orange zest or a hint of lavender. Summer's great for adding fresh berry flavors to the ganache, while fall is perfect for warm spices like cinnamon and nutmeg. The trick is to add these flavors when you're heating the cream, so they really get into the ganache. After years of playing around, I've found that less is more - subtle flavors let the chocolate really shine.
Wrapping and Showing Them Off
Homemade truffles deserve to look as good as they taste. I've found that little paper candy cups in nice gift boxes make them look super professional. For special times, I mix different coatings - cocoa, nuts, and chocolate-dipped - in one box, making a gorgeous mix that looks store-bought. Keep the boxes in the fridge until about 30 minutes before giving them away. I figured out this timing through trial and error - it gets the truffles to just the right temperature for that perfect first bite. Add a little note telling people what flavors you've made and suggesting they eat them within two weeks (though they never last that long!).
Working With Your Environment
Making truffles has taught me a lot about how the room around you affects chocolate. During humid summer days, I use a tablespoon less cream and work in an air-conditioned room to make sure they set right. In winter, when my kitchen's cold, letting the ganache sit at room temperature for an extra 10 minutes before rolling makes them way easier to shape. I've also found that working early in the morning, when the kitchen isn't hot yet, gives the best results. These little adjustments, which I've picked up from making countless batches in different seasons, help me make great-looking truffles all year long.
Pro Pointers
Don't try to speed up cooling in the freezer - your truffles won't set evenly
If your ganache separates, warm it gently while stirring until it comes back together
Have a digital thermometer nearby to check cream temperature
Wipe your scoop or spoon clean between each truffle for more even sizes
Making perfect chocolate truffles is kind of like doing a careful dance between temperature and timing. Each step builds on the last one, creating something really special. Whether you're making them for someone you love or just treating yourself, these truffles show us that sometimes the simplest ingredients can make the most amazing treats. The feeling you get from creating something so fancy from just a few ingredients makes all that careful work totally worth it.
Frequently Asked Questions
→ Can I prep these Valentine's chocolates in advance?
Absolutely! They'll keep for up to 4 days on the counter or 2 weeks in the fridge – ideal for planning ahead.
→ How can I make these more romantic for Valentine's?
Add pink sprinkles, heart decorations, or a cute pink chocolate swirl on top.
→ What chocolate should I pick for truffles?
Go for high-quality baking chocolate like Baker's or Ghirardelli bars – skip the chips for the best texture.
→ Can I change up the flavor of these truffles?
Definitely! Add a touch of raspberry extract, strawberry, or even a splash of liqueur for a special twist.
→ What if my truffles are tricky to roll?
If the mixture's too soft, pop it back in the fridge for a bit. Cold truffles are much easier to handle!
Valentines Day Chocolate Truffles
Luxe, creamy chocolate bites crafted with love, perfect for Valentine's. A charming treat that's easy to whip up and share with someone special.
038 ounces (226g) bittersweet or semi-sweet chocolate, chopped finely
041 Tablespoon (14g) unsalted butter, softened
→ Topping Choices
05Melted chocolate
06Chopped nuts
07Sprinkles
08Cocoa powder (unsweetened)
Instructions
Step 01
Warm the heavy cream until it starts to simmer, either on the stovetop or in the microwave.
Step 02
Put the finely chopped chocolate in a bowl that can handle heat. Set it aside.
Step 03
Add softened butter to the chocolate. Pour the hot cream on top, leave it alone for 5 minutes, then stir in vanilla until all the chocolate melts smoothly.
Step 04
Place plastic wrap directly on the surface of the mixture, then refrigerate for 1-2 hours. Pro tip: Speed up the process by chilling it in a shallow container!
Step 05
Scoop out small portions, about 2 teaspoons each, and roll them into balls. Coat with your favorite toppings if you want.
Notes
Tastes best when served at room temperature
You can mix in flavorings like extracts or liqueurs
High-quality chocolate bars work better than chocolate chips
Tools You'll Need
Mixing bowl (heat-safe)
Cookie scoop (small size)
Plastic wrap
Shallow pan (8-inch, optional)
Allergy Information
Please check ingredients for potential allergens and consult a health professional if in doubt.

 Pin it
 Pin it
 Pin it