
 Pin it
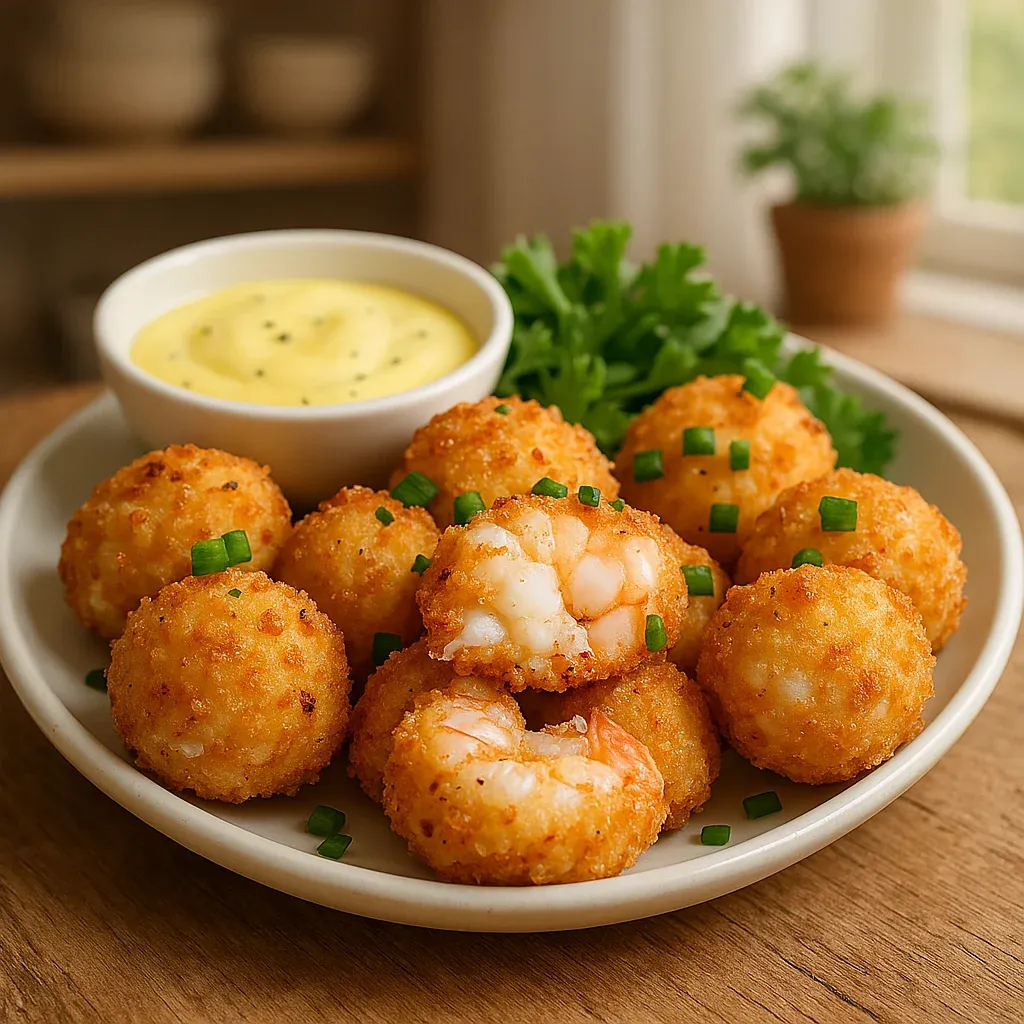
The chunky Shrimp Cakes with Lemon Aioli has become my favorite way to wow friends without spending forever cooking. The outside gets amazingly crunchy while the inside stays soft and juicy, and that tangy lemon aioli puts it over the top.
I whipped these shrimp cakes up when friends dropped by unexpectedly and I needed something that looked fancy but wasn't hard to make. Everyone cleaned their plates, and now my kids beg for them whenever we're celebrating something. That mix of the crunchy outside with tender shrimp bits inside makes everyone smile.
- 1 lb shrimp: cleaned, tails off, and chopped roughly to keep that meaty seafood texture
- 1/2 cup panko breadcrumbs: gives you that satisfying crunch that makes each bite special
- 1/4 cup mayonnaise: holds everything together and adds a smooth richness
- 1 egg: works as the glue so your cakes stay in one piece
- 2 tablespoons fresh parsley: brings color and a garden-fresh taste
- 1 tablespoon Dijon mustard: adds a nice kick and complexity
- 1 tablespoon lemon zest: wakes up all the flavors
- 1/2 teaspoon Old Bay seasoning: adds that signature seafood spice blend
- Salt and pepper: to taste for just the right punch
- 1 tablespoon olive oil: helps create that beautiful brown crust
- For the Lemon Aioli:
- 1/2 cup mayonnaise: creates the smooth, spreadable base
- 1 tablespoon fresh lemon juice: gives that zippy tartness
- 1 teaspoon lemon zest: doubles down on the citrus flavor
- 1 teaspoon garlic: adds that must-have savory bite
- Salt and pepper: to taste for perfect balance
Easy Cooking Guide
- Chop Your Shrimp:
- Cut your shrimp into small chunks about the size of corn kernels. Don't make them too tiny or you'll lose the shrimp feel, but don't leave them too big or your cakes won't stick together. The size really matters here.
- Blend Everything Together:
- Put all your shrimp cake stuff in a big bowl. Fold it together gently so you don't mash up the shrimp pieces. The mix should feel a bit sticky but still come together when you press it. If it feels sloppy, toss in another spoonful of breadcrumbs.
- Shape Your Cakes:
- Split the mix into four even portions using a scoop or spoon. Get your hands a little wet, then gently press each portion into a patty about as thick as your pinky finger. Smooth the edges so they don't crack while cooking.
- Cook Them Up:
- Warm your pan over medium heat until it's hot but not smoking. Pour in the olive oil and wait till it shimmers, then carefully place your cakes in. Don't touch them for 3-4 minutes until they're golden brown underneath. Flip them super carefully and cook another 3-4 minutes until they hit 145°F inside.
- Mix Your Aioli:
- While the cakes cook, stir all aioli ingredients in a small bowl. Start with just a bit of lemon and garlic, then add more if you want. The sauce should be thick enough to scoop but still drizzle nicely over your warm shrimp cakes.
 Pin it
I remember the first time I made these shrimp cakes during a backyard get-together. When everyone took their first bite of that crunchy outside and soft shrimp inside with the tangy lemon sauce, the whole table went completely quiet. That's when you know you've made something special. Now we kick off every summer with these on the menu.
Storing and Planning Ahead
These shrimp cakes actually taste better if you let the mix hang out in the fridge before cooking. You can mix everything up a day ahead, shape the patties, and keep them covered in the fridge. This rest time mixes all the flavors together and helps them stay in one piece when you cook them.
If you want to save them longer, put the raw patties on a baking sheet with parchment, freeze them solid, then slip them into a freezer bag. They'll stay good for three months. You can cook them straight from frozen, just add about 2-3 more minutes per side.
If you have any cooked cakes left (which rarely happens at my house), they'll keep in the fridge for two days. Warm them in a 350°F oven for about 10 minutes to bring back their crunch.
Great Side Dishes
These shrimp cakes can stand alone but they also play well with others. For a light meal, put them on top of some salad greens with a little dressing. If you want something heartier, add some roasted asparagus and lemon rice on the side.
The lemon aioli is perfect with the cakes, but try putting extra in a small dish for dipping too. You can even turn them into mini sandwiches by putting them on small toasted buns with the aioli, some peppery arugula, and thin avocado slices.
For drinks, go with a light, fruity white wine like Chardonnay (not the oaky kind) or Sauvignon Blanc that won't fight with the delicate shrimp taste.
 Pin it
Fixing Common Problems
If your shrimp cakes fall apart while cooking, your mix is probably too wet. Add breadcrumbs one spoonful at a time until everything stays together when pressed. Putting the shaped patties in the fridge for half an hour before cooking can also help them stick together.
If your aioli seems too thick, add a tiny splash of water or lemon juice. If it's runny, mix in a little more mayo. Remember that the garlic and lemon flavors get stronger as the sauce sits, so make it a bit milder than you want if you're making it ahead.
Frequently Asked Questions
- → What stops shrimp cakes from breaking apart in the pan?
Make sure to use enough binder ingredients like mayo or breadcrumbs to bring the mix together. Pop the patties in the fridge for about 20 minutes before cooking to keep them firm while frying.
- → Can I bake these instead of frying?
Absolutely! Set your oven to 375°F, lay the patties on a baking sheet, and cook for about 15-20 minutes. Flip them halfway so they get evenly browned.
- → What can I use if I don’t have Old Bay seasoning?
No Old Bay? Mix paprika, garlic powder, cayenne, a bit of black pepper, and celery salt to recreate a similar kick.
- → How can I make the lemon aioli taste bolder?
For extra zest, stir in some lemon rind, a little Dijon mustard, or smoked paprika. If you want it garlickier, add more garlic paste.
- → Can I prep these ahead of time?
Sure thing! Shape the patties and store them in the fridge for up to four hours before cooking. It helps the flavors come together and makes them easier to handle.