
 Pin it
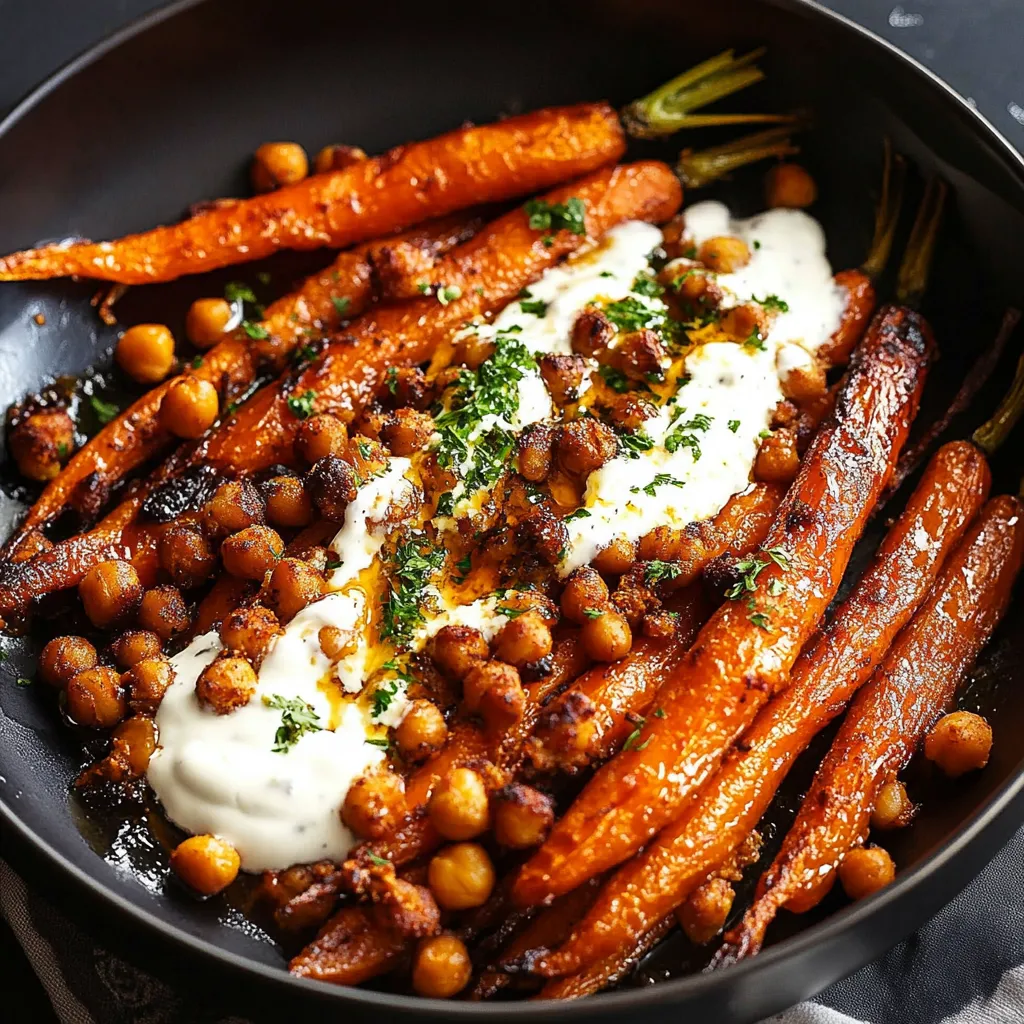
This eye-catching meal brings together tangy-sweet oven-roasted carrots, crispy chickpeas, and a refreshing yogurt dip for a wonderful mix of tastes and textures. What begins as three basic elements turns into a stunning dish that's equally good as a hefty side or a meatless main. I stumbled upon this idea while searching for ways to turn ordinary veggies into something special.
I brought this to a get-together last week, and everyone couldn't believe how these simple ingredients created such an amazing dish. Every mouthful is exciting because of the different temperatures and textures.
Key Components and Shopping Advice
- Dutch Carrots - Regular ones cut lengthwise work too
- Maple Syrup - Honey works in a pinch but maple tastes better
- Sriracha - Gives spiciness plus a hint of vinegar
- Chickpeas - Use a can, just drain them without drying
- Greek Yogurt - Choose full-fat for the creamiest sauce
The real wonder happens as the maple-sriracha mix turns sticky on the carrots while the chickpeas get super crunchy in the hot oven.
Step-by-Step Cooking Guide
- Step 1: Get Ready
- Turn your oven to 200°C/425°F (180°C fan). Make sure the racks are 20cm apart so heat can move around.
- Step 2: First Chickpea Cooking
- Drain your chickpeas but leave them damp. Put them on a tray while still wet and let them roast for the first 10 minutes.
- Step 3: Mix Up Carrot Coating
- Combine maple syrup (3 tbsp), sriracha (2 tbsp), olive oil (1½ tbsp), salt (¼ tsp), and pepper until well blended.
- Step 4: Coat Your Carrots
- Roll the Dutch carrots (or long strips of regular carrots) in the maple-sriracha blend until they're fully covered.
- Step 5: Start Cooking Both Parts
- Put carrots on the top shelf and wet chickpeas on the bottom shelf. Start your 10-minute timer for the first chickpea cook.
- Step 6: Fix Up Chickpeas
- After 10 minutes, take out the chickpeas. Move them to one side, add oil and spices. Mix everything well.
- Step 7: Keep Roasting
- Put chickpeas back in for another 20-25 minutes. Keep cooking the carrots too, flipping them once halfway.
- Step 8: Create Yogurt Dip
- Mix yogurt, grated garlic, lemon juice, olive oil, and salt. Let it sit for 20 minutes.
- Step 9: Make Extra Sauce
- Stir together more maple syrup and sriracha for drizzling at the end.
- Step 10: Check If It's Done
- Chickpeas should make noise when you shake the pan. Carrots should be soft and browned.
 Pin it
Getting Amazing Texture
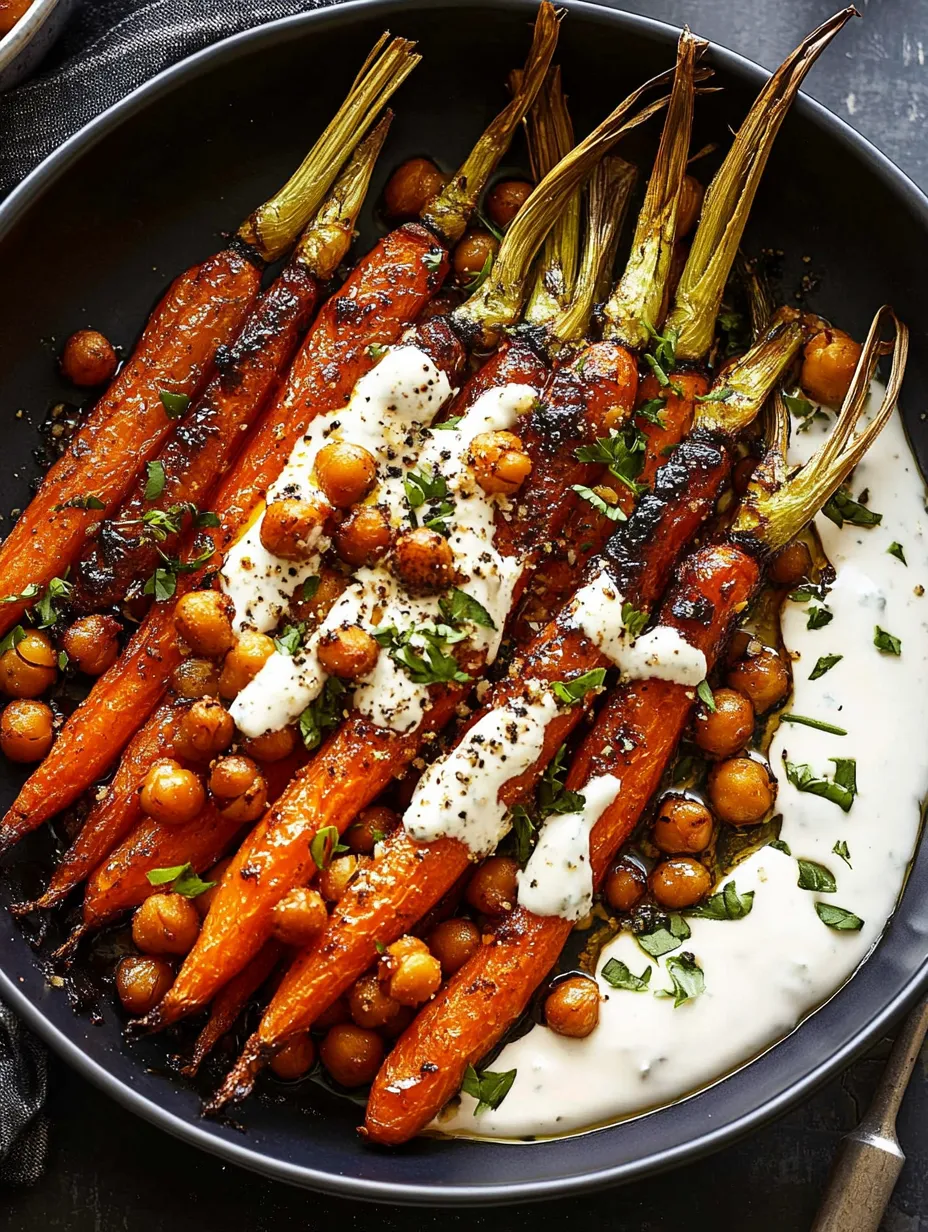
What makes this dish special is the different textures in each part. Your carrots need to be tender without getting mushy, chickpeas should be truly crunchy, and the yogurt sauce smooth and rich. Getting the timing and heat just right is how you make this happen.
Heat Levels Count
Every part of this dish needs to be served at just the right warmth. The carrots and chickpeas should come straight from the hot oven, while the yogurt sauce gives a cool contrast. This mix of hot and cold makes every bite more interesting.
Ways To Serve
This flexible dish can be used in many ways:
- A meatless main dish with warm bread
- Part of a table full of small plates
- Fancy side for barbecued meats
- One part of a filling lunch salad
Pro Kitchen Tricks
- Always do the first chickpea roast
- Don't mix parts until ready to eat
- Check yogurt sauce for flavor
- Add some fresh herbs on top
- Eat right away for maximum crunch
 Pin it
I now make this dish for both family meals and when friends come over. Simple ingredients working together create something that looks fancy but isn't hard to make.
Last Helpful Hints
- Make more chickpeas to munch on later
- Use more or less sriracha as you like
- Try adding some roasted nuts
- Mix leftovers with grains for a new meal
- Store each part separately until eating
Frequently Asked Questions
- → Is the dish really spicy?
- Not very! Roasting softens the sriracha’s kick, but you can tweak the spice level.
- → Can I use large carrots instead?
- Absolutely—slice big ones lengthwise to match smaller carrots in size.
- → What’s the trick to crispy chickpeas?
- Eat them within two hours of cooking for the crunchiest texture.
- → Can I prepare this in advance?
- Keep everything stored separately and put it together right before serving.
- → How long do the leftovers last?
- Just one day. Let them warm up to room temp before eating.