
 Pin it
Take plain canned tuna to amazing new heights with these Asian-style Sriracha Tuna Cakes. They're crunchy outside but soft and tasty inside, giving you just the right kick of heat and flavor in every mouthful. Add the tangy spicy tartar sauce and you've got a quick but impressive meal that comes together fast. Whether you need a speedy lunch or an easy dinner option, these tuna cakes show how simple pantry items can turn into restaurant-quality food with just a bit of prep work.
I first whipped these tuna cakes up when I needed creative ways to use what was in my pantry during hectic weeks. What started as just trying something new has become a regular meal at my house. A few weeks back, I made these for some friends who swore they "couldn't stand canned tuna" - they asked me for the recipe before they left. The spicy kick plus the crispy outside totally changed their minds.
Key Ingredients and Shopping Advice
- Canned Tuna: Go for solid white albacore in water for the nicest texture and taste. Make sure you drain it really well so your cakes don't turn out mushy.
- Rice Crumbs or Breadcrumbs: You can find rice crumbs at Trader Joe's for a gluten-free option, but any breadcrumbs do the job. Panko gives you an extra crunchy outside.
- Sriracha: Put in more or less depending on how spicy you like things. What I suggest here gives a medium heat most folks enjoy.
- Mini Sweet Peppers: These bring color, flavor, and a touch of sweetness that works well with the heat. You can swap in red bell pepper if that's what you have.
What's great about this dish is how easy it is to change - you can make it spicier by adding more sriracha, or switch ingredients based on what's in your kitchen. The first time I tried these, I used chopped jalapeño instead of sweet peppers for extra heat, and they turned out just as yummy.
Step-by-Step Cooking Guide
- Step 1: Mix Up the Spicy Tartar Sauce
- Start by throwing together 1/4 cup mayo, 1/4 cup dill pickle relish, and 2 tablespoons sriracha in a small bowl. Toss in some ground ginger if you've got it for extra flavor, then add salt and pepper how you like it. Mix everything until it's smooth, cover it up, and stick it in the fridge while you work on the tuna cakes.
- Step 2: Put Together the Tuna Mix
- Drain two 5-ounce cans of tuna really well and dump them in a medium bowl. Break up any chunks with a fork until it looks even. Beat an egg in another small bowl, then pour it over the tuna and stir it in. Add 1/2 cup rice crumbs or breadcrumbs, 2 tablespoons mayo, 1 tablespoon sriracha, one minced garlic clove, and seasonings. Carefully fold in finely chopped sweet peppers and sliced green onions until everything's mixed up evenly.
- Step 3: Shape Your Patties
- Get your hands a little wet to stop sticking, then scoop about 1/3 cup of the tuna mix and roll it into a ball. Gently flatten it between your hands to make a patty about 3/4-inch thick. Put the finished patties on a plate and keep going until you've used all the mix, making about five same-sized cakes.
- Step 4: Cook Them Golden Brown
- Heat up 1-2 tablespoons olive oil in a big skillet over medium-high heat until it's hot but not smoking. Carefully put the tuna cakes in the oil, making sure they don't touch each other. Let them cook for 3-4 minutes on the first side until they're golden and crispy, then carefully flip them with a thin spatula. Cook another 3-4 minutes on the other side until they're golden all over and hot inside.
- Step 5: Plate Up and Eat
- Move the hot tuna cakes to a plate lined with paper towels to soak up extra oil. Serve them right away with a big dollop of the spicy tartar sauce on top or on the side for dipping. For a complete meal, add a simple side salad with Asian dressing, cauliflower rice, or some roasted veggies. Sprinkle with extra sliced green onions and lime wedges for a fresh finish.
 Pin it
The first time I tried making these tuna cakes, I learned something about patience. I tried to flip them too soon before they had a good crust, and ended up with crumbs everywhere. Now I wait until I can see golden edges forming before I try to turn them, and that makes all the difference in how they look when done.
Tasty Serving Ideas
These adaptable tuna cakes go great with lots of different sides. For a light lunch, put them on top of mixed greens with a simple rice vinegar and sesame oil dressing. For a bigger dinner, serve with sesame cucumber salad and cauliflower rice. They also make great sliders - just put each cake on a small bun with some spicy tartar sauce, sliced avocado, and microgreens for a fancy appetizer or game day snack that'll vanish quickly.
 Pin it
Prep-Ahead Options
These tuna cakes work great for meal prep and can be made ahead several ways. You can mix and shape the patties up to 24 hours early - just cover and keep in the fridge until you're ready to cook. You can also fully cook the cakes, let them cool, and keep them in the fridge up to three days. To reheat, pop them in a 350°F oven for about 10 minutes or in an air fryer for 3-4 minutes at 350°F until they're hot. The spicy tartar sauce actually tastes better after sitting in the fridge for a day as the flavors mix together.
Air Fryer Method
For an easier cooking approach using less oil, these tuna cakes work great in an air fryer. Heat your air fryer to 350°F for about 5 minutes. Lightly spray both sides of each tuna cake with cooking oil, then put them in a single layer in the air fryer basket, leaving space between each cake. Cook for 8-10 minutes, carefully flipping halfway through, until they're golden brown and hot inside. This way makes super crispy exteriors that many people like better.
 Pin it
These Sriracha Tuna Cakes have become my favorite fix for those nights when the fridge looks empty but the pantry's still full. With just a few basic ingredients I always keep around, I can make a meal that feels special rather than thrown together. The mix of crispy outside, flavorful inside, and zesty sauce turns regular canned tuna into something I actually crave and feel proud to serve to both family and guests.
Frequently Asked Questions
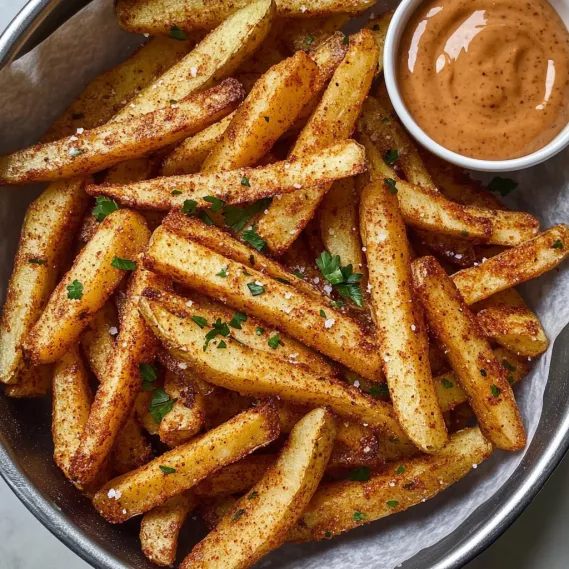
- → Why soak potato slices in water?
- Soaking sliced potatoes in ice-cold water helps in three ways. First, it cuts down on surface starch so the fries cook up crisp instead of sticky or soggy. Second, it keeps the potatoes from turning brown while you prep. Third, a soak adds moisture that creates fluffy insides while the outside crisps up nicely. For the best crunch, soak for at least 30 minutes—or even overnight in the fridge for extra time to work its magic.
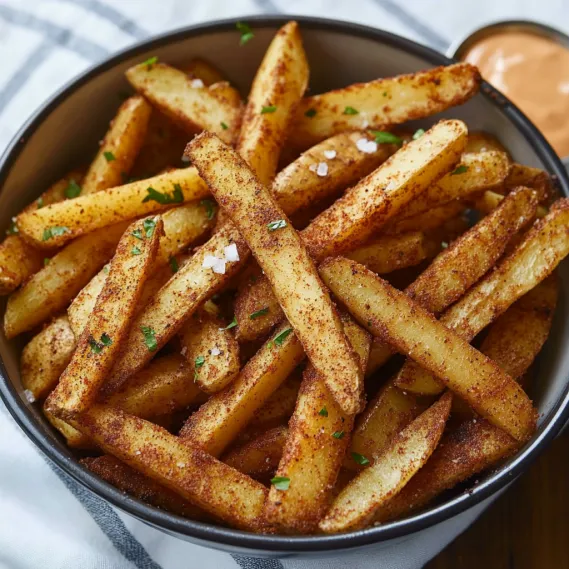
- → Can I make these fries less spicy?
- Totally! To dial down the heat, cut the cayenne pepper to 1/4 teaspoon or skip it. For spicier fries, boost the cayenne to a teaspoon or toss in extra flavor with ground chipotle or red pepper flakes. Adjust the paprika too—it can add heat if you're using the spicy kind, so balance it out to fit your taste.
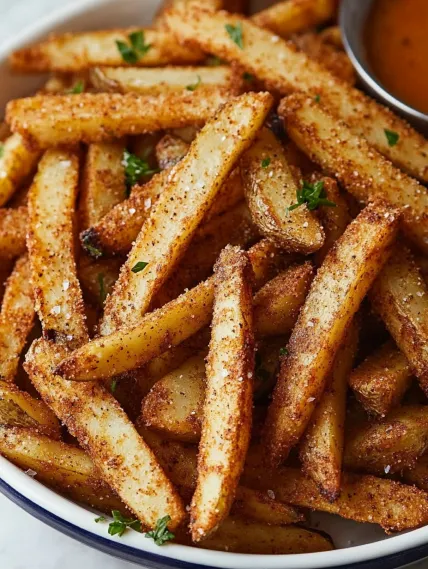
- → What's the deal with frying the potatoes twice?
- Double-frying is the secret to fries that are crunchy outside and soft inside. The first, low-temp fry (around 260°F) cooks the insides and sets up a nice surface. After a cooling break, the second, hotter fry (about 350°F) crisps up that surface to a golden crunch. Without this two-step method, it's tricky to get such great texture in fries.
- → Can baked fries be crunchier?
- Yup, here are some tricks: Pat the sliced potatoes completely dry after soaking. Spread them out on your baking sheet so they aren't crowded. Preheat your baking sheet in the oven to give them a quick sear. Use enough oil—up to 4 tablespoons for 2 pounds of potatoes works best. After they bake, let them sit in the turned-off oven for a few minutes to let moisture escape without overcooking.
- → Which sauces go well with Cajun fries?
- These fries love a good dip! Classic choices include remoulade (spicy mayo with herbs and pickles) or fry sauce (ketchup and mayo with extras). For variety, try ranch with a spicy kick, garlic aioli, honey mustard, barbecue sauce, or even a cool yogurt dip. For extra Louisiana flair, mix up a creole mustard or spicy mayo.
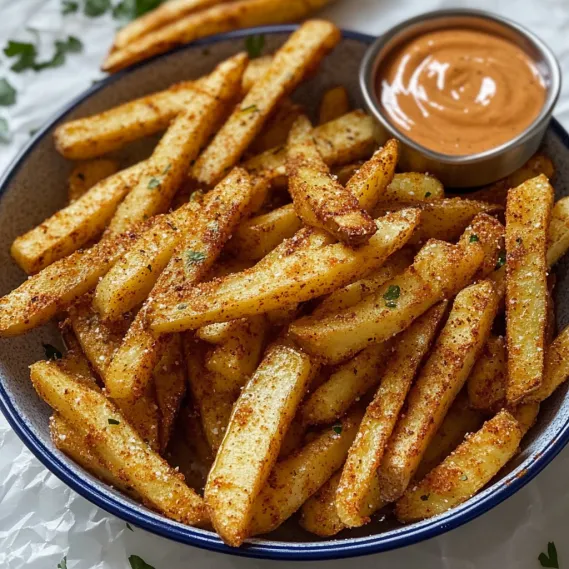
- → Can I prep any steps ahead of time?
- For sure! Cut potatoes can sit in water in the fridge for a day. Mix up your spice blend ahead of time and keep it in a jar—it lasts for months. If you're baking, the potatoes can be parboiled, drained, and stored in the fridge for up to a day before seasoning and finishing. Having everything set up ahead of time makes cooking day much easier!