
 Pin it
These oven-baked chicken strips turn regular chicken into an incredible dish that's better than what you'd get eating out, but way healthier too. When you bite in, you'll love how the super crunchy outside gives way to tender, juicy chicken inside - it's that perfect combo we all want in chicken strips.
I came up with this when I was trying to find something my picky kids would eat instead of fast food. Now we make these strips every week, and any leftovers are usually gone by lunchtime the next day.
- Chicken breasts or tenders go with fresh when possible, though thawed frozen ones work fine
- Large eggs they're what makes the coating stick really well
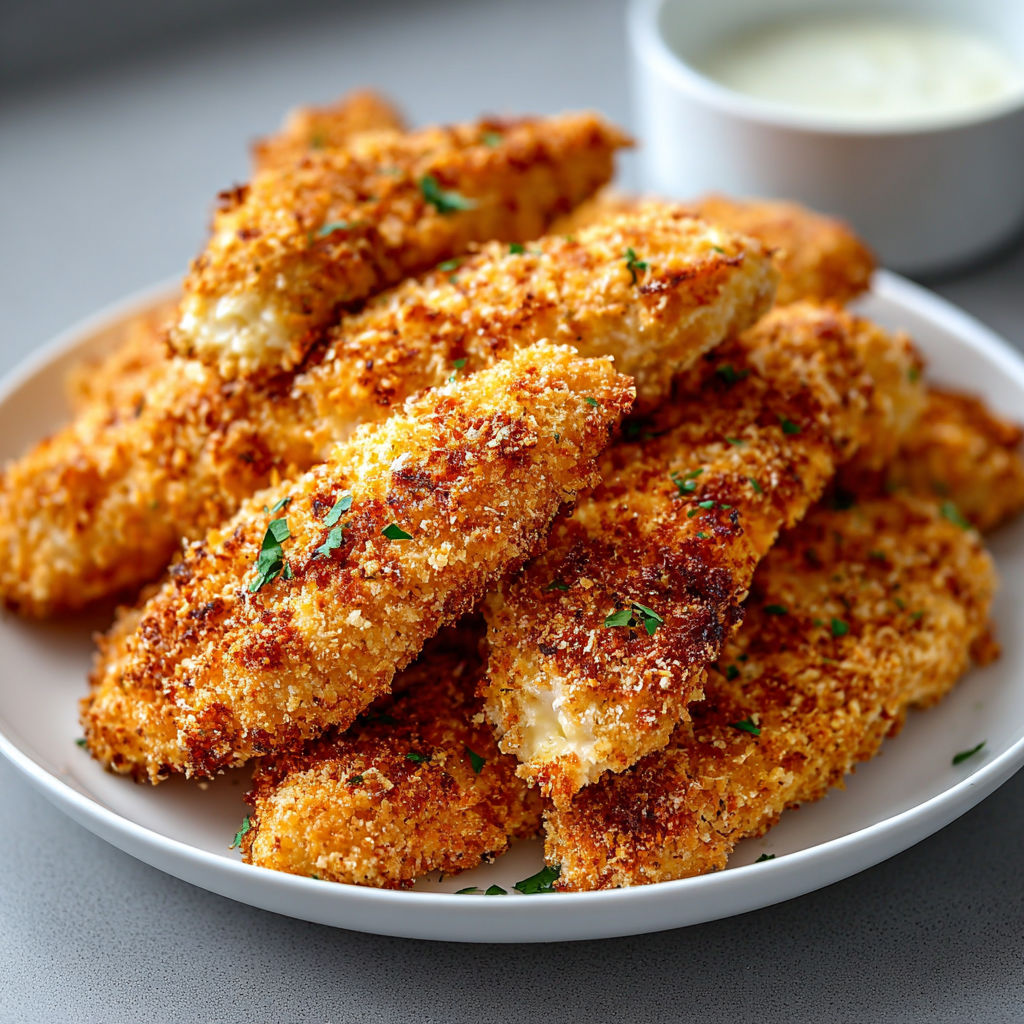
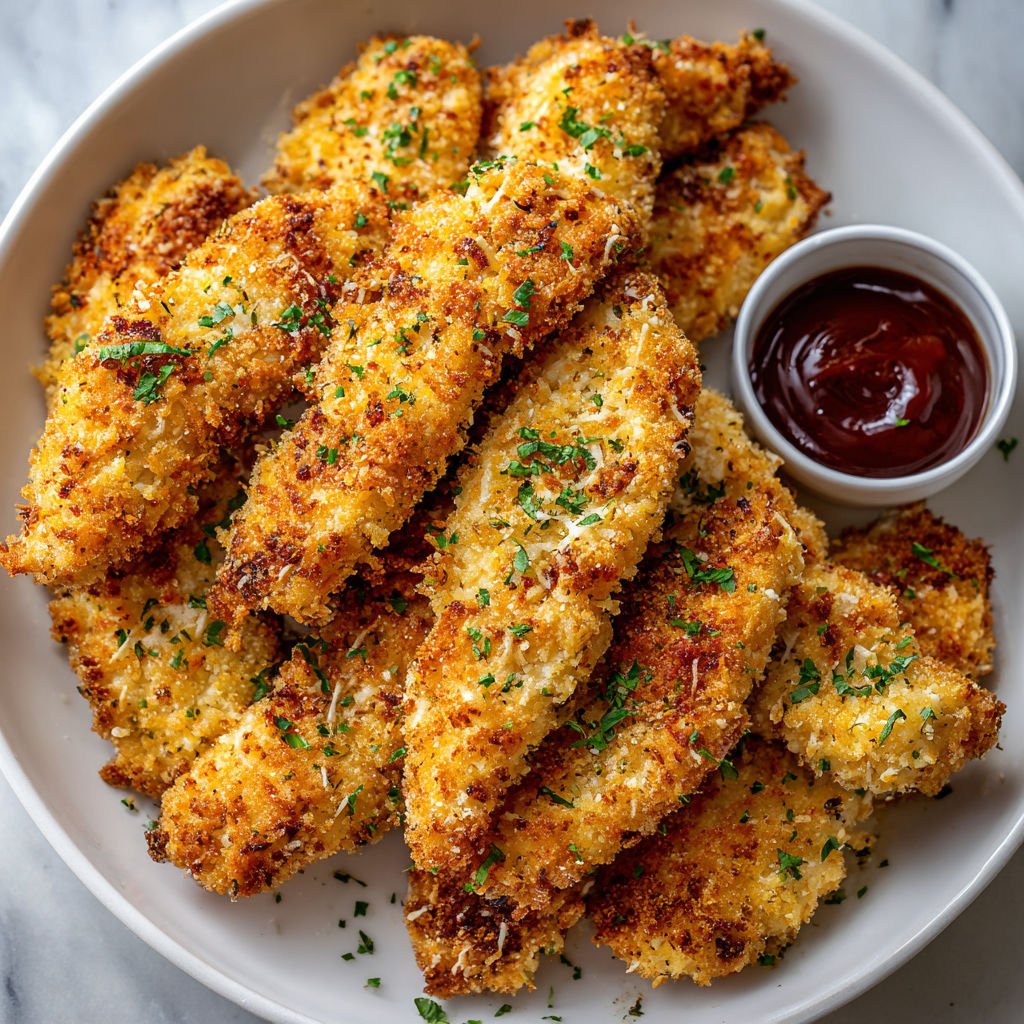
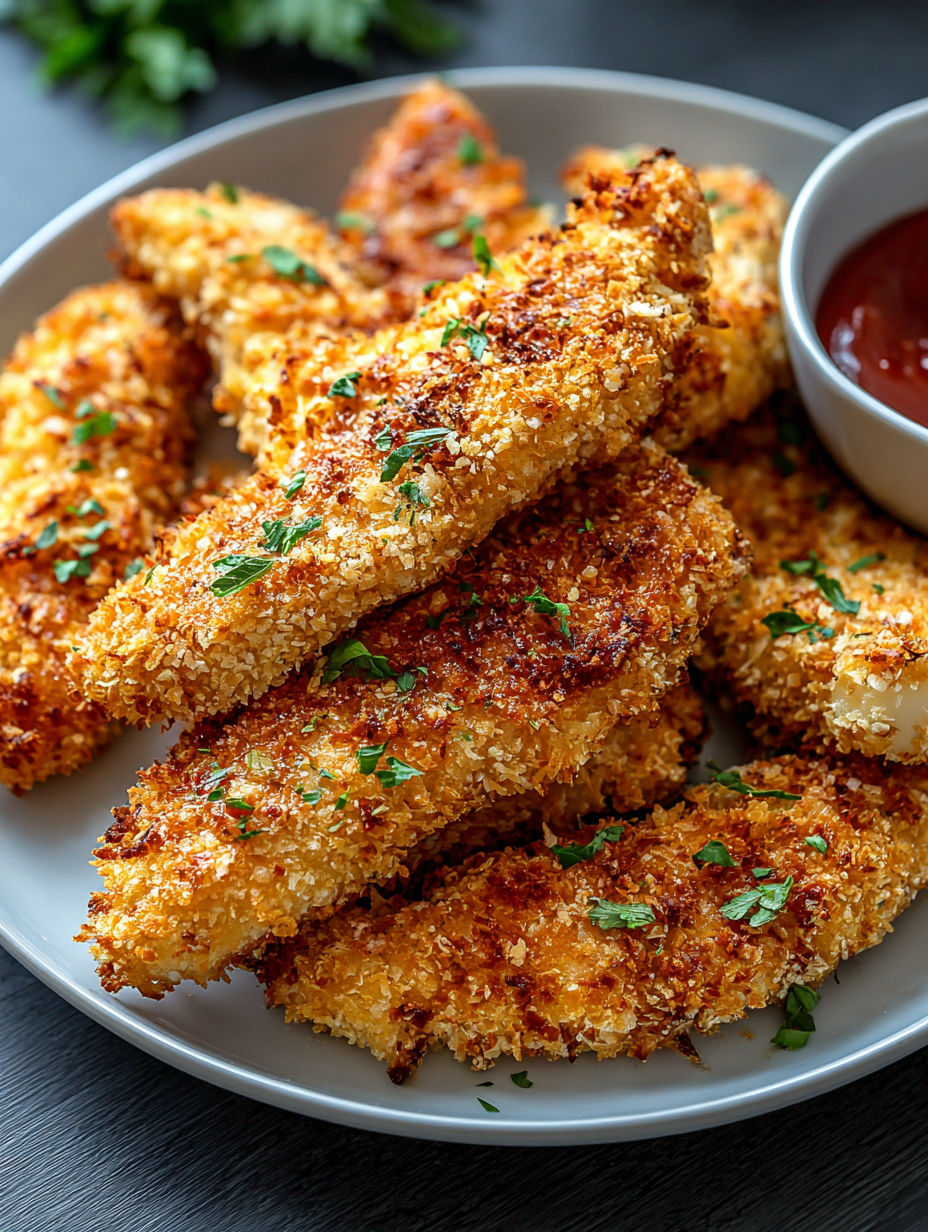
- Panko breadcrumbs they're way crunchier than normal breadcrumbs
- Parmesan cheese brings rich flavor and helps make that golden outside
- Garlic powder gives great taste without burning like fresh garlic would
- Paprika adds a bit of smoky flavor and nice color
- Onion powder gives a tasty flavor base
- Salt and pepper pulls all the flavors together
- Olive oil spray helps get that golden crunch without frying
Delicious Baked Chicken Strips Preparation
- Prep the Chicken
- Slice chicken breasts into even strips about 1 inch thick so they cook the same. Grab some paper towels and dry them off good - this gets rid of water that would stop them from crisping up. If you bought pre-cut tenders, you can skip cutting but still dry them off.
- Season and Setup
- Sprinkle a bit of salt and pepper on the chicken before you start coating it. This way the meat itself has flavor, not just the outside. Then get two bowls ready - one with eggs beaten until smooth, and another with all your breadcrumb stuff mixed together.
- The Perfect Coating
- Take each piece of chicken and dunk it in the egg, let it drip for a few seconds. Then push it into the breadcrumbs so they stick all over. Try to use one hand for the wet egg bowl and the other for the dry breadcrumbs so your fingers don't get all gunky.
- Baking Preparation
- Put your coated chicken pieces on a baking sheet lined with parchment paper. Make sure to leave some space between each one. This lets hot air flow around them so they get crispy all over. Using a wire rack makes them even crunchier if you've got one.
- Oven Magic
- Cook them in a hot oven at 400°F for 10 minutes, then grab some tongs and flip each piece over. Cook another 10 to 15 minutes until they read 165°F inside and look golden and crunchy on the outside.
- Rest and Serve
- When they come out of the oven, let them sit for a few minutes. This super important step keeps all the juices inside the meat instead of running out when you cut them. Then serve them right away with your favorite dips.
The panko breadcrumbs really make all the difference in this recipe. I found out how amazing they are years back when I was trying to make my grandma's fried chicken but in a healthier way. She would've been so surprised at how these turn out almost as crunchy as her famous double-coated chicken.
Plan Ahead Options
You can get these strips ready a day early. Just bread them and put them on a baking sheet with plastic wrap over top in the fridge. Before cooking, let them sit out for about 15 minutes to warm up a bit. If you want to save some for later, freeze the breaded raw strips on a baking sheet until hard, then put them in a freezer bag. You can cook them straight from frozen - just add about 5 to 7 minutes to your cooking time.
Amazing Dipping Choices
A good sauce makes these chicken strips even better. Try mixing equal parts honey and Dijon mustard with a splash of apple cider vinegar for homemade honey mustard. Want something spicy? Mix mayo with sriracha and squeeze in some lime juice. My family can't get enough of basic garlic dip - just stir together mayo, crushed garlic, lemon juice and a tiny bit of salt.
 Pin it
Creative Flavor Twists
Play around with different stuff in your breadcrumb mix. Throw in some Italian herbs for a Mediterranean taste. Add taco seasoning for a Southwestern feel that goes great with guacamole. If you like heat, mix in some cayenne or red pepper flakes. You can switch up the cheese too - try Pecorino Romano for a stronger flavor than Parmesan, or use nutritional yeast if you don't do dairy but still want that cheesy taste.
 Pin it
Frequently Asked Questions
- → What can I do to get extra crispy baked chicken tenders?
To get the crispiest chicken strips possible, try these: 1) Dry the raw chicken with paper towels before adding your coating, 2) Choose panko crumbs for crunch, 3) Give the tenders a light oil spray before placing in the oven, 4) Bake them on a wire rack to let air get to all sides, and 5) For an added crunch, re-coat the chicken by doing a second egg and crumb layer.
- → Is it possible to prep these ahead of time?
You bet! Either bread the chicken strips and stash them raw in the fridge for up to a day before baking, or fully cook and cool them before storing for up to three days. When ready, reheat the cooked chicken at 350°F for about 10-15 minutes to refresh that crispness.
- → How do I know my chicken strips are fully cooked?
The easiest way is with a food thermometer. Look for an internal temp of 165°F (74°C). They should also be golden outside and have no pink inside when you cut into them. Baked at 400°F, they'll usually be done in 20-25 minutes, but thicker pieces might take a bit longer.
- → What sauce goes best with them?
These chicken strips go great with so many dips like honey mustard, ranch, BBQ, buffalo sauce, garlic aioli, or sweet and sour. Even ketchup works! For something different, try mixing mayo with pesto or chipotle for a fun homemade sauce.
- → Can I use thighs instead of breasts?
Yes, thighs work too! Go for boneless, skinless thighs. Slice them into similar-sized pieces as breasts. They'll cook slightly longer but turn out super juicy. Just check they hit 165°F with a thermometer for doneness, and enjoy the richer taste!
- → How can I make these gluten-free?
It's easy! Swap out regular panko for a gluten-free version, or use gluten-free corn flakes, rice cereal, or finely ground nuts mixed with gluten-free flour. You can find gluten-free panko in most stores, too!