
 Pin it
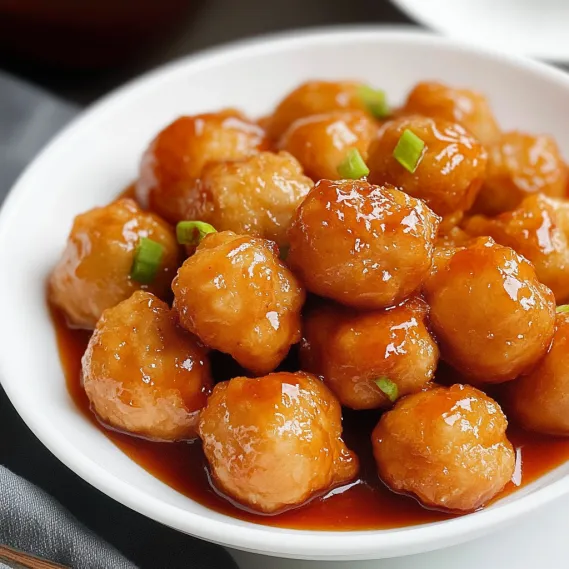
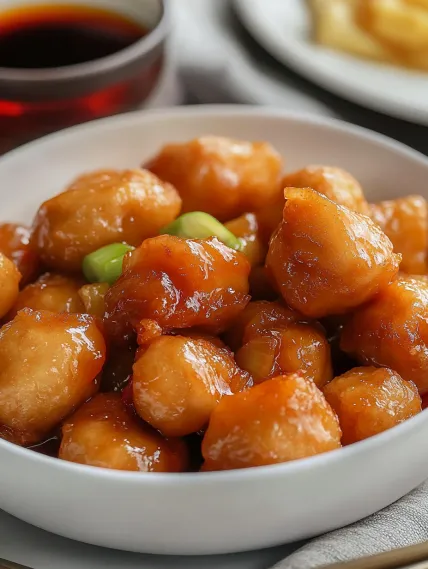
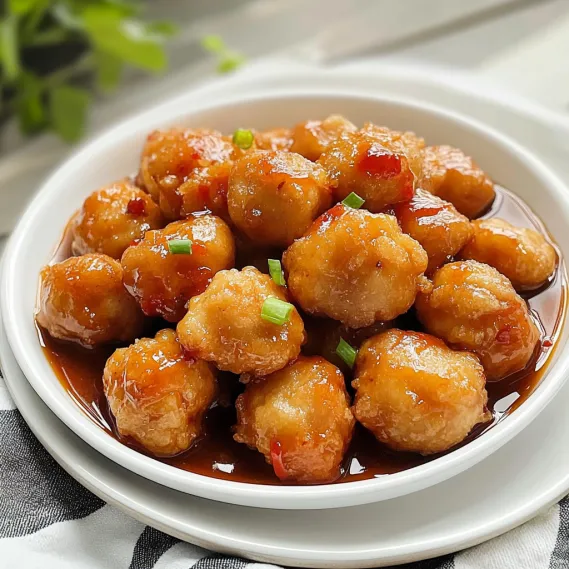
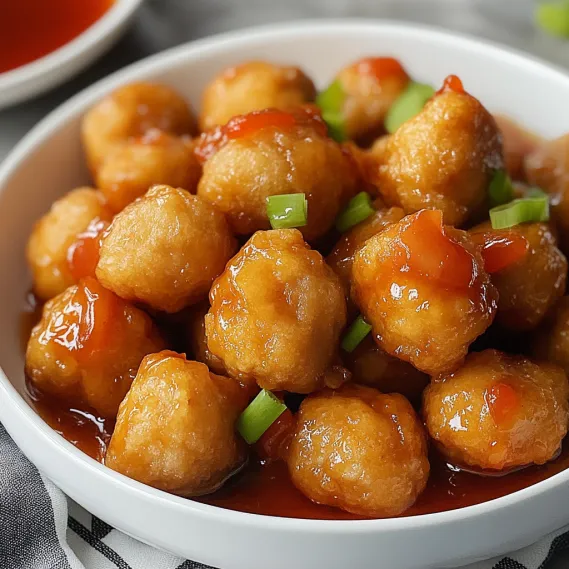
These Chinese-style chicken balls hit all the right notes with their airy, crispy outside and juicy chicken inside, plus a homemade tangy-sweet dipping sauce that's hard to beat. The twice-fried method gives you that real Chinese restaurant crunch that won't go soft quickly. This favorite turns basic ingredients into mouthwatering bites that won't last long at any get-together. The best part? Making them at home lets you pick quality ingredients and enjoy them piping hot.
I started trying to make these chicken balls after I couldn't visit my go-to Chinese spot anymore. After many batches of heavy, soggy attempts, I finally learned the real tricks from my friend's dad who ran a Chinese restaurant for years. The first time I nailed it, my family was shocked by how genuine they tasted – crunchy outside, soft chicken inside, and that just-right sweet-tangy sauce for dunking.
Key Ingredients and Smart Shopping Advice
- Chicken Breast: Go for the boneless, skinless kind for clean taste and feel. Chop into 1-inch chunks for the ideal bite-sized pieces.
- Plain Flour: This is your batter base, giving structure and crunch. Regular all-purpose works great here.
- Corn Starch: This makes everything light and helps get that golden color. Don't swap it for more flour.
- Baking Soda: This tiny but mighty addition makes your batter puff up and get fluffy. A small amount works wonders.
- Ketchup & Vinegar: These make up your sweet and sour sauce foundation, bringing sweetness and tang together.
I've found that how wet your chicken is can really change your end result. If your chicken seems too damp or floppy, throw in a spoon of plain breadcrumbs to help it stick together better while you're forming and freezing the balls.
Step-by-Step Cooking Guide
- Step 1: Mix Up Your Chicken Soak
- Dice 500g chicken breast into 1-inch chunks and drop them in a bowl. Add 1 teaspoon salt, ½ teaspoon white pepper, 1 teaspoon sesame oil, 1 teaspoon sugar, ¼ teaspoon baking soda, 1 teaspoon garlic paste, and 1 tablespoon cornstarch. Work it around with your hands until all pieces are covered, then chill for 30-60 minutes.
- Step 2: Whip Up Your Puffy Batter
- Grab a big bowl and mix 1 cup plain flour, ½ cup cornstarch, ½ teaspoon salt, and ½ teaspoon baking soda. Slowly pour in 1 cup cold water while whisking until you've got a thickish batter that sticks to a spoon. Let it sit for 5 minutes while your oil heats up.
- Step 3: Nail the Twice-Fried Method
- Get your oil to 340-350°F in a deep pan. Roll marinated chicken in cornstarch, dunk in batter, then carefully drop into hot oil. Cook small batches for 3 minutes until pale gold, then take them out to drain. Once all pieces have had their first fry, turn up the heat a bit and fry them again for 1-2 minutes until golden and crunchy.
- Step 4: Cook Up Your Dipping Sauce
- In a pot, mix ¼ cup ketchup, 2 tablespoons tomato puree, ¼ cup sugar, 1 tablespoon white vinegar, and ¼ cup water. Cook gently for 2-3 minutes until it thickens a bit. Take it off the heat and stir in 1 tablespoon cornstarch mixed with 2 tablespoons water until it's smooth.
- Step 5: Get It On The Table
- Put your crunchy chicken balls on a plate lined with paper towels to soak up extra oil. Serve them right away with sweet and sour sauce on the side for dipping, or toss them in the sauce to coat them completely.
 Pin it
When I first tried this recipe, I worried about the double-frying part. After a few uneven tries, I realized that basic folds work just as well as fancy ones - they taste amazing either way. These days my kids help with the folding, making their own special shapes that have become our family's unique tradition.
Getting That Amazing Texture
What makes these chicken balls special is how they're crunchy on the bottom but soft on top. I've learned that controlling moisture is everything. First, you've gotta squeeze all the water out of the salted cabbage or your filling gets soggy. Next, the cornstarch doesn't just hold everything together - it soaks up any leftover moisture. And lastly, that cooking method - fry, then steam, then fry again - gives you that crispy bottom while making sure the filling gets cooked just right.
 Pin it
Prep Ahead For Easy Entertaining
One thing I love about this recipe is how you can break it up into steps when you're having people over. I often shape and freeze the balls up to a month ahead, bread them the day before (keeping them covered in the fridge), and just bake them when guests arrive. The smell of these cooking fills your house with an amazing aroma that gets everyone excited to eat. For bigger parties, I make two batches, keeping the second one warm in a low oven until needed.
New Ways To Use Your Leftovers
If you somehow have chicken balls left over (which hardly ever happens at my place!), you can turn them into completely different meals. Break them up into scrambled eggs for a Chinese-style breakfast hash, or cut them up and toss them in a simple green salad with spicy dressing for a light lunch. My favorite trick is to cut leftover chicken balls in half and put them on top of creamy grits for a hearty breakfast that carries the flavors into next day.
 Pin it
Pro Kitchen Tricks
- Let your balls cool for 5 minutes after baking before you dig in – this helps the inside set up for the perfect bite
- Want more flavor? Throw a teaspoon of smoked paprika into your panko mix
- Can't find chicken thighs nearby? Order online from places like Bourgeois Meat Market or The Best Stop
- Set out different dips – maybe a spicy remoulade and cool ranch alongside your sweet and sour sauce
- Want it to look fancy? Arrange your balls on a platter with sprinkles of chopped parsley, purple cabbage, and yellow bell pepper bits to show off traditional green, purple, and gold colors
Frequently Asked Questions
- → Can I prepare these chicken bites ahead of time?
- Totally! Fry them once and store in the fridge until you're ready. When it's almost time to serve, fry them again for 2-3 minutes until they're nice and crispy. Super handy for events where you want hot, fresh snacks but need to minimize last-minute work.
- → Is deep frying the only cooking method?
- Deep frying gives the best crunch, but you can shallow fry them lightly first and finish in a hot oven or air fryer until they're browned and crispy. The texture won't be identical, but it'll still taste amazing!
- → Why fry them twice?
- Double-frying makes them extra crunchy! The first fry sets the batter and cooks the meat. A second hot fry crisps the outside perfectly to give you that crunch that lasts.
- → Can I tweak the sauce to my liking?
- Definitely! Dial up the sweetness with more sugar, make it tangier with extra vinegar, or add a spicy kick with some chili flakes or hot sauce like sriracha.
- → What should I serve with these chicken bites?
- You can enjoy them as a starter all on their own. Or, go all out and pair them with fried rice, stir-fried veggies, or noodles. For parties, they’re amazing alongside spring rolls or dumplings.
- → How long can I keep the sauce?
- The sauce stays fresh in the fridge for up to a week if you keep it in a sealed container. It’s super versatile—use it for dipping spring rolls, drizzling over wontons, or even as a sauce for fries.